
Laser Cut Honeycomb Shelves

Honeycomb shelves are a pretty neat storage solution that kind of blur the line between decoration and functional. However, they are rather labor intensive to make using common techniques like a miter saw. So my goal for this project was to try to build honeycomb shelves using a different method (namely using a laser cutter), and see how the building process and final result compared to a more conventional design.
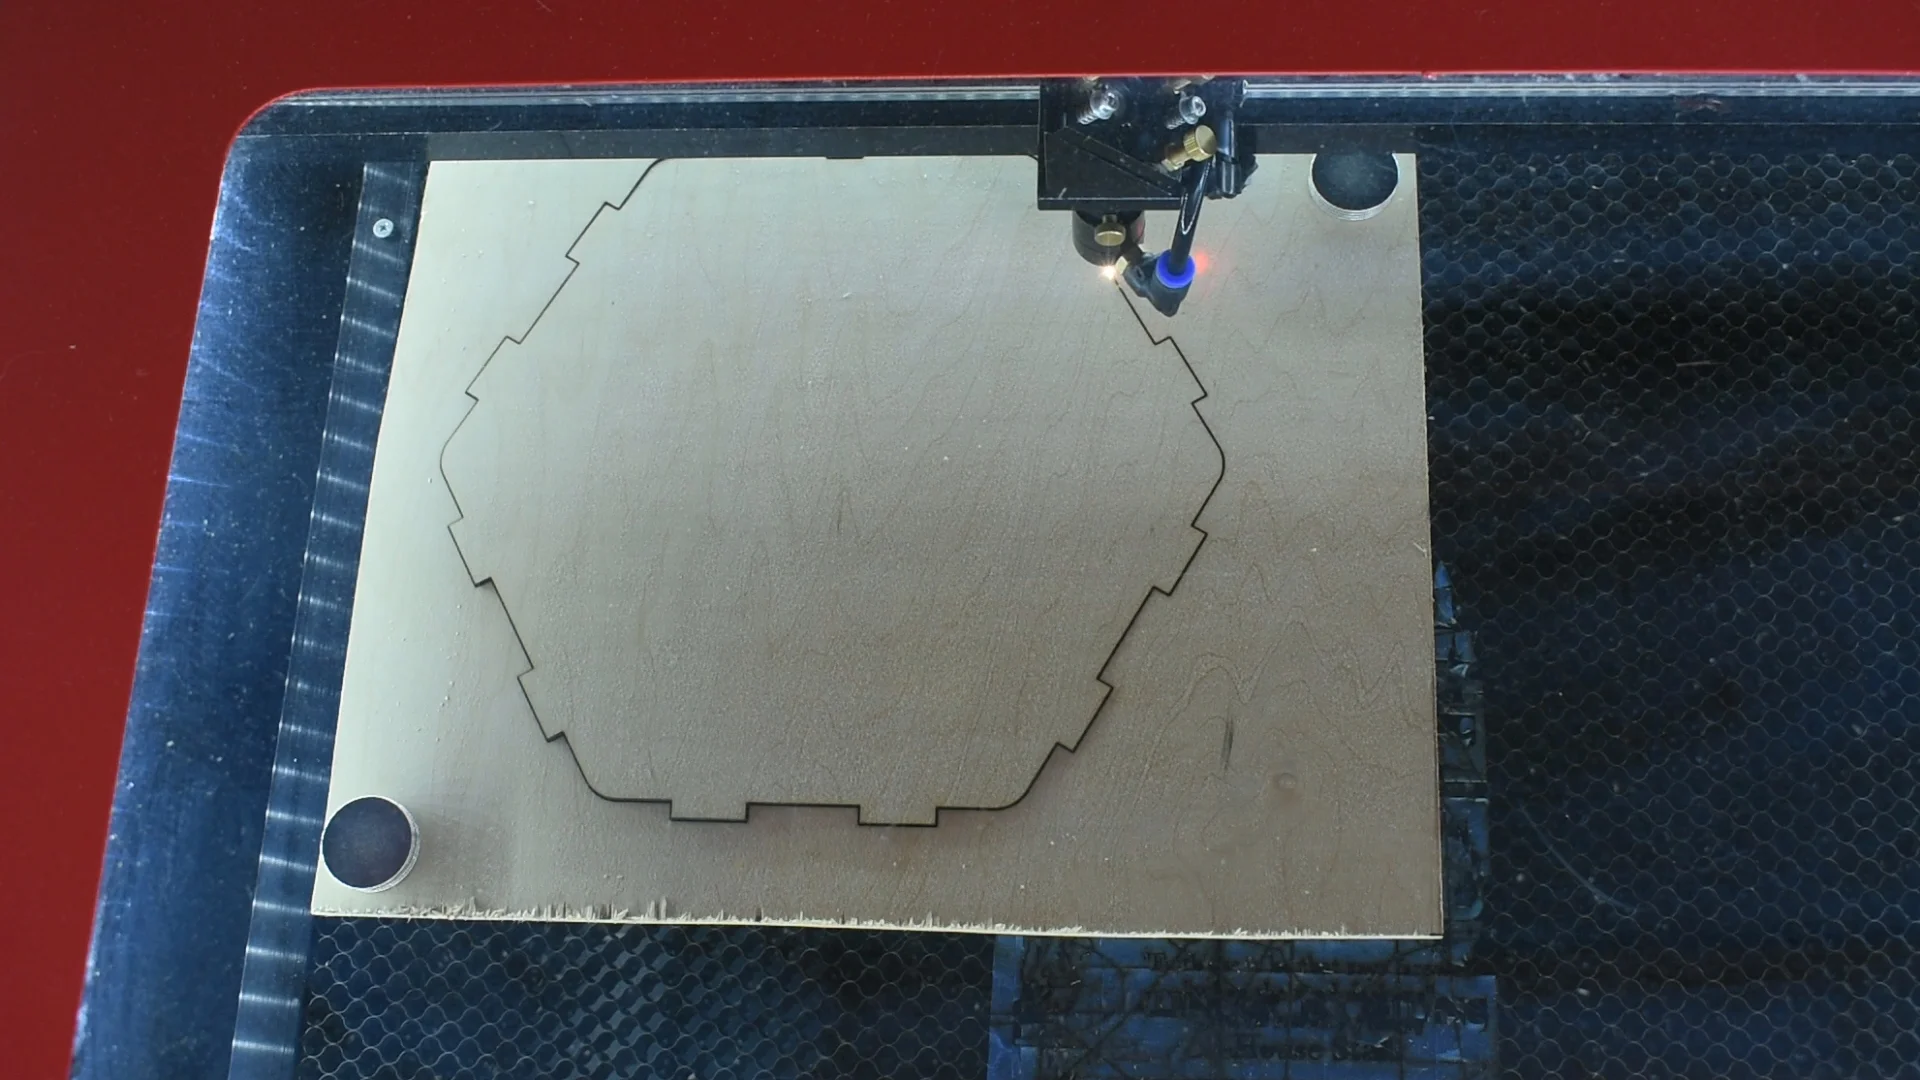
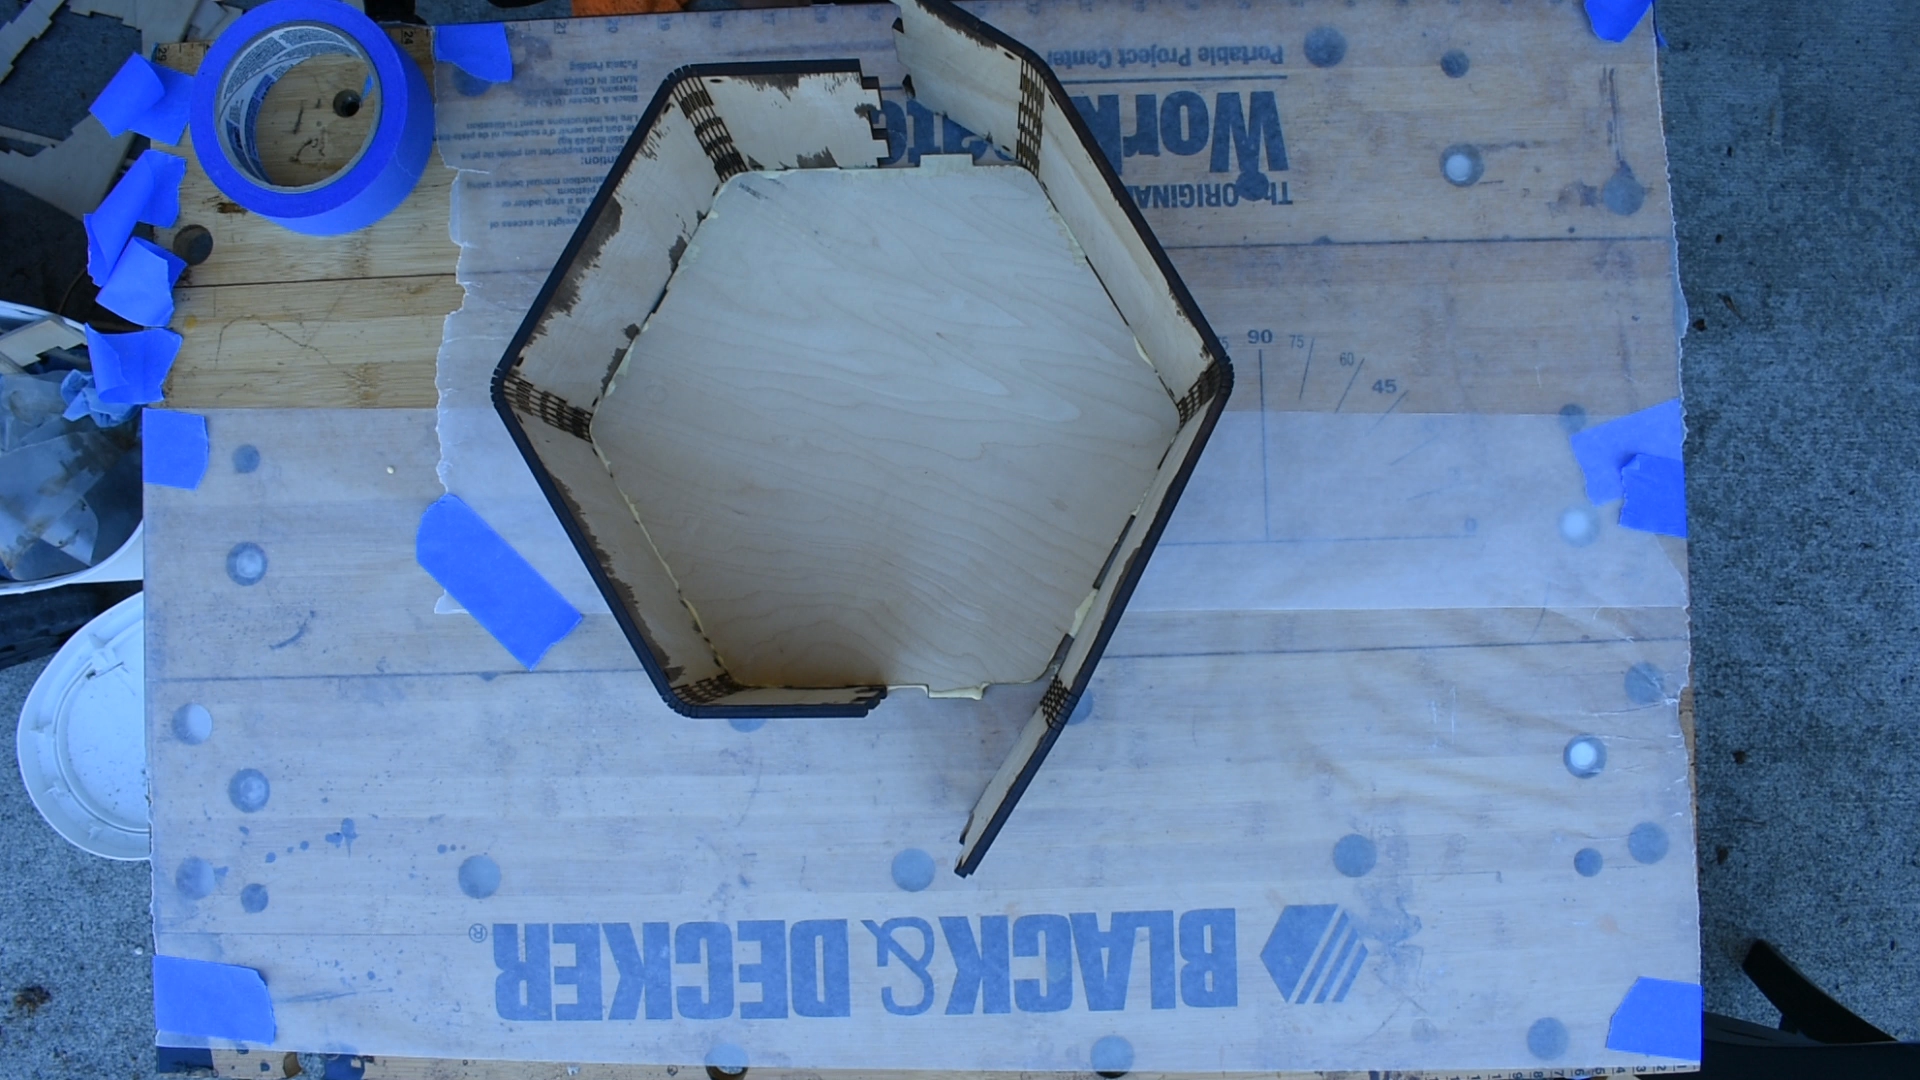
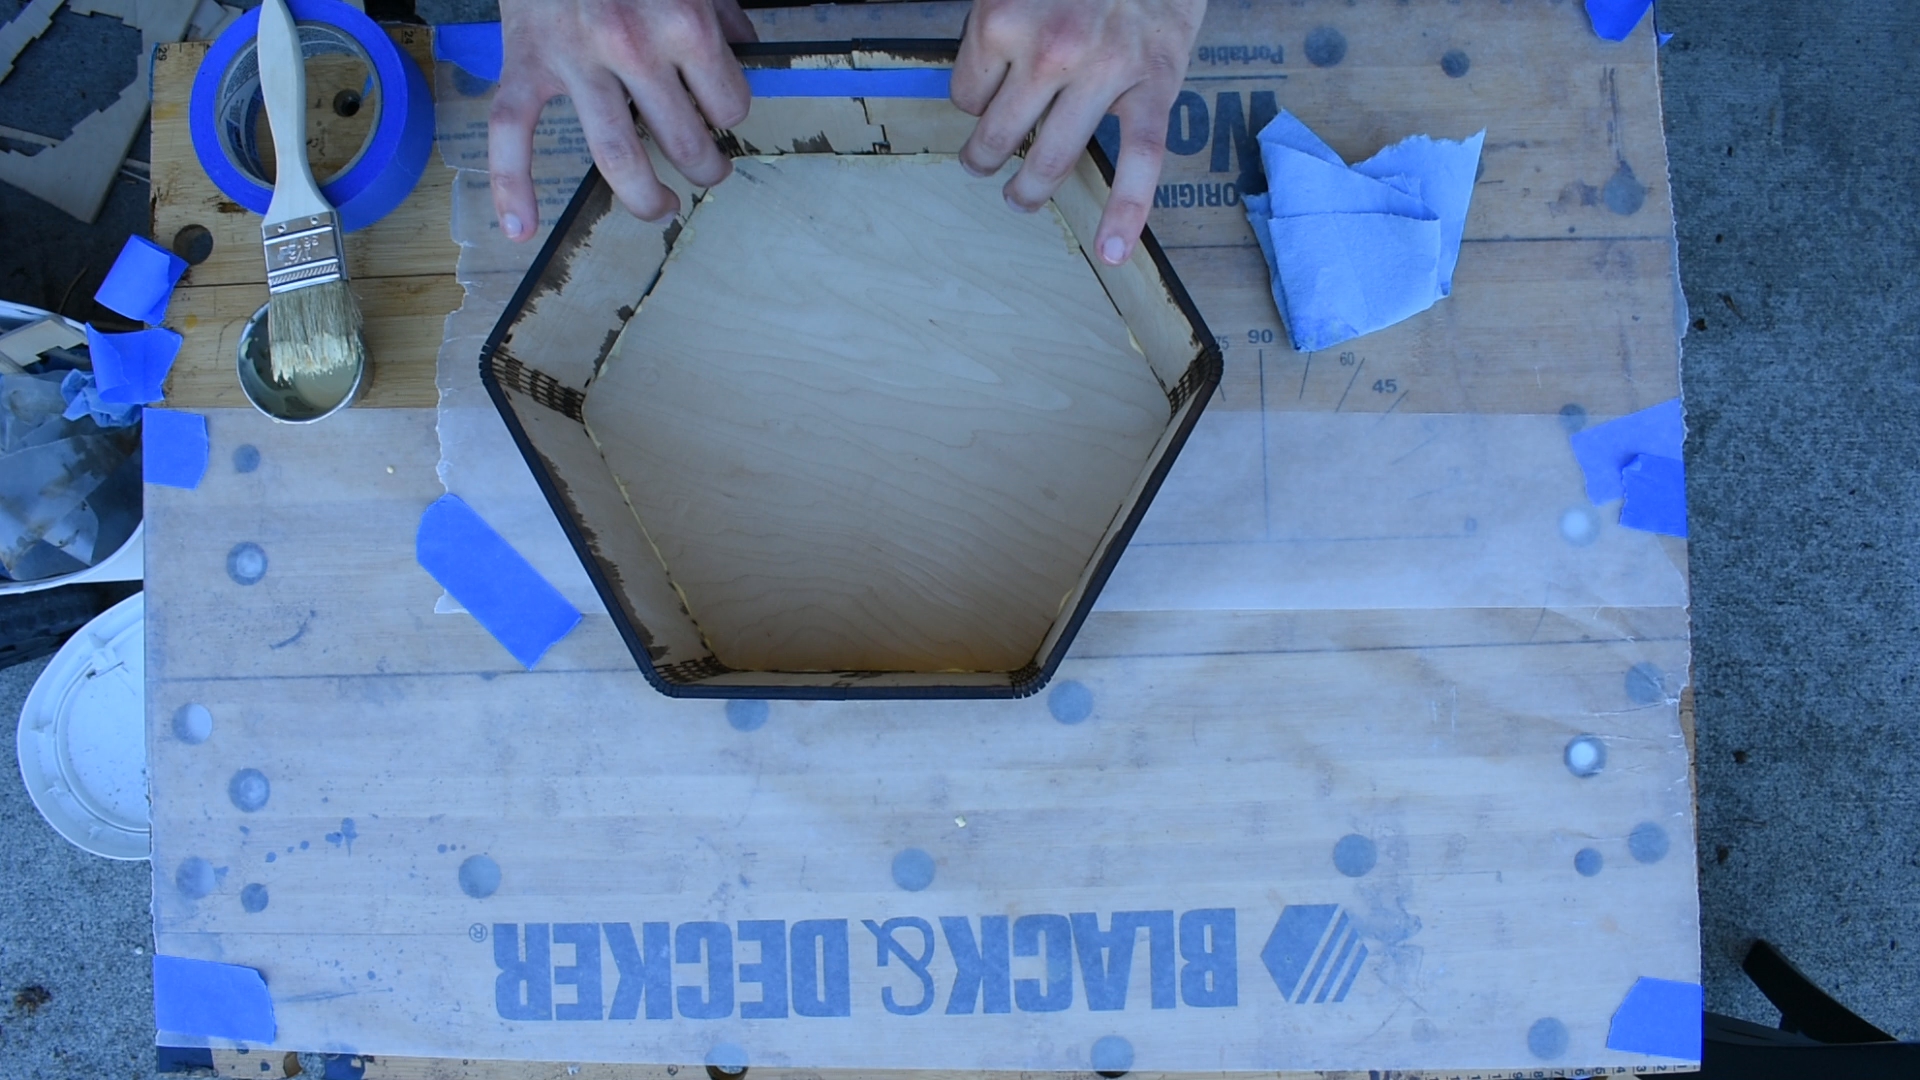
The first part of the project was seeing how I could go about making the honeycomb shelves using a laser cutter. Laser cutters can't cut very thick material, so I was limited to using plywood. Rather than cutting a piece for every side, a possible solution using a laser cutter is to use "living hinges", a technique that involves cutting slots into plywood that allow it to bend. To keep the honeycomb shelf rigid, this would involve having a "back" piece to hold the sides in place.
Step 1: Prototyping
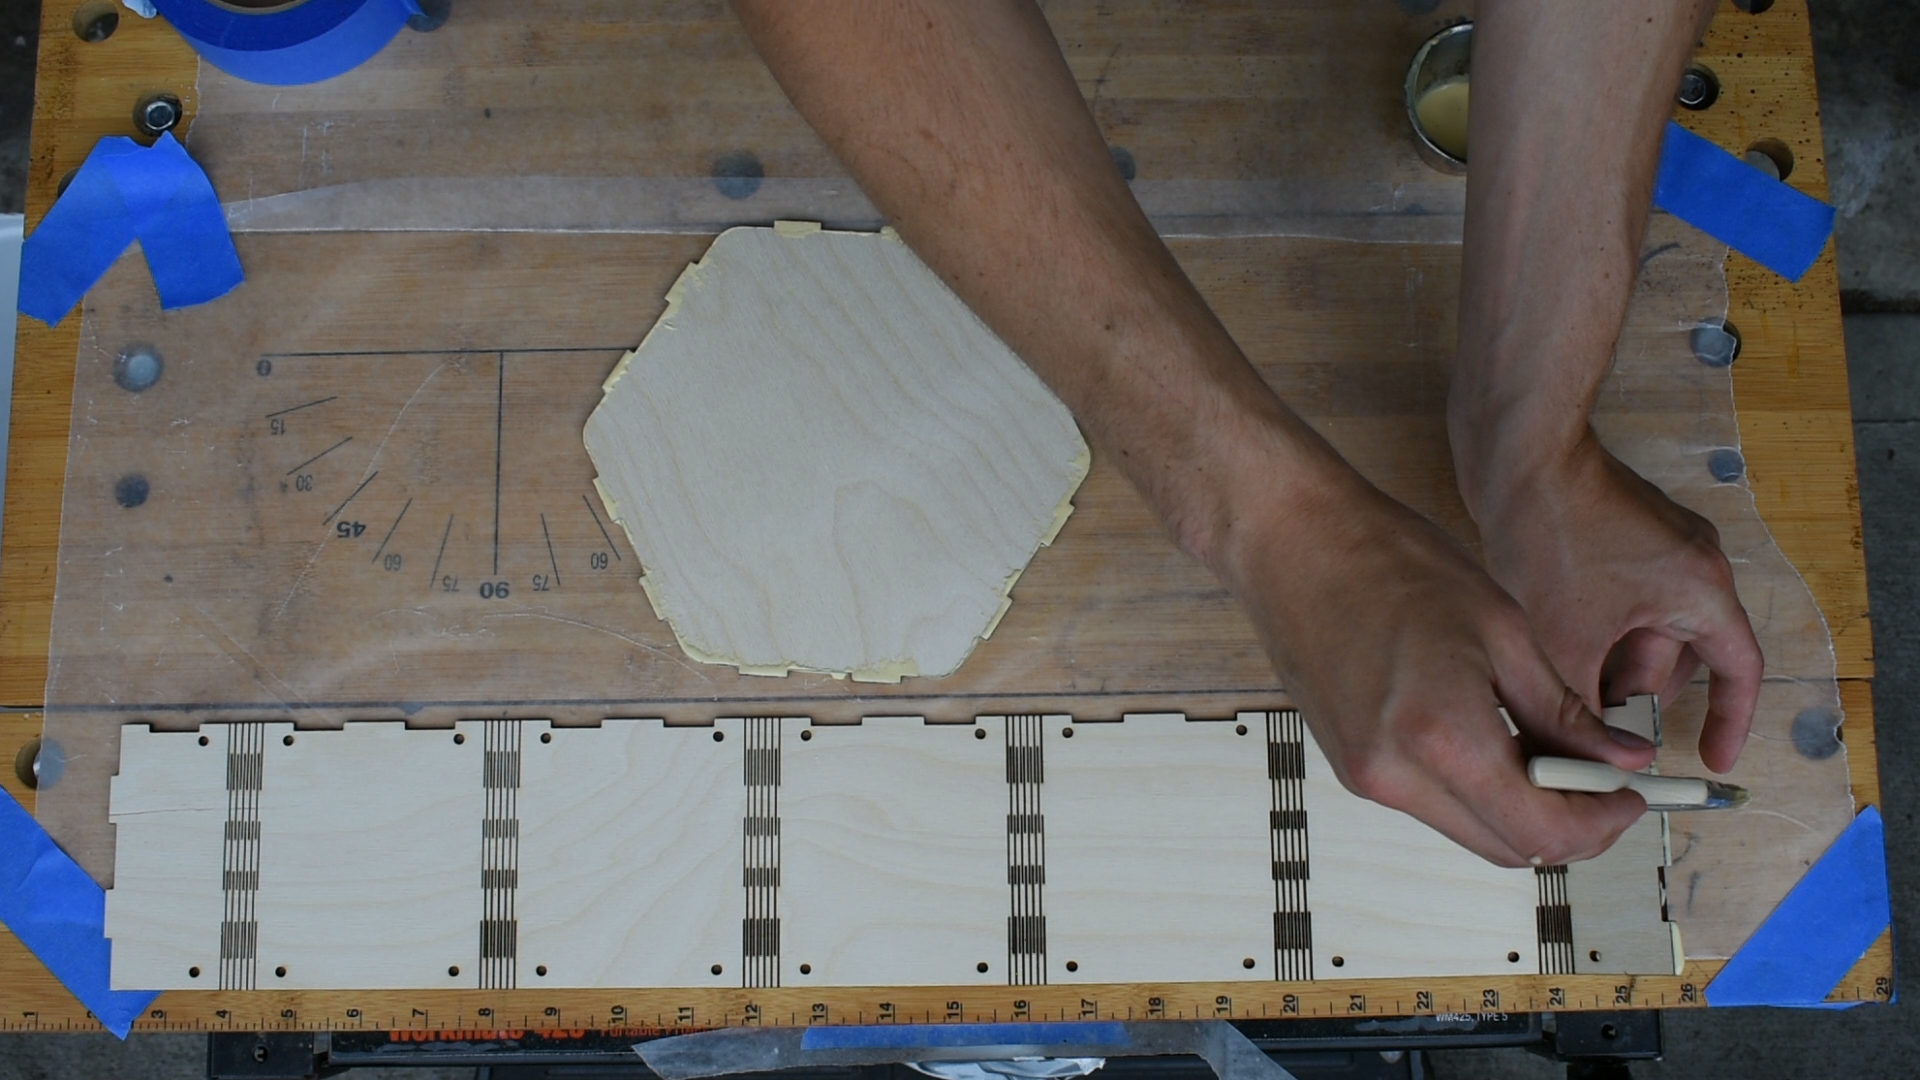
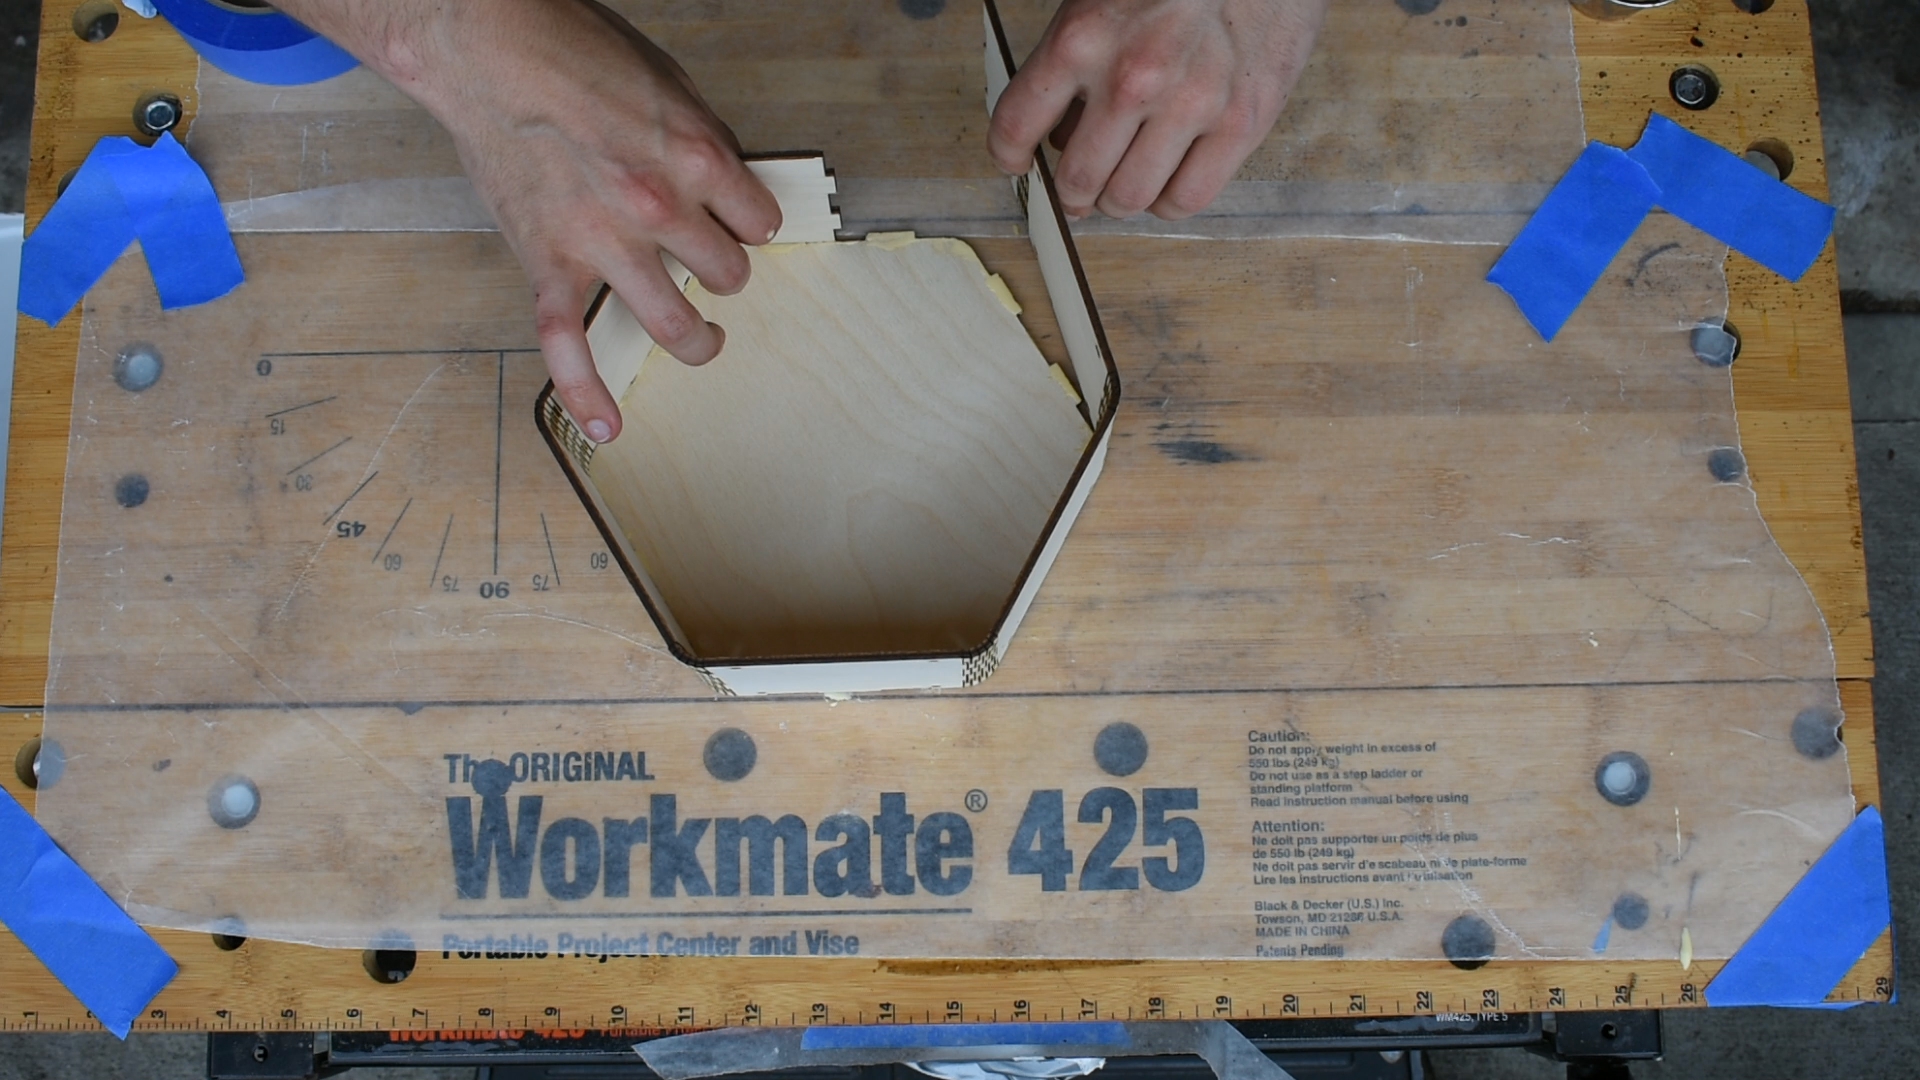
With this basic solution imagined, I set about prototyping. I decided for my first test piece that I would make it using 1/8 inch plywood, and design it so that the shelf that wraps around the base would be one continuous piece. Since my 1/8 in plywood sheets were 18 x 24 inches, this meant that the max perimeter that I could make these shelves were 24 inches. With the basic dimensions determined, I cut out a few living edge samples to find one that best compromised between being able to bend around a 60 degree corner and staying rigid.
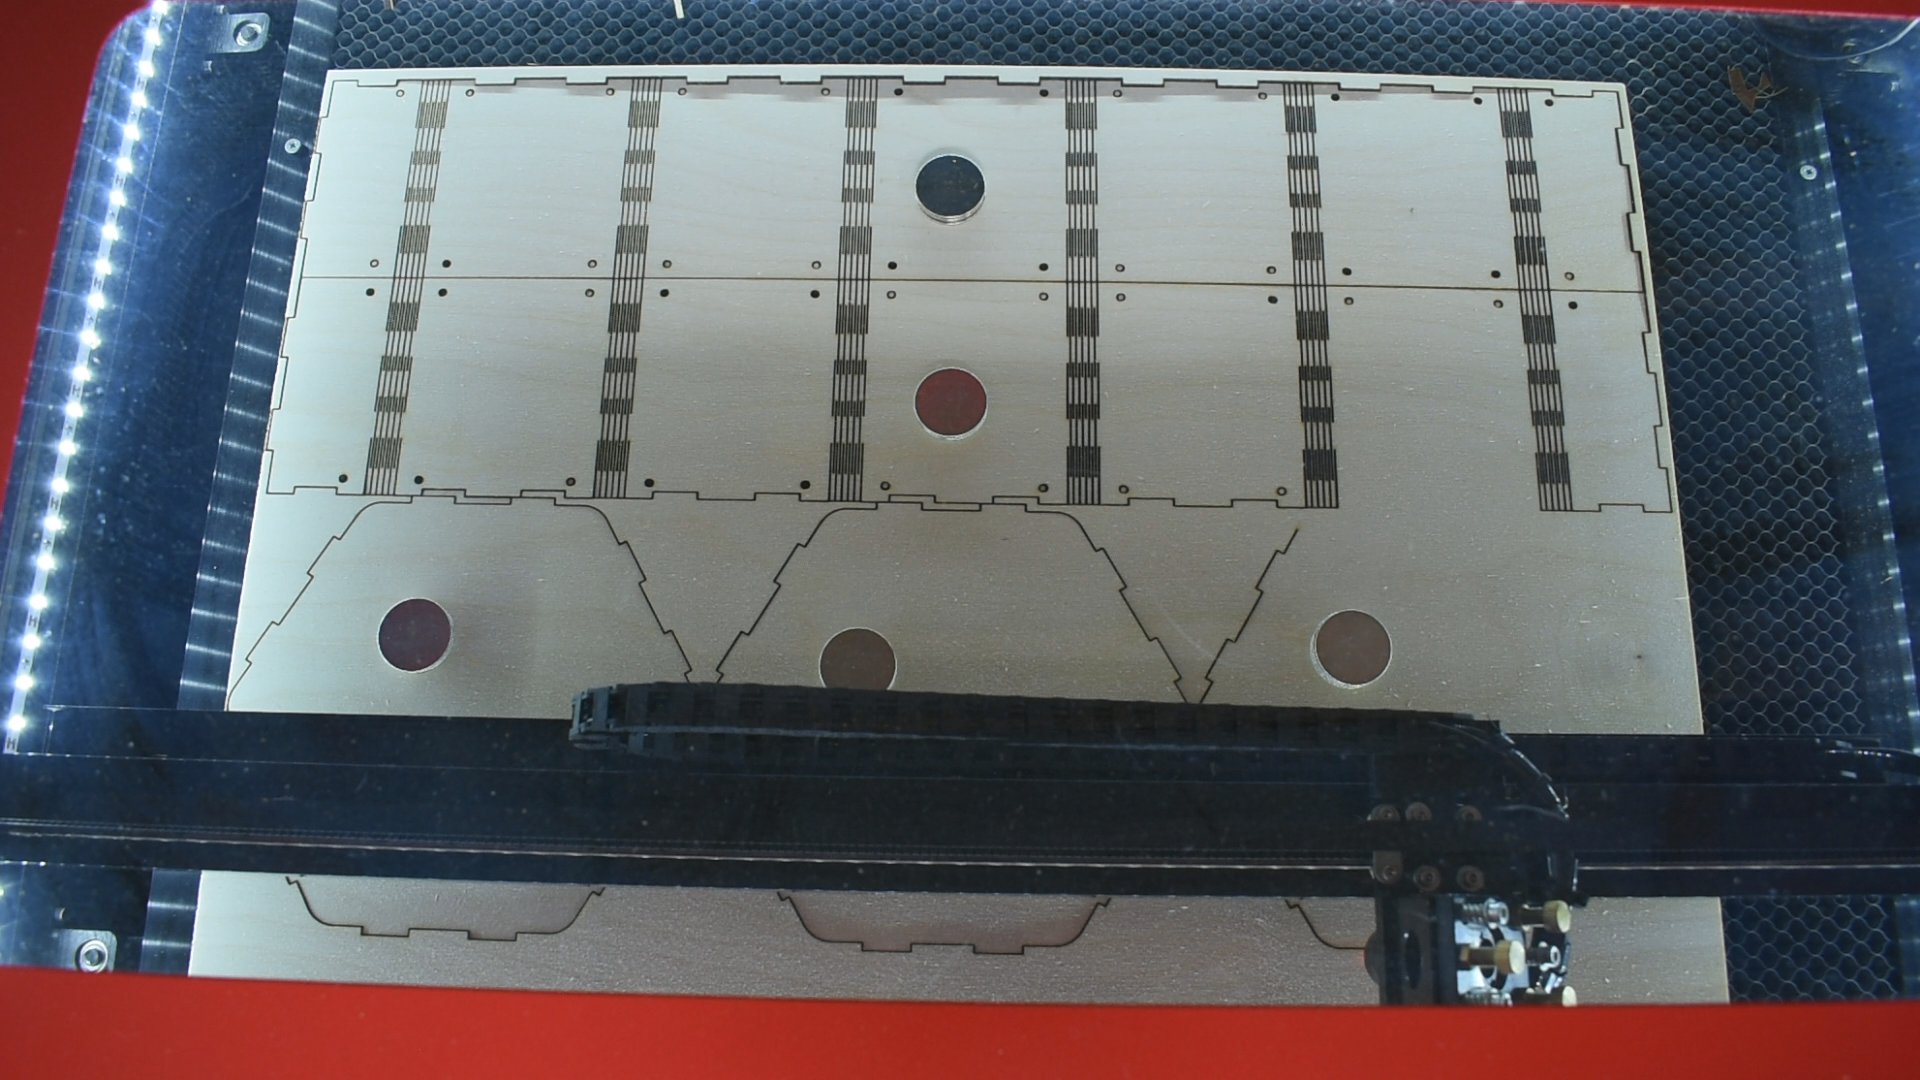
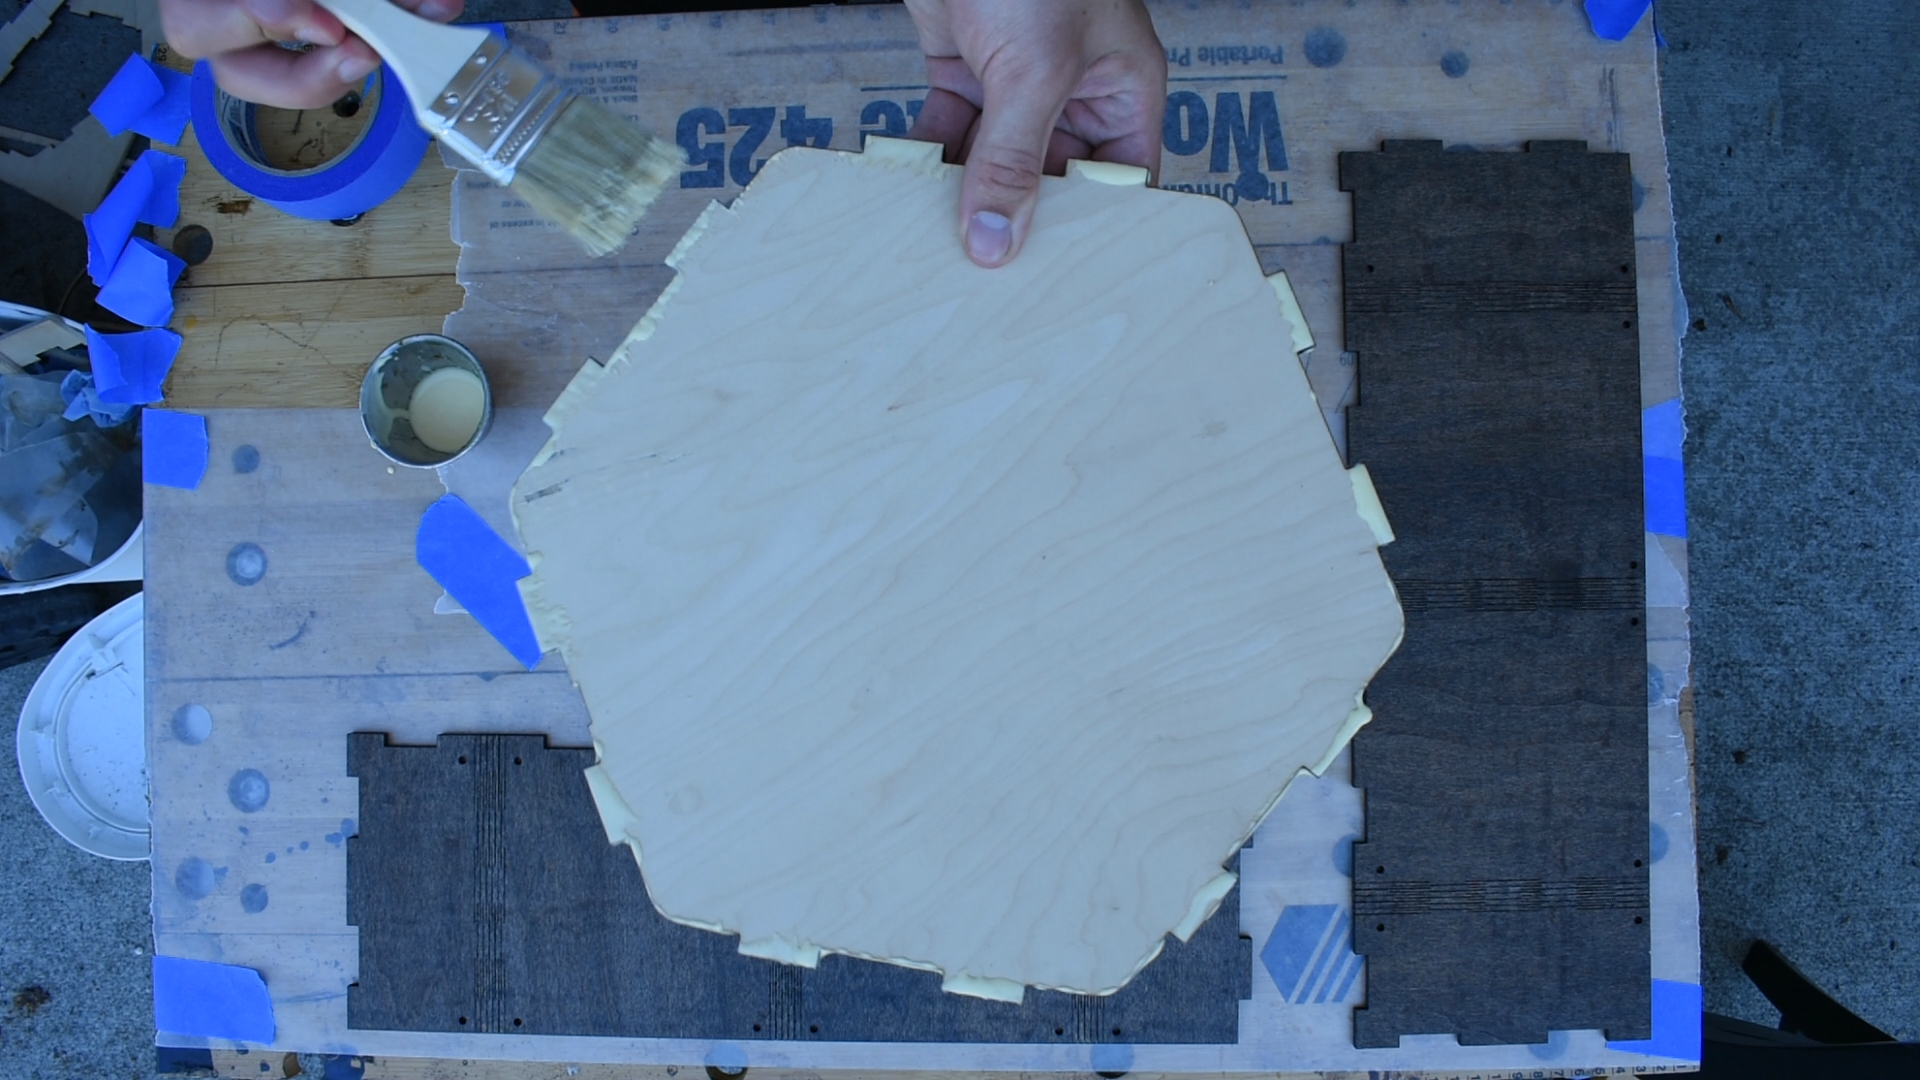
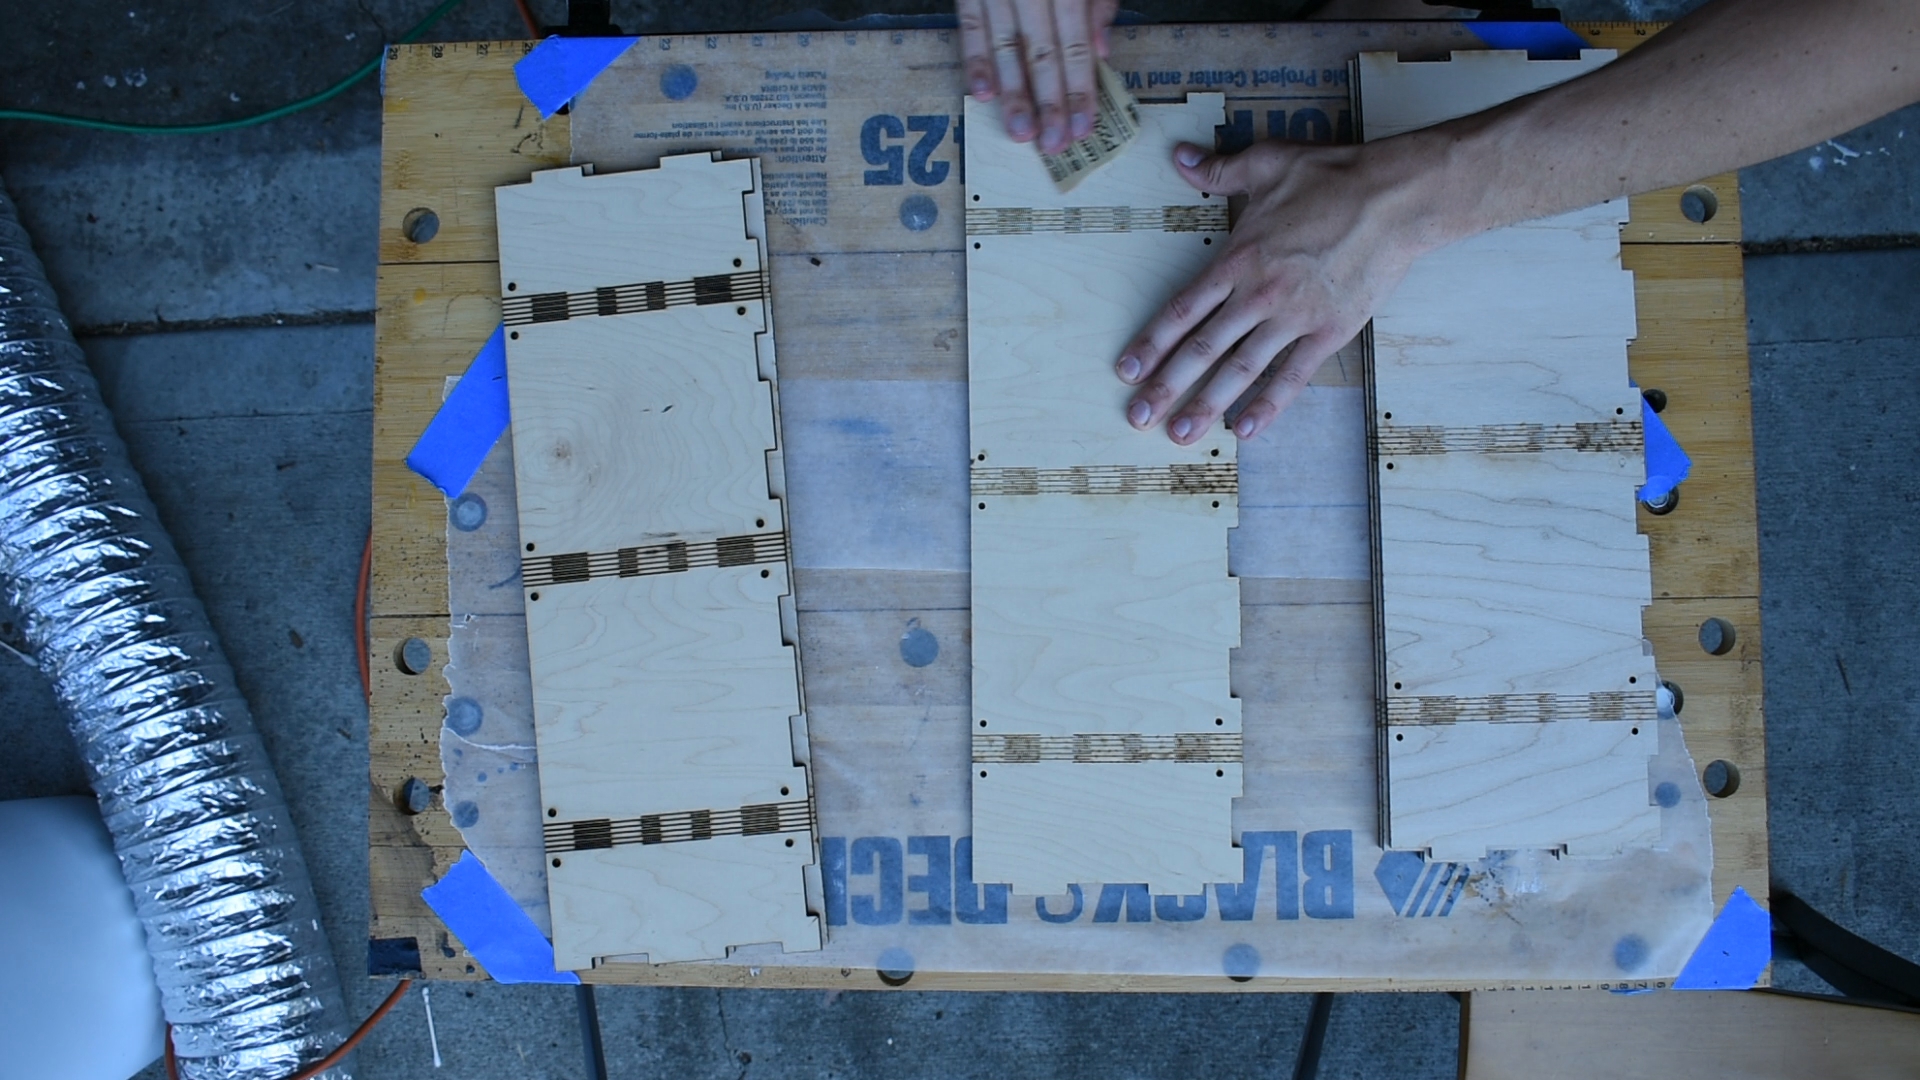
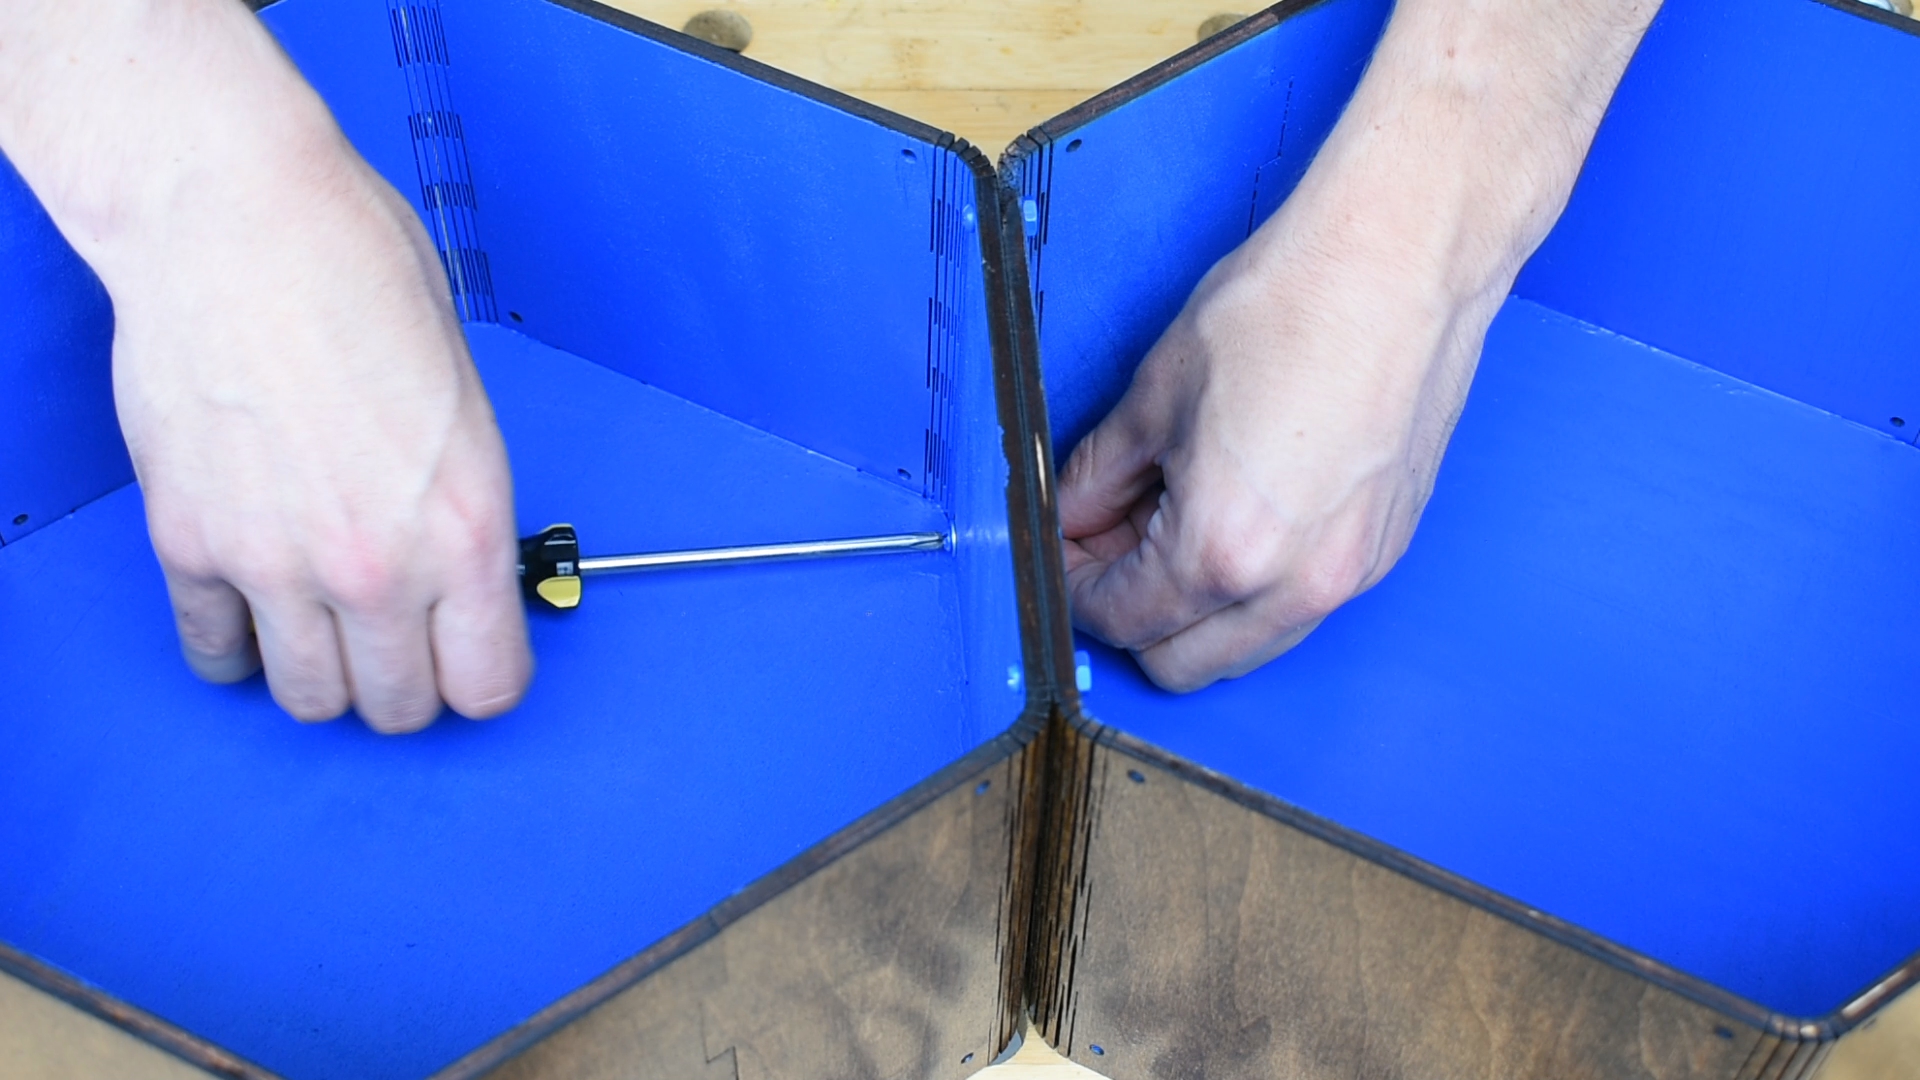
Next I went about designing the prototype. I did this using a combination of Autodesk Inventor and Inkscape. A key design point that I included besides the living hinges were 4 holes near the corner of each side so that the individual honeycomb shelves could be attached using screws. An alternative to this would be glue the shelves together, but that would be a permanent solution, and I wanted this to be truly "modular", so I used screws. Then I laser cut the pieces to make 3 of these prototype shelves.
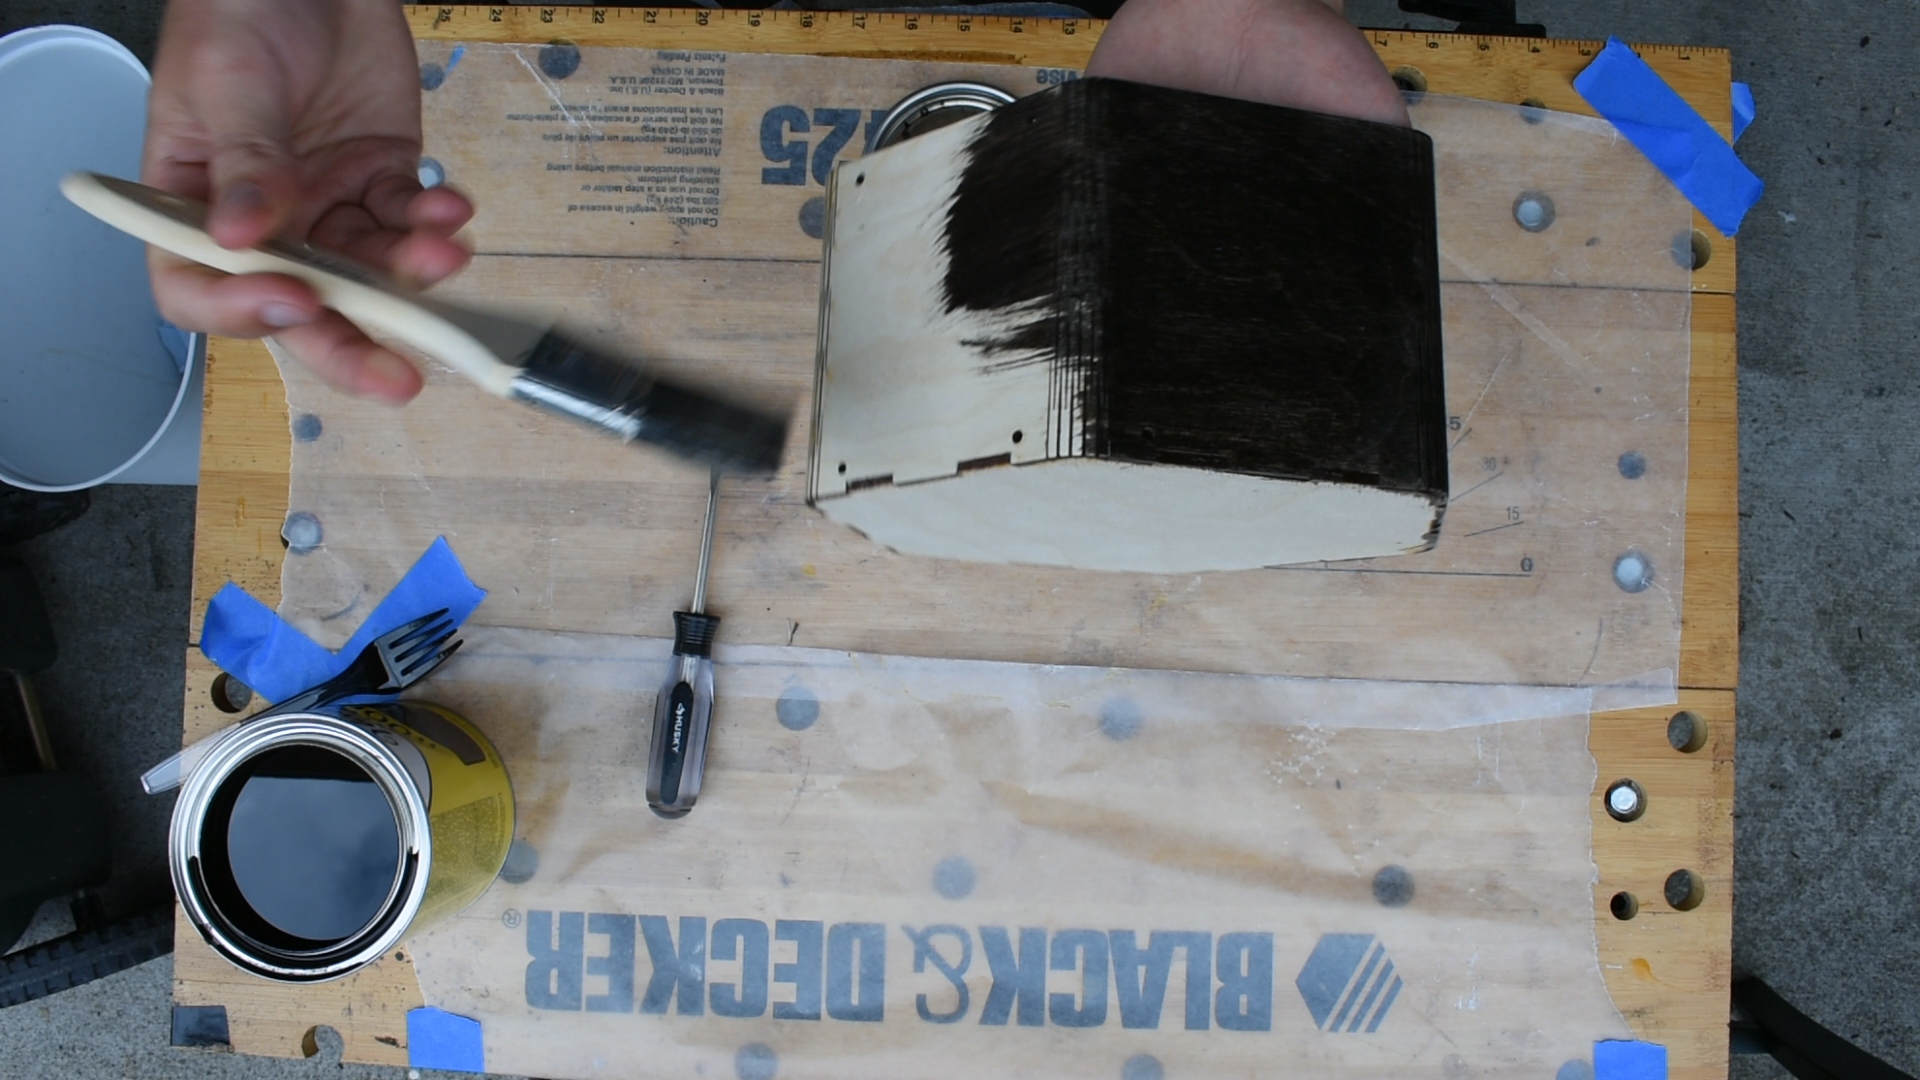
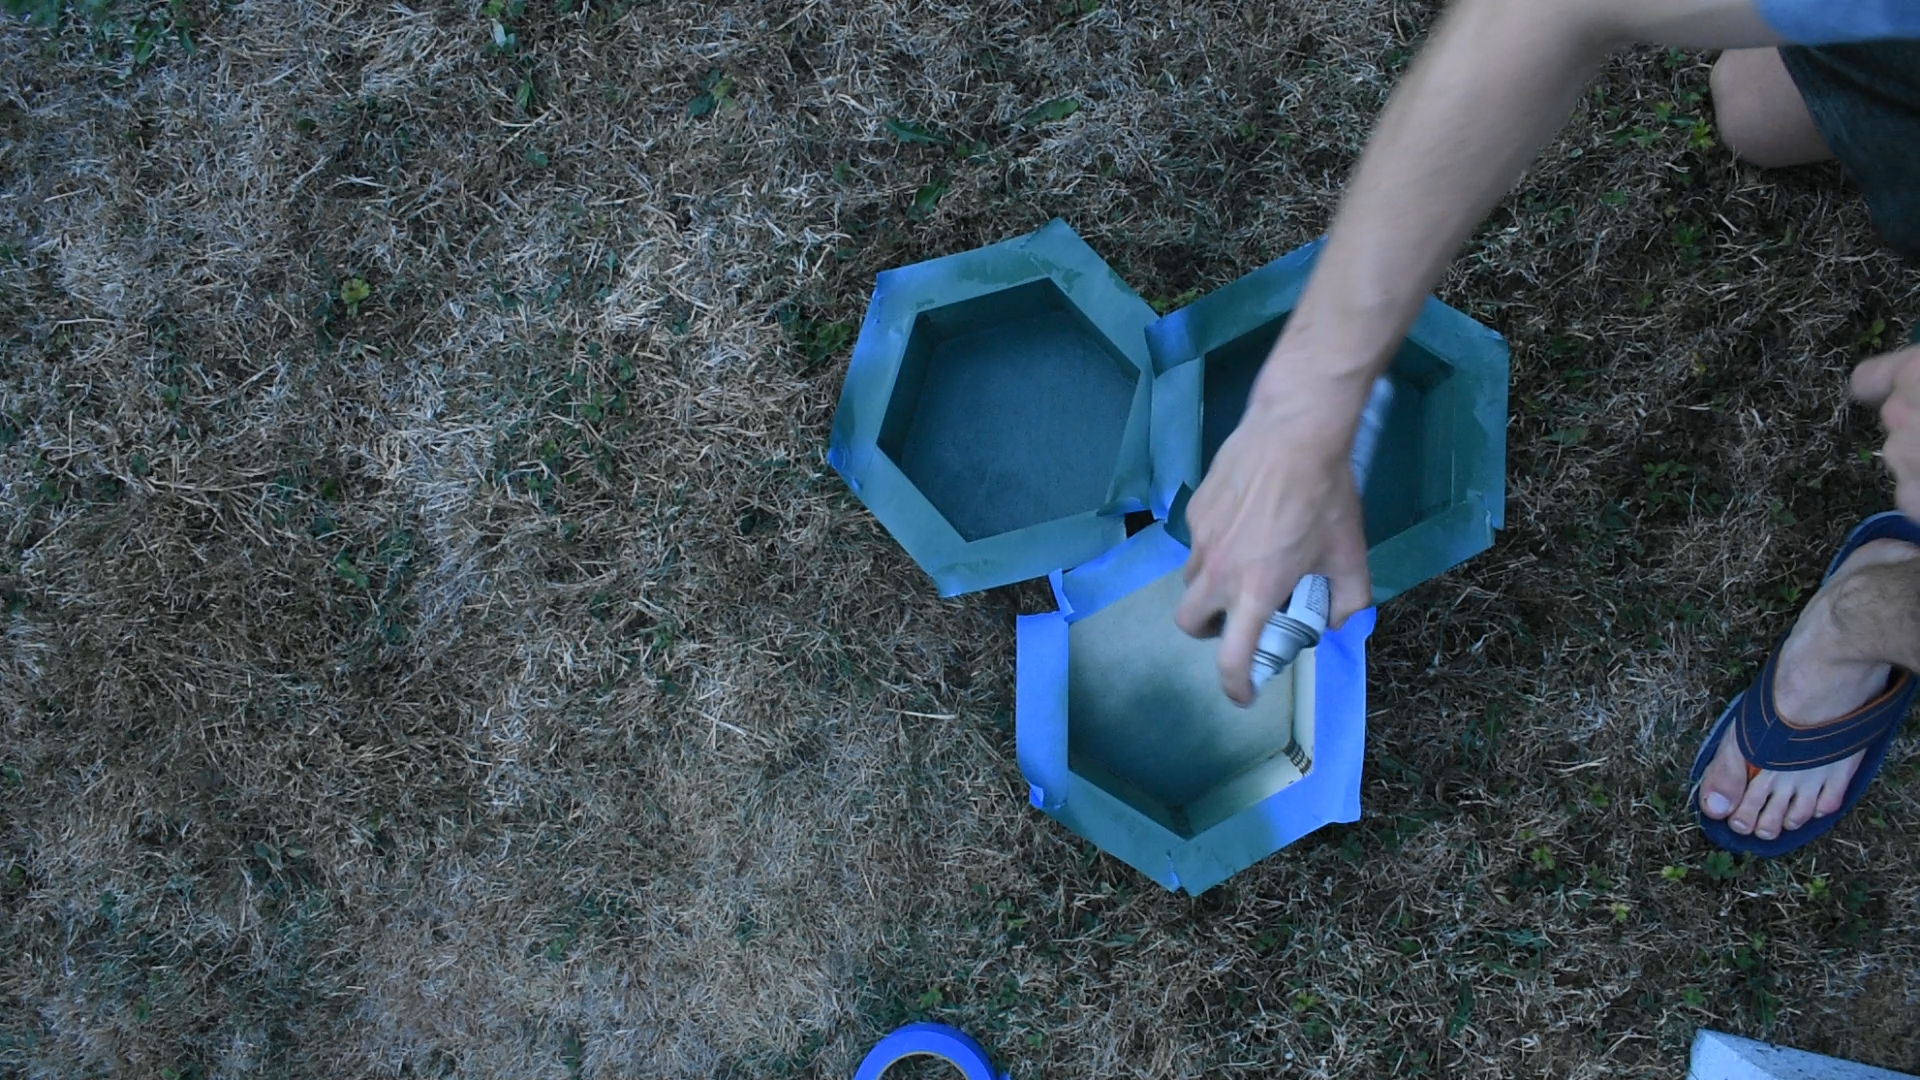
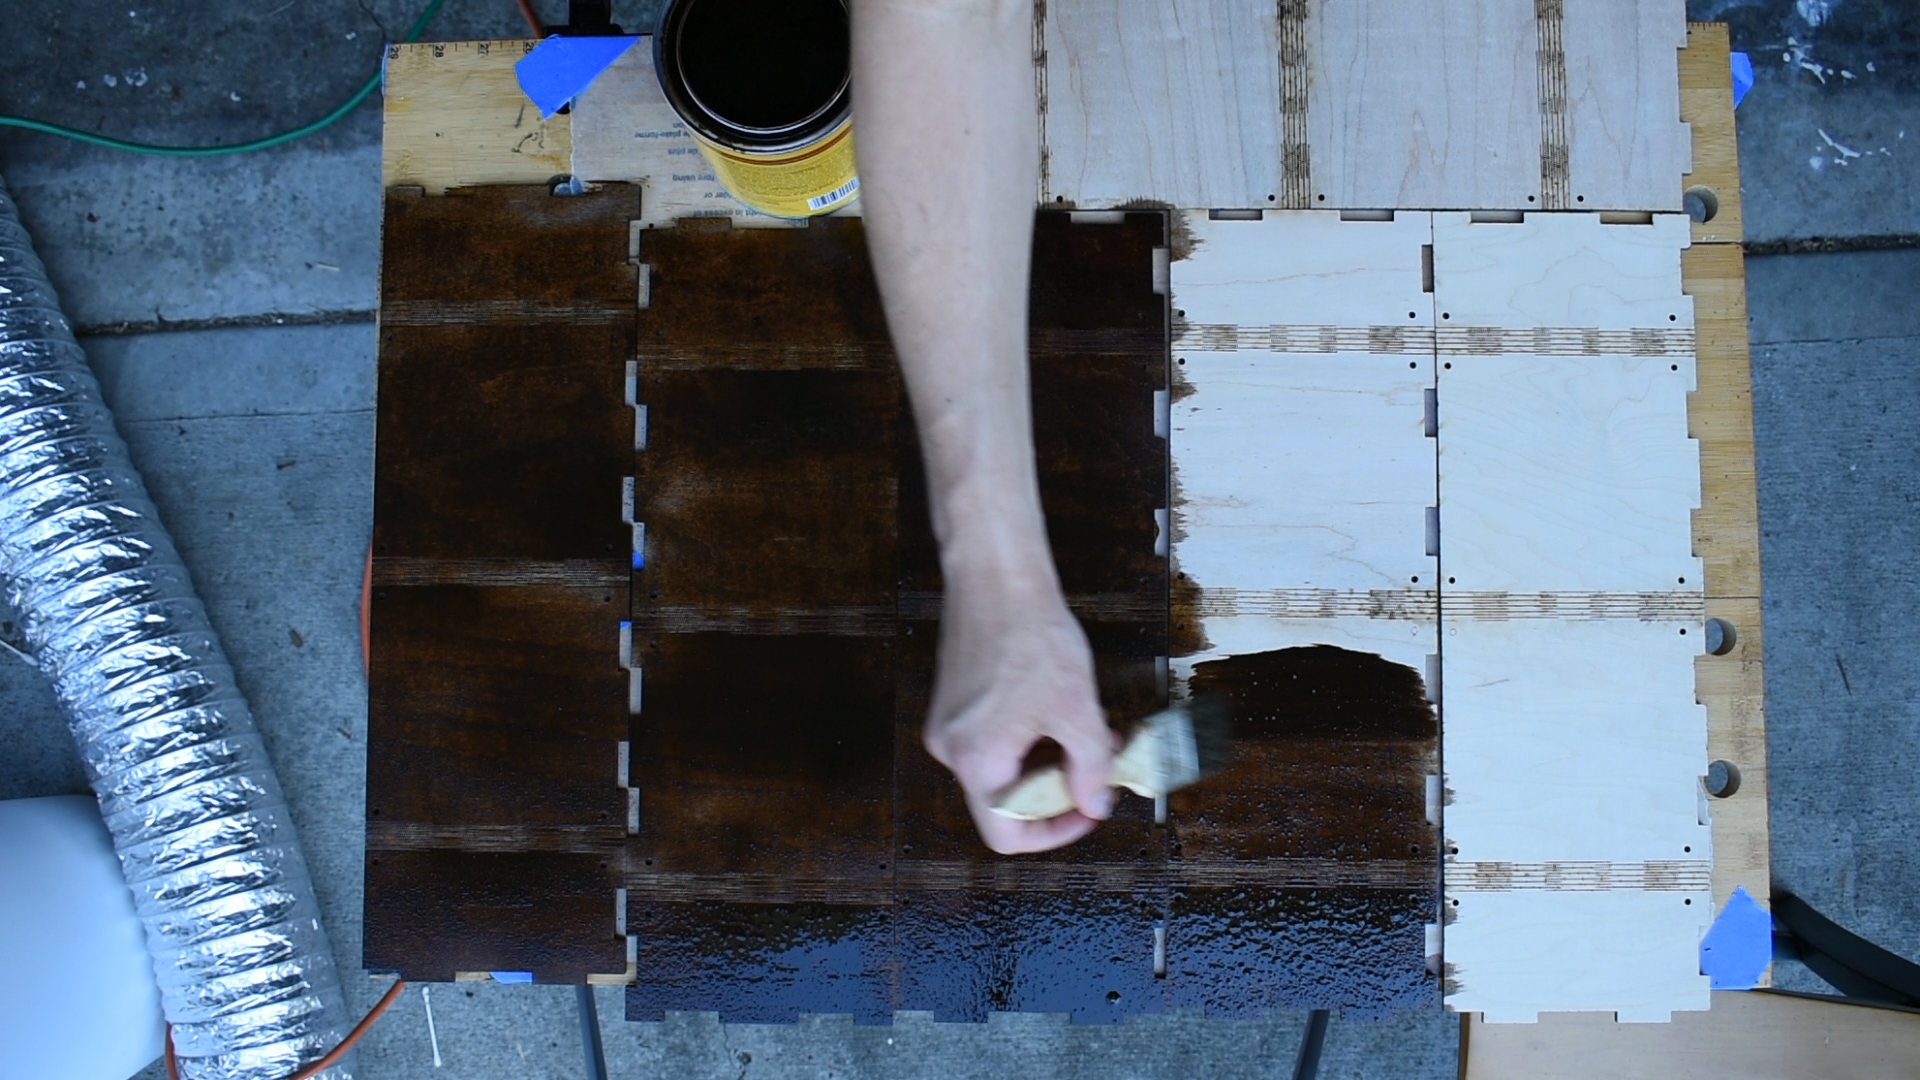
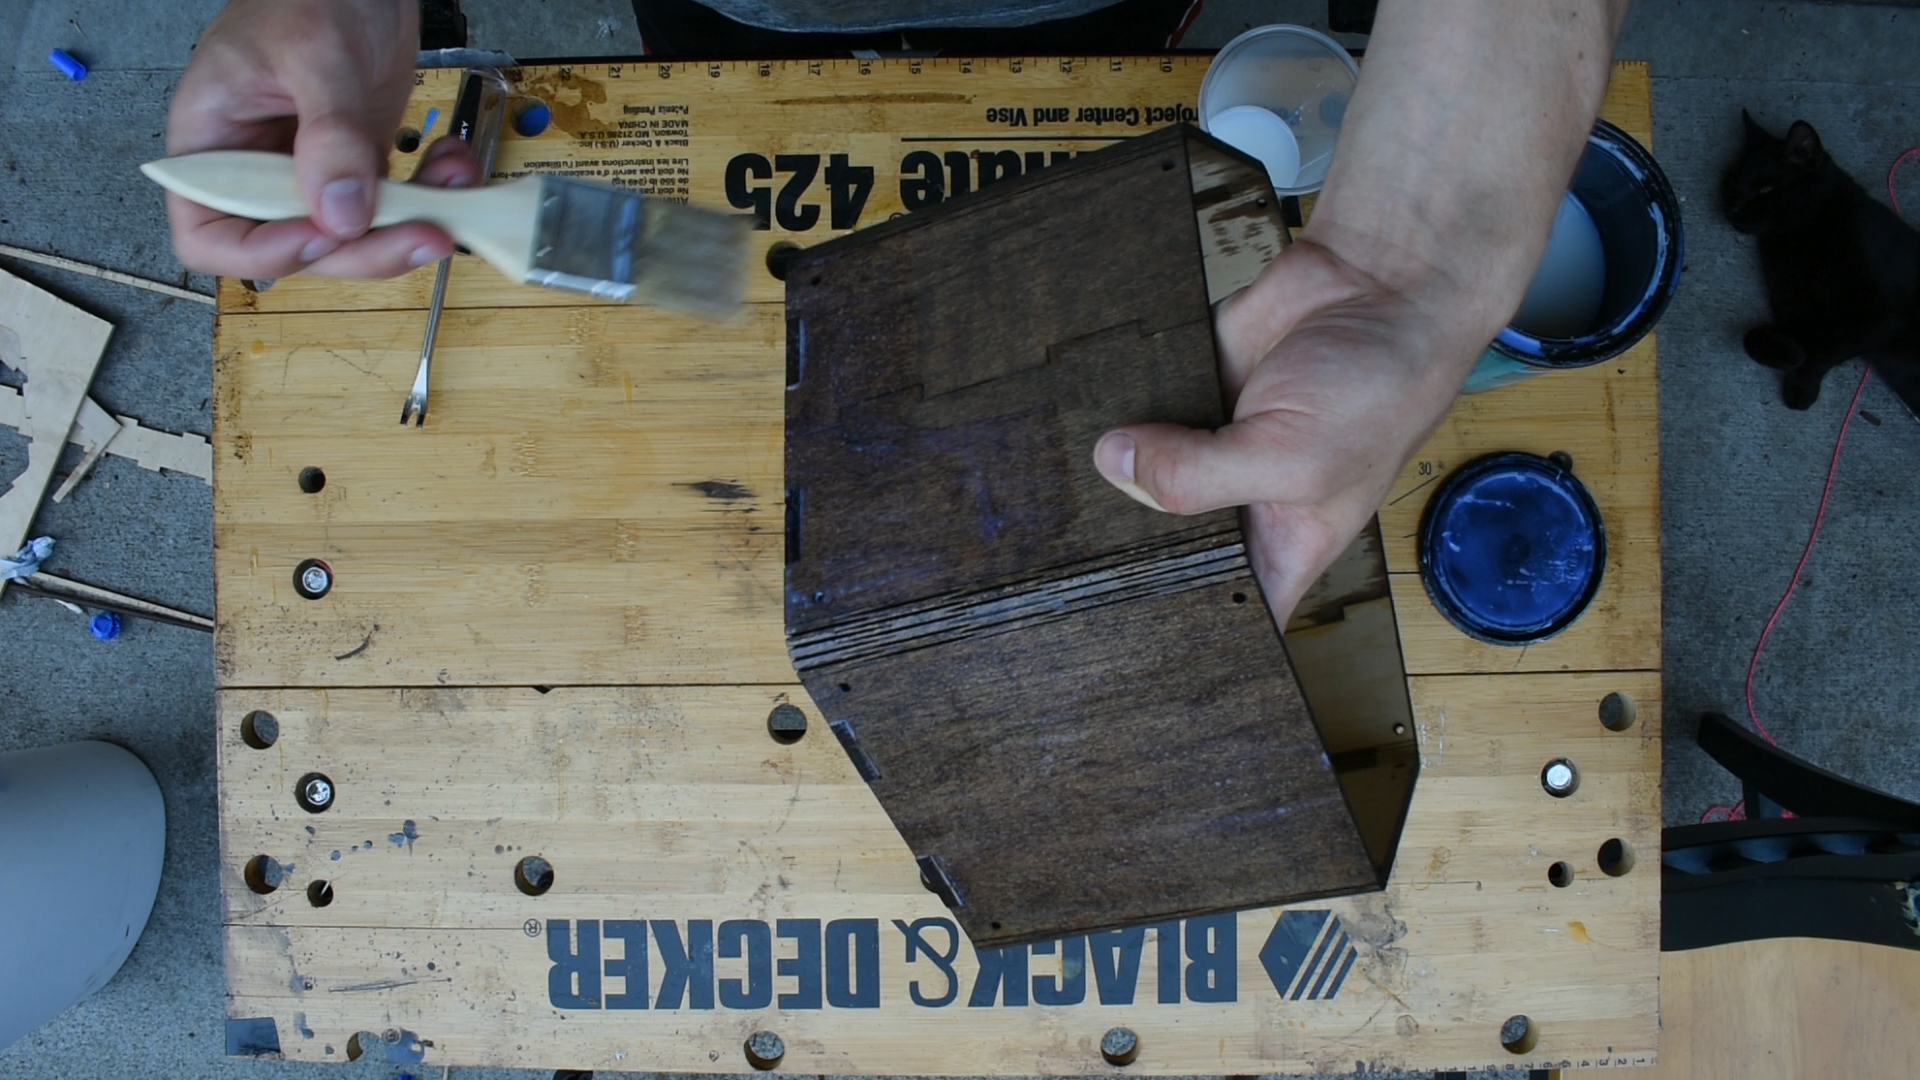
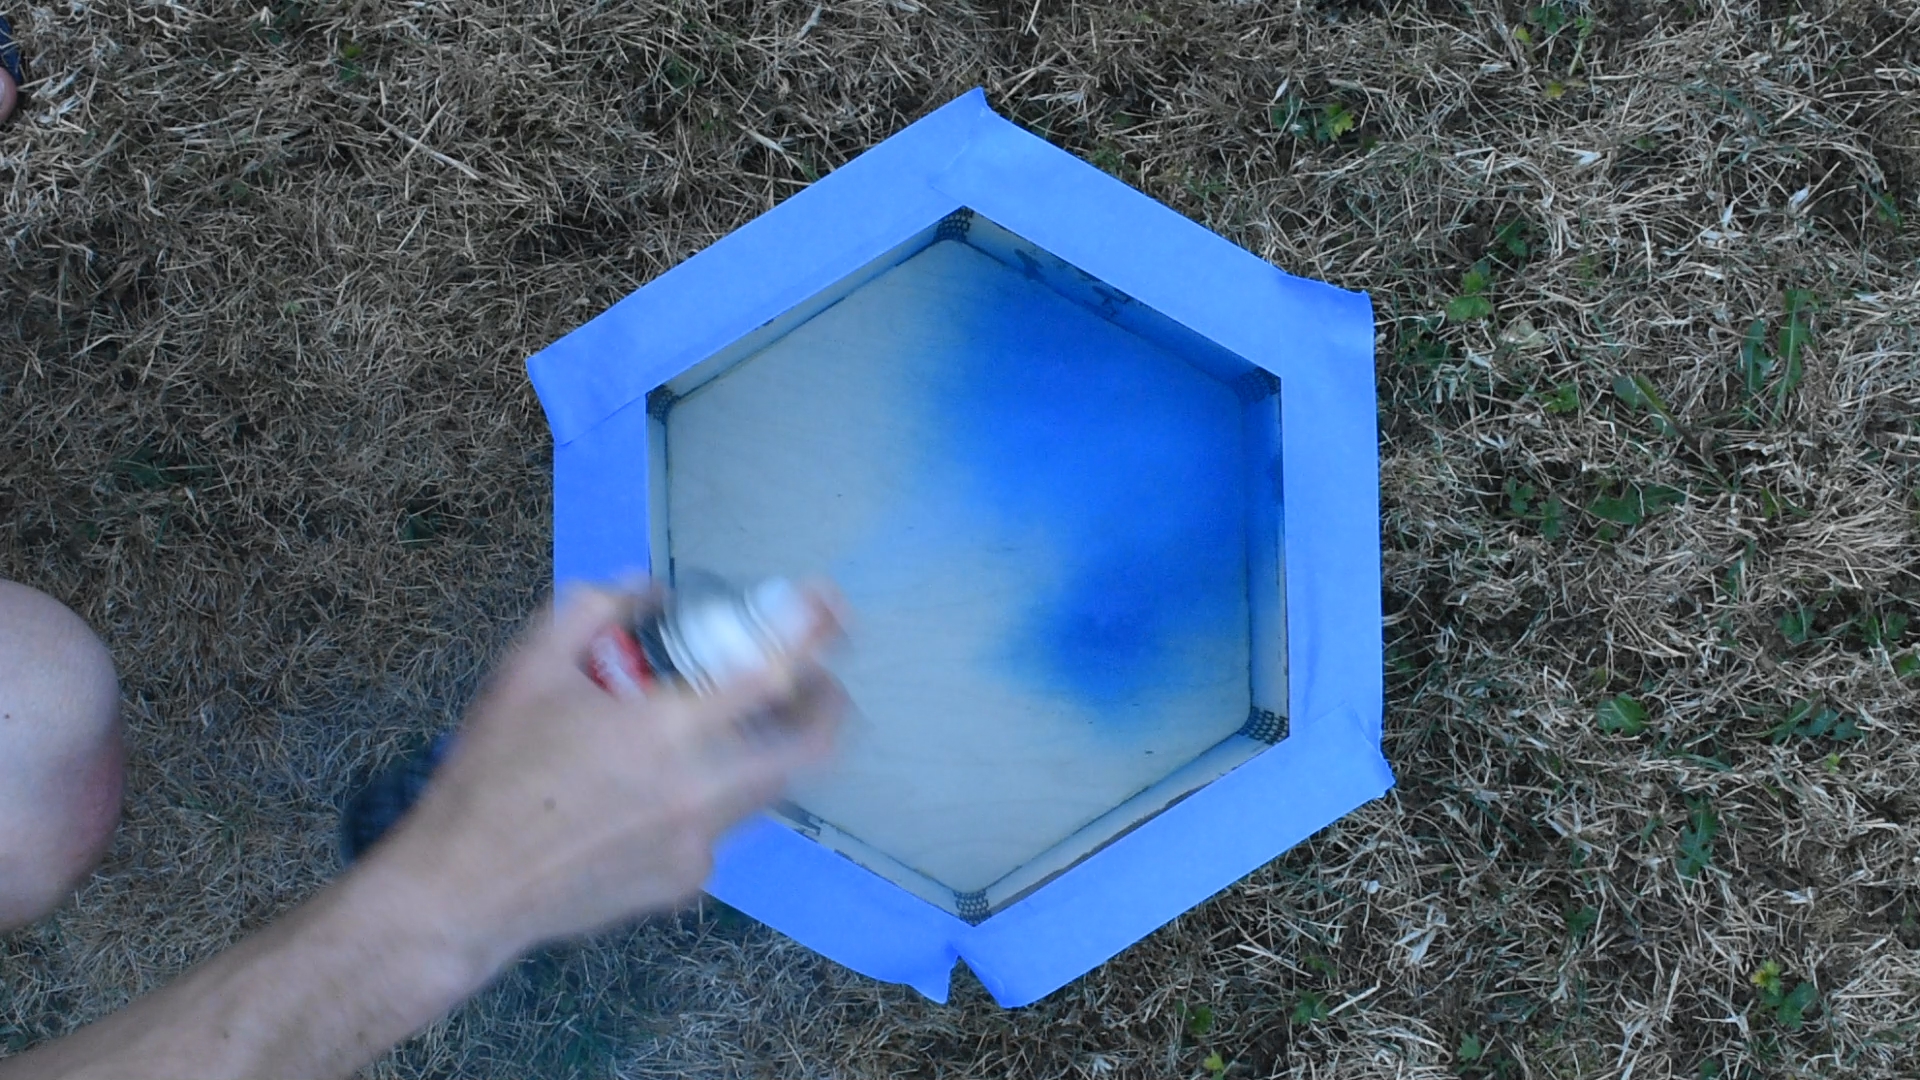
To build them, I first glued the pieces together at the joints, holding them together using painters tape. Then I stained and finished the outside of the shelves, and finally spray painted the inside (using painters tape around the edges to make sure that the outside wouldn’t get spray painted). With the individual prototypes done, I then joined them using the screws to see how well they would hold together. With it fully assembled, I tested how structurally sound they were when assembled together. Here I was looking mainly at how the glued joints held up, because by way of this design, they had to be able to support the entire load of anything on the shelves. Aesthetically, I also wanted to make sure that the rounded corners of the living hinge shelves didn't look weird joined together compared to the sharp corners that you get using a miter saw. And happy with the prototypes, I moved on to the full scale models.
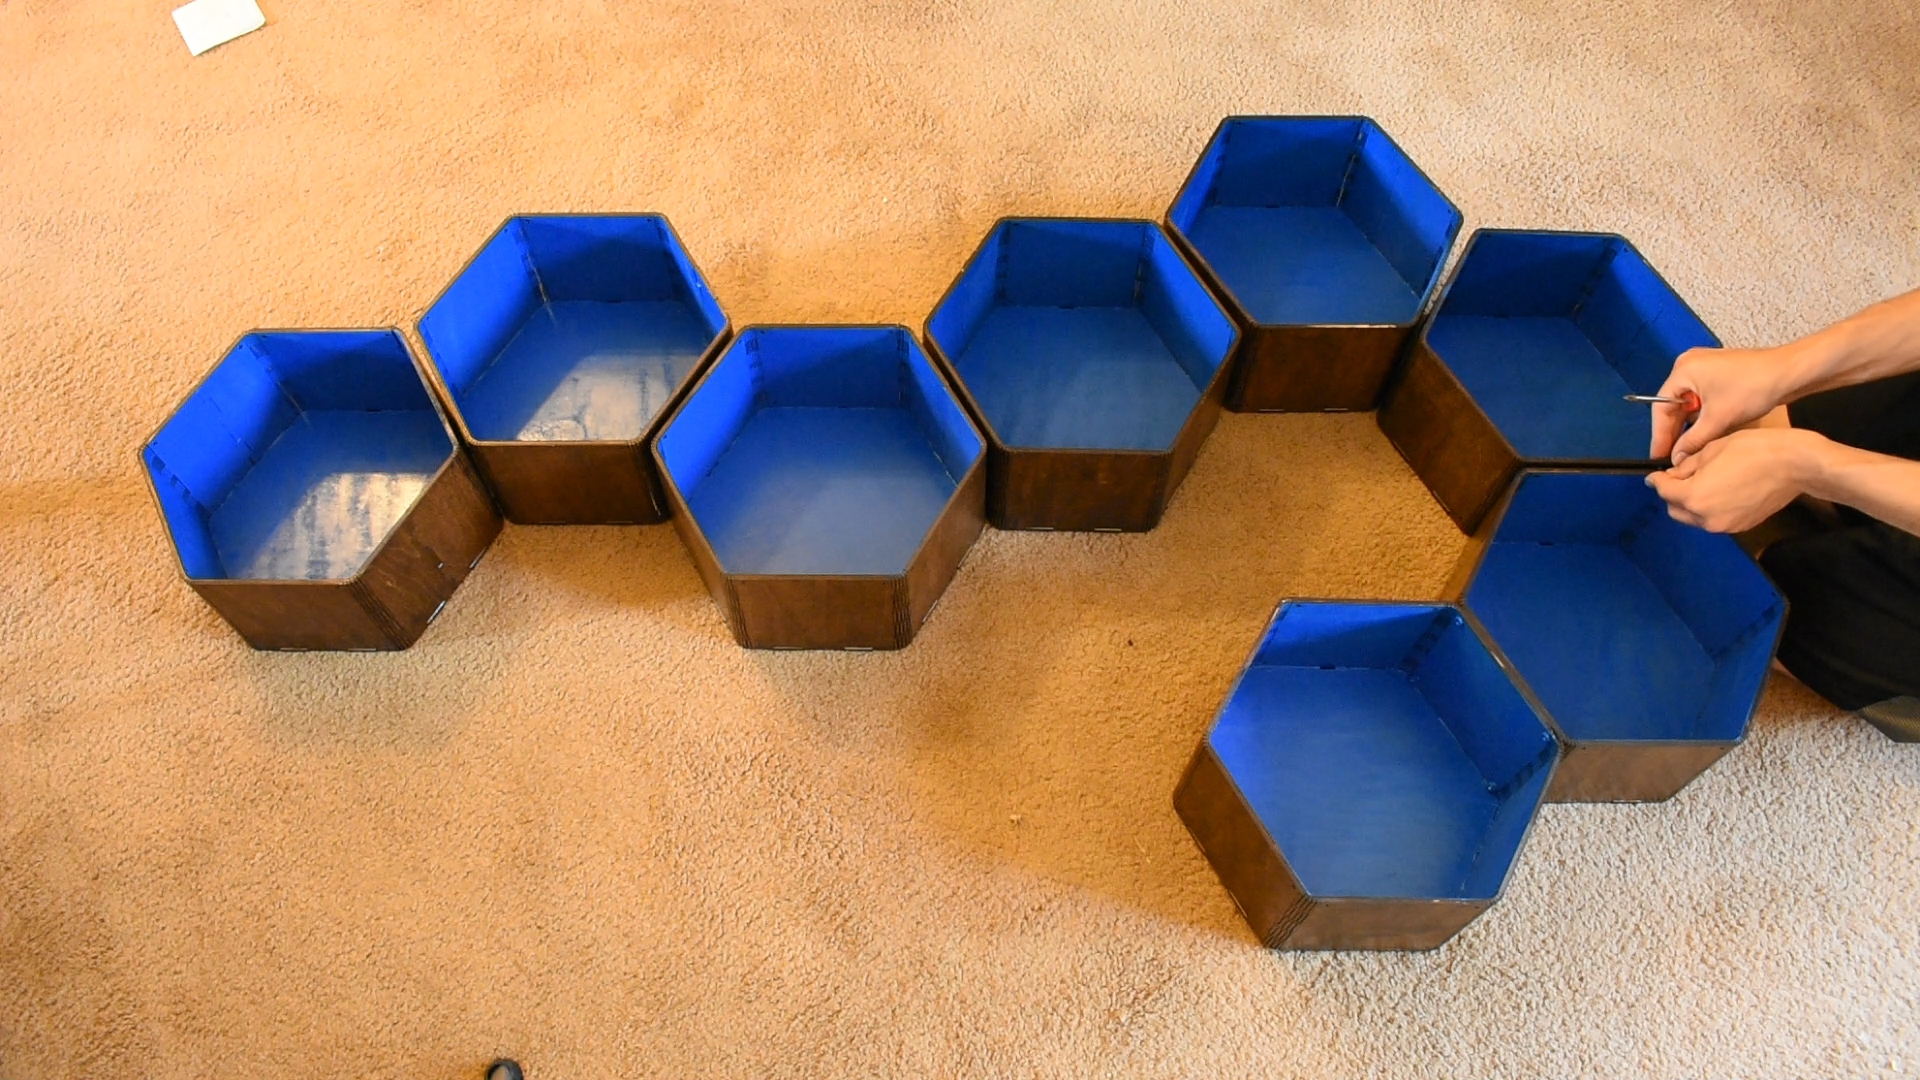
Step 2: The Final Model
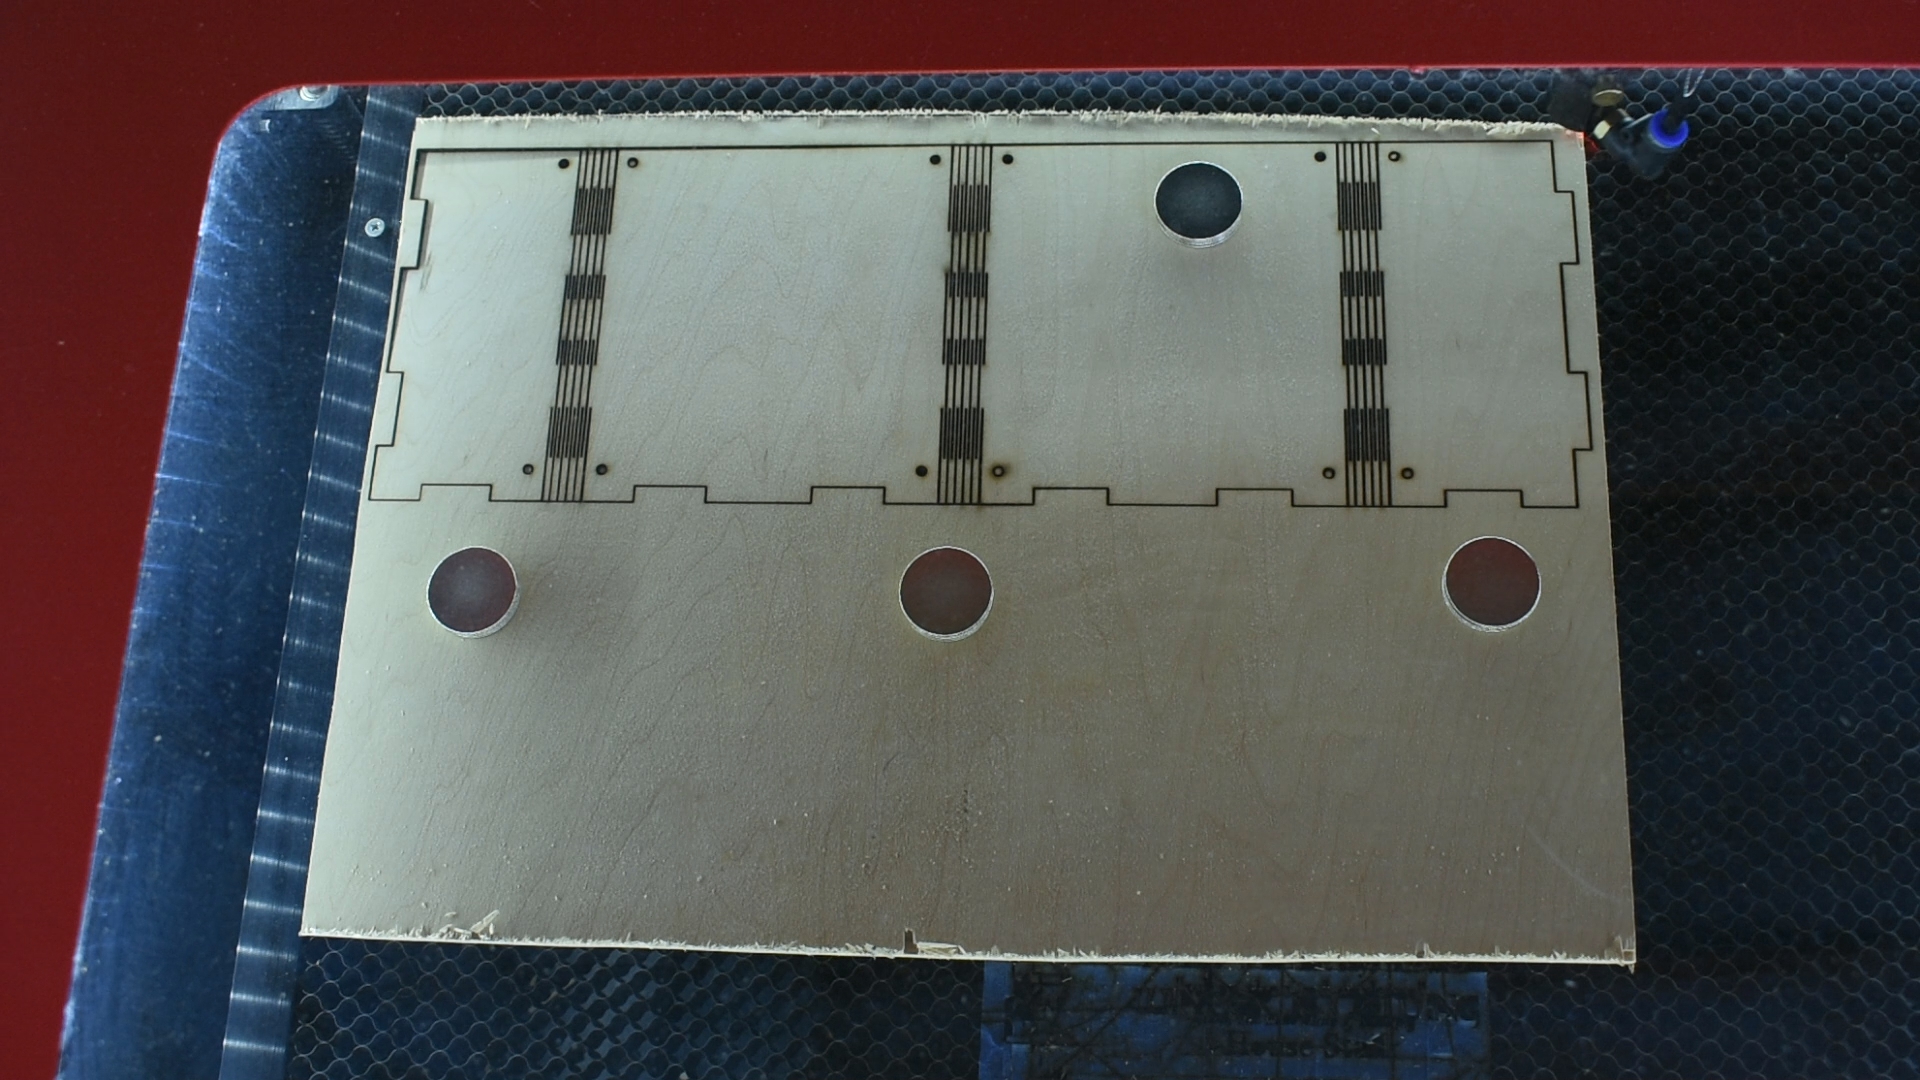
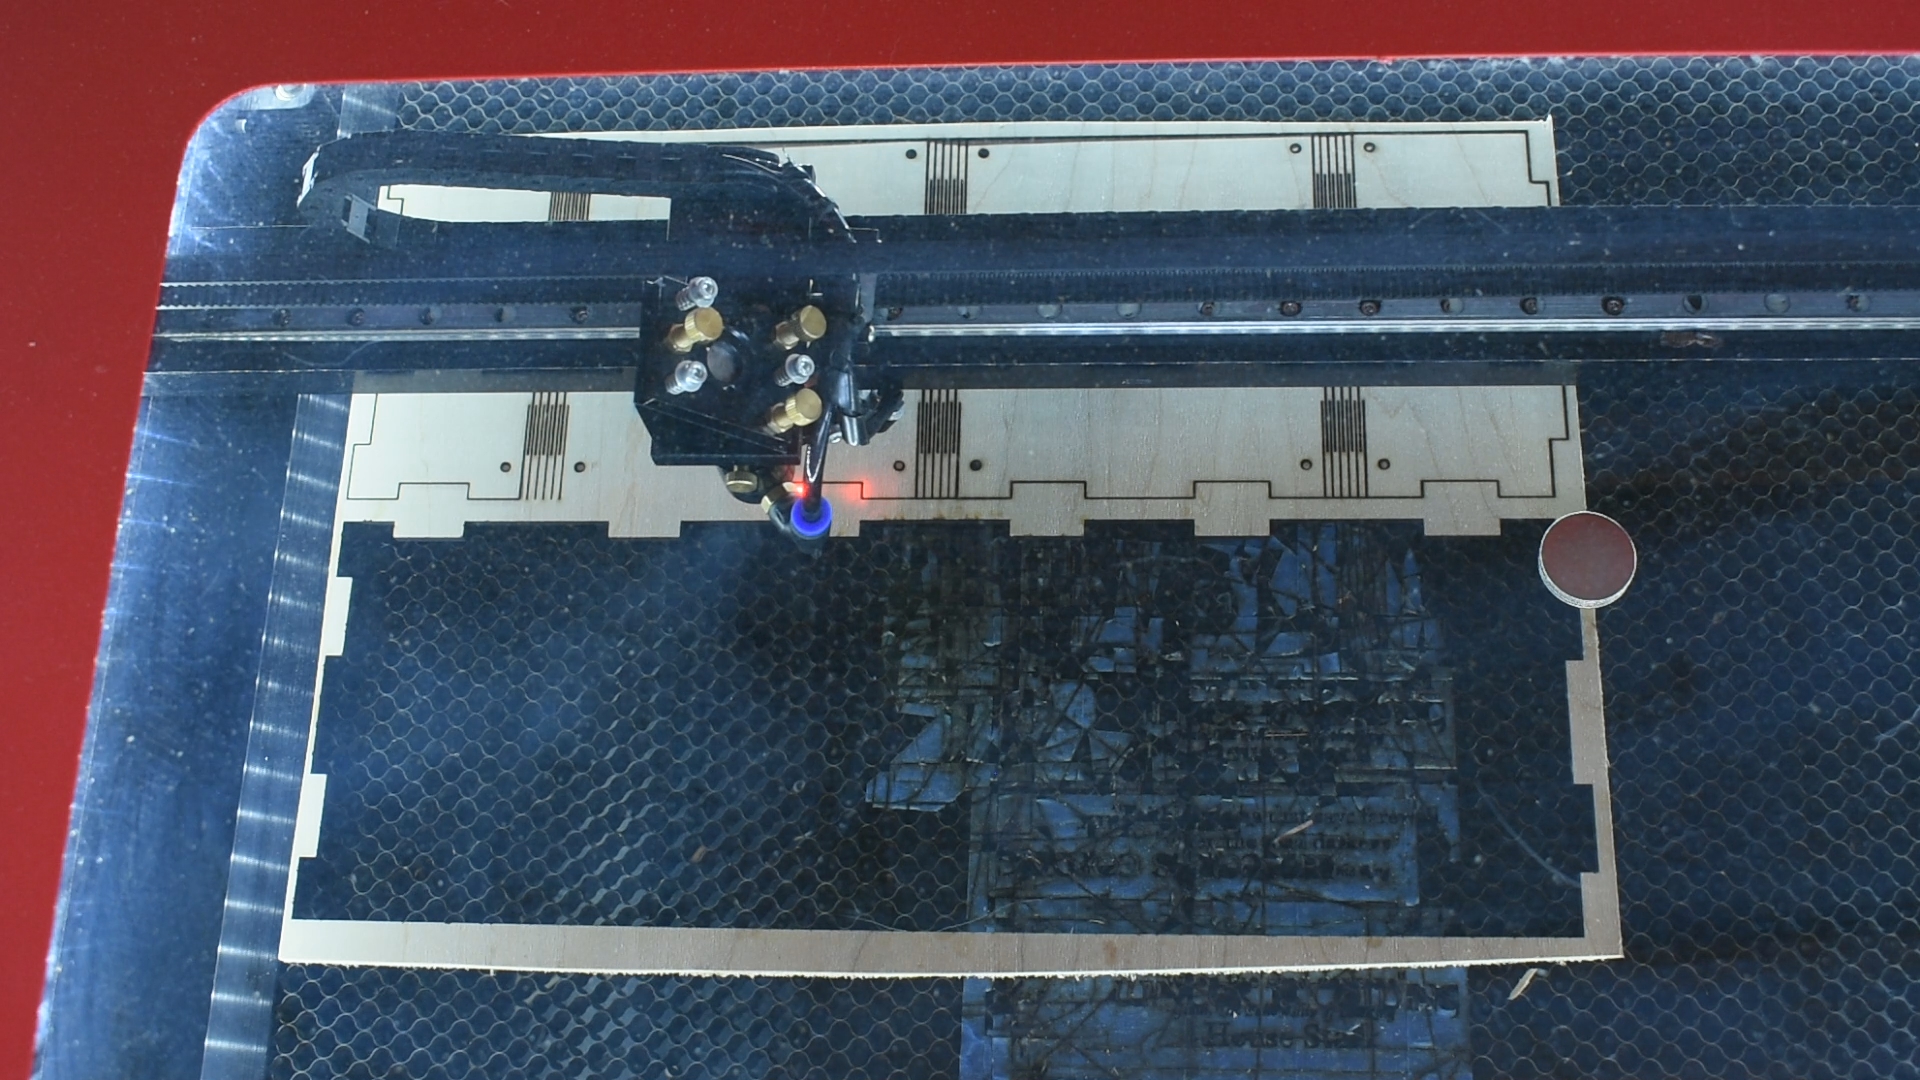
For the most part, the design between the prototypes and final shelves were the same. The main difference was that I wanted to make the shelves bigger, so I used 1/4 inch plywood, and used two strips to make the outside of the shelf instead of one.
Likewise, the building process was much the same as with the prototypes; the main difference is I stained the pieces first because the wood glue can be hard to wipe off and blocks the stain from soaking in. Everything else was pretty much the same.
Step 3: Hanging Shelves
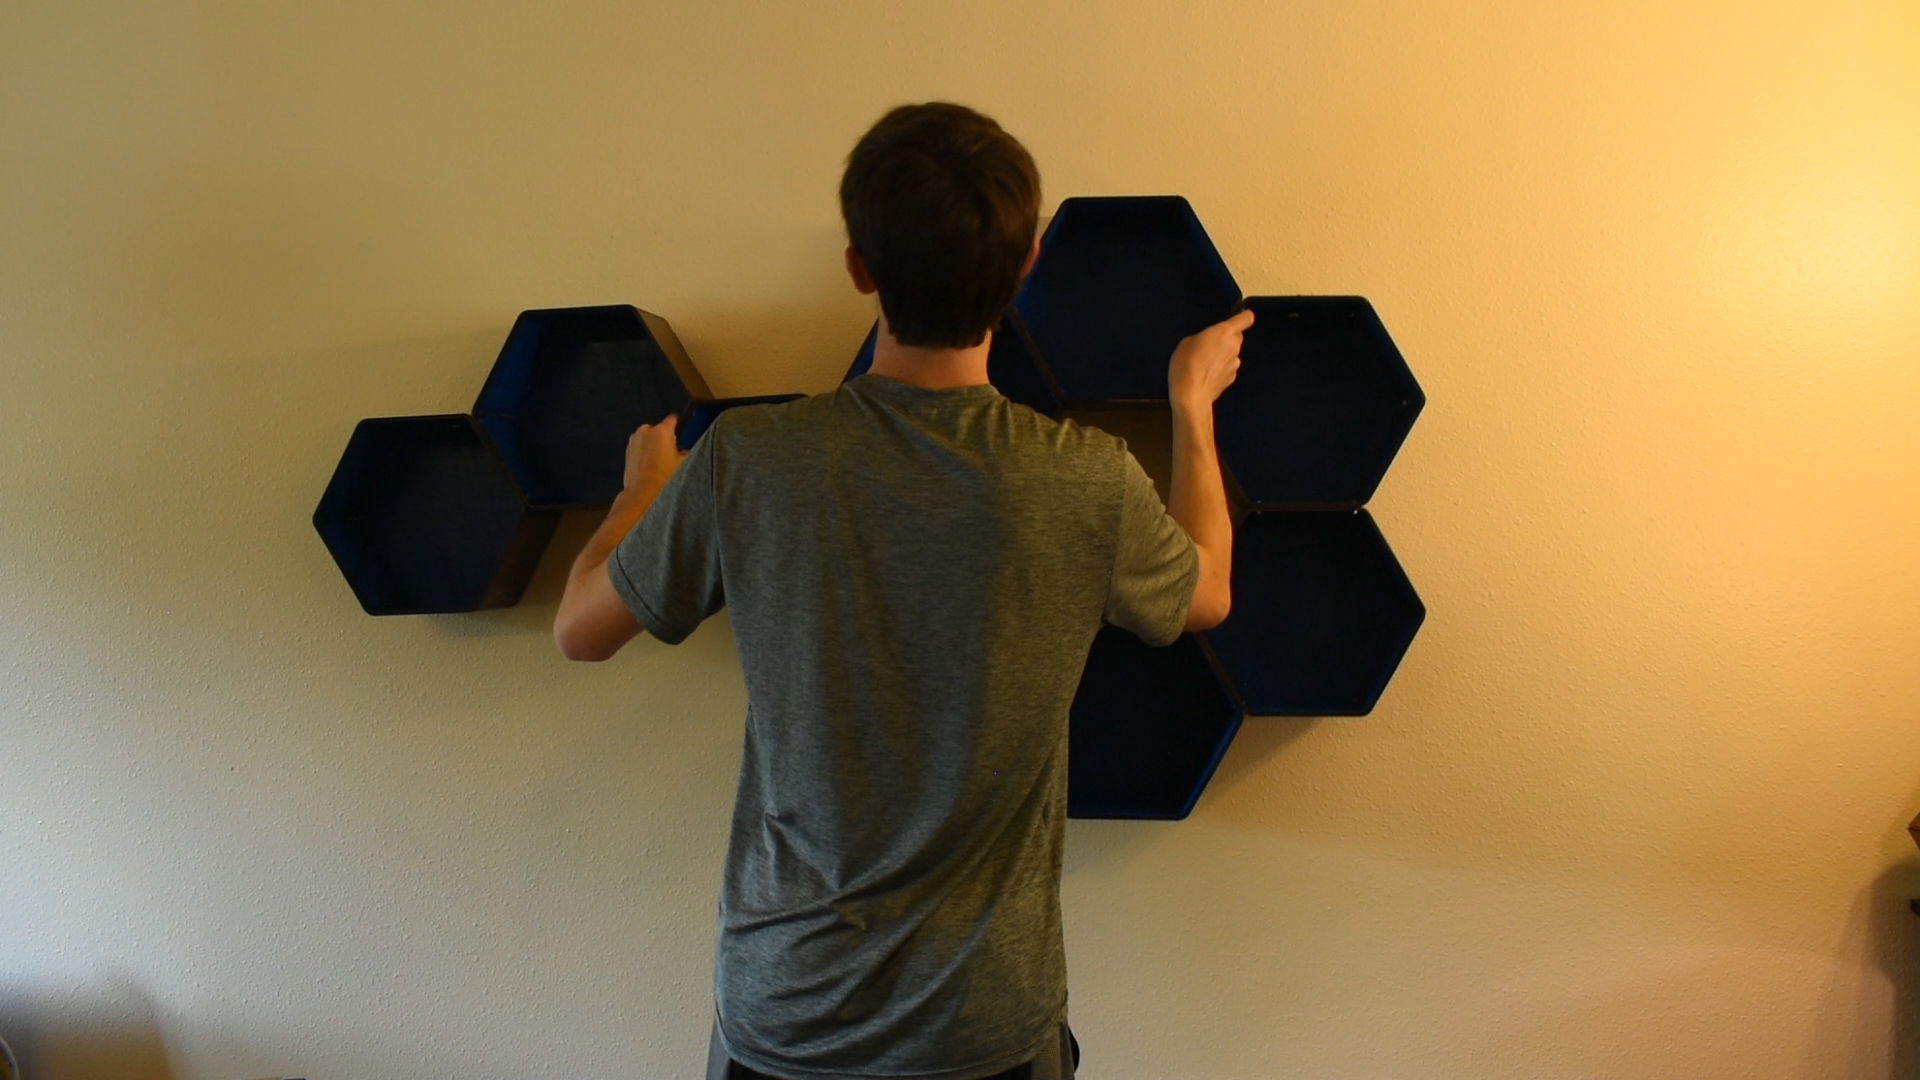
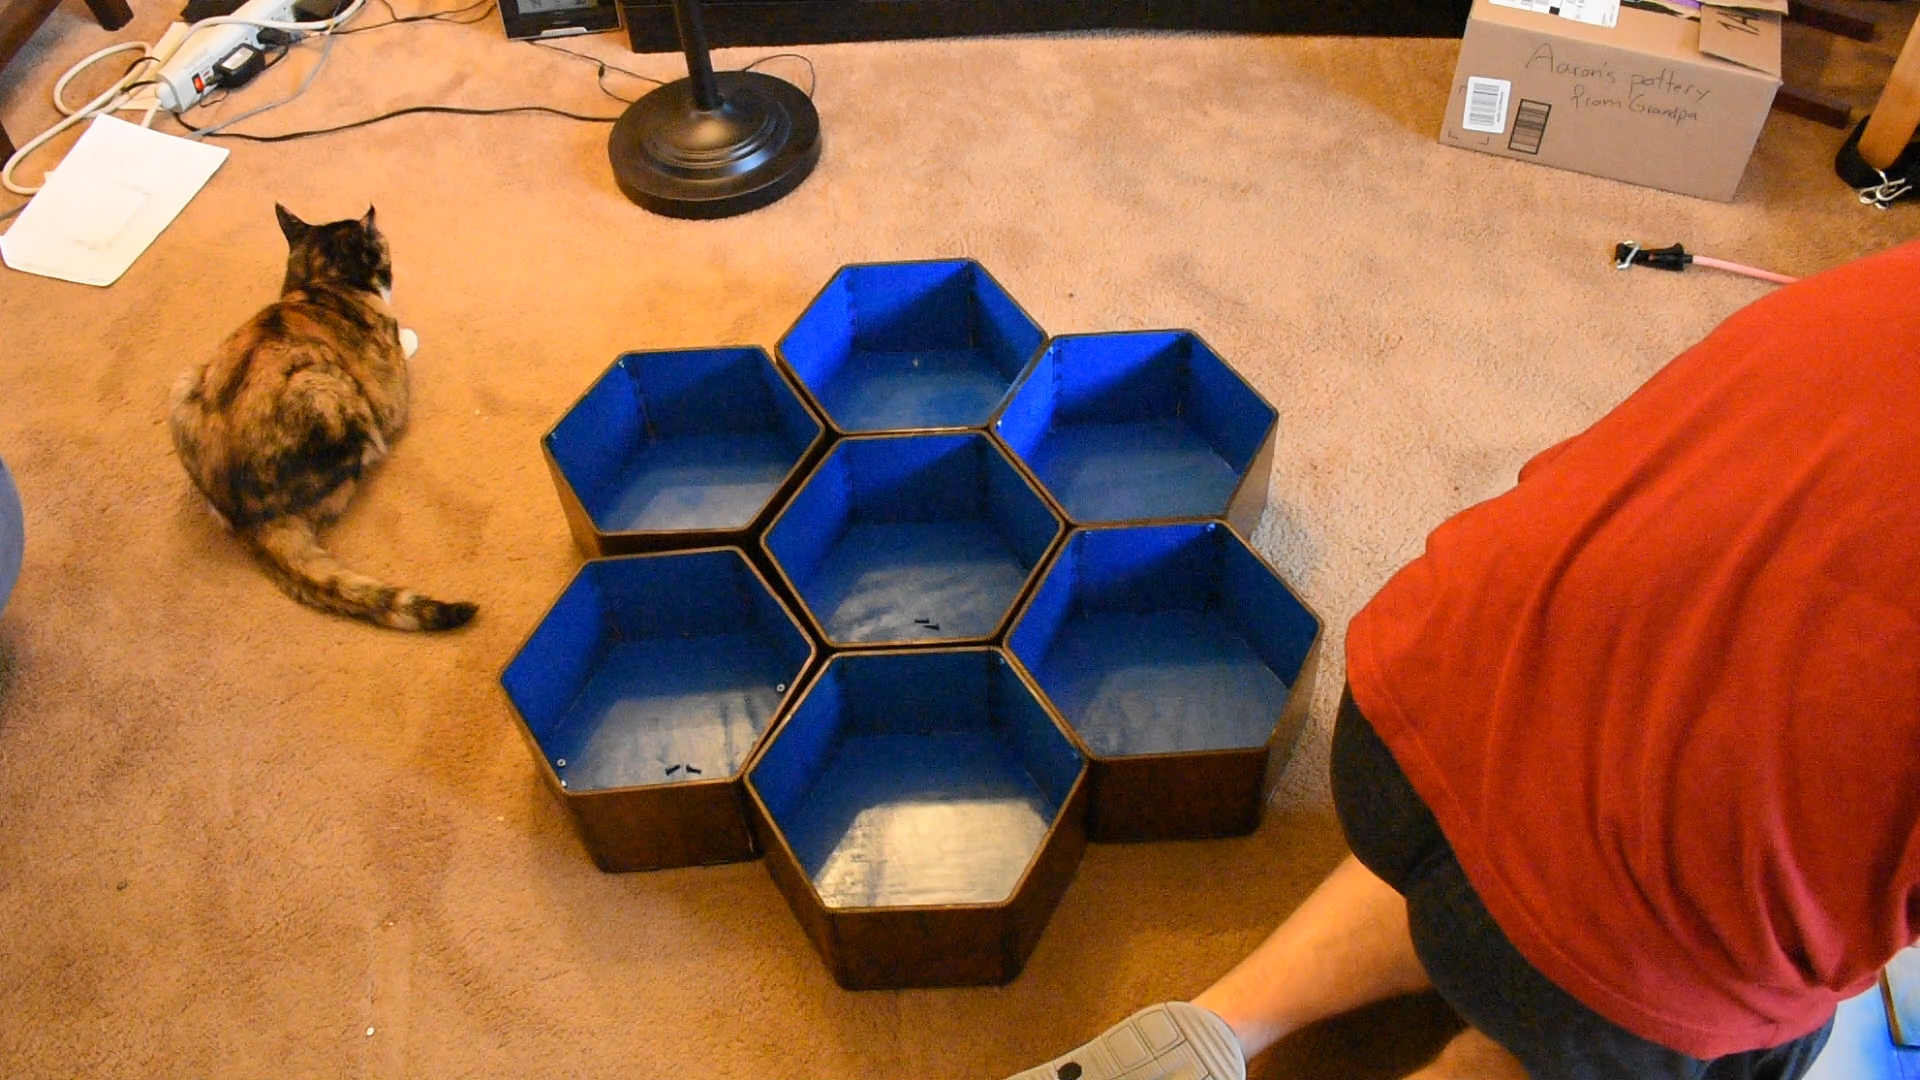
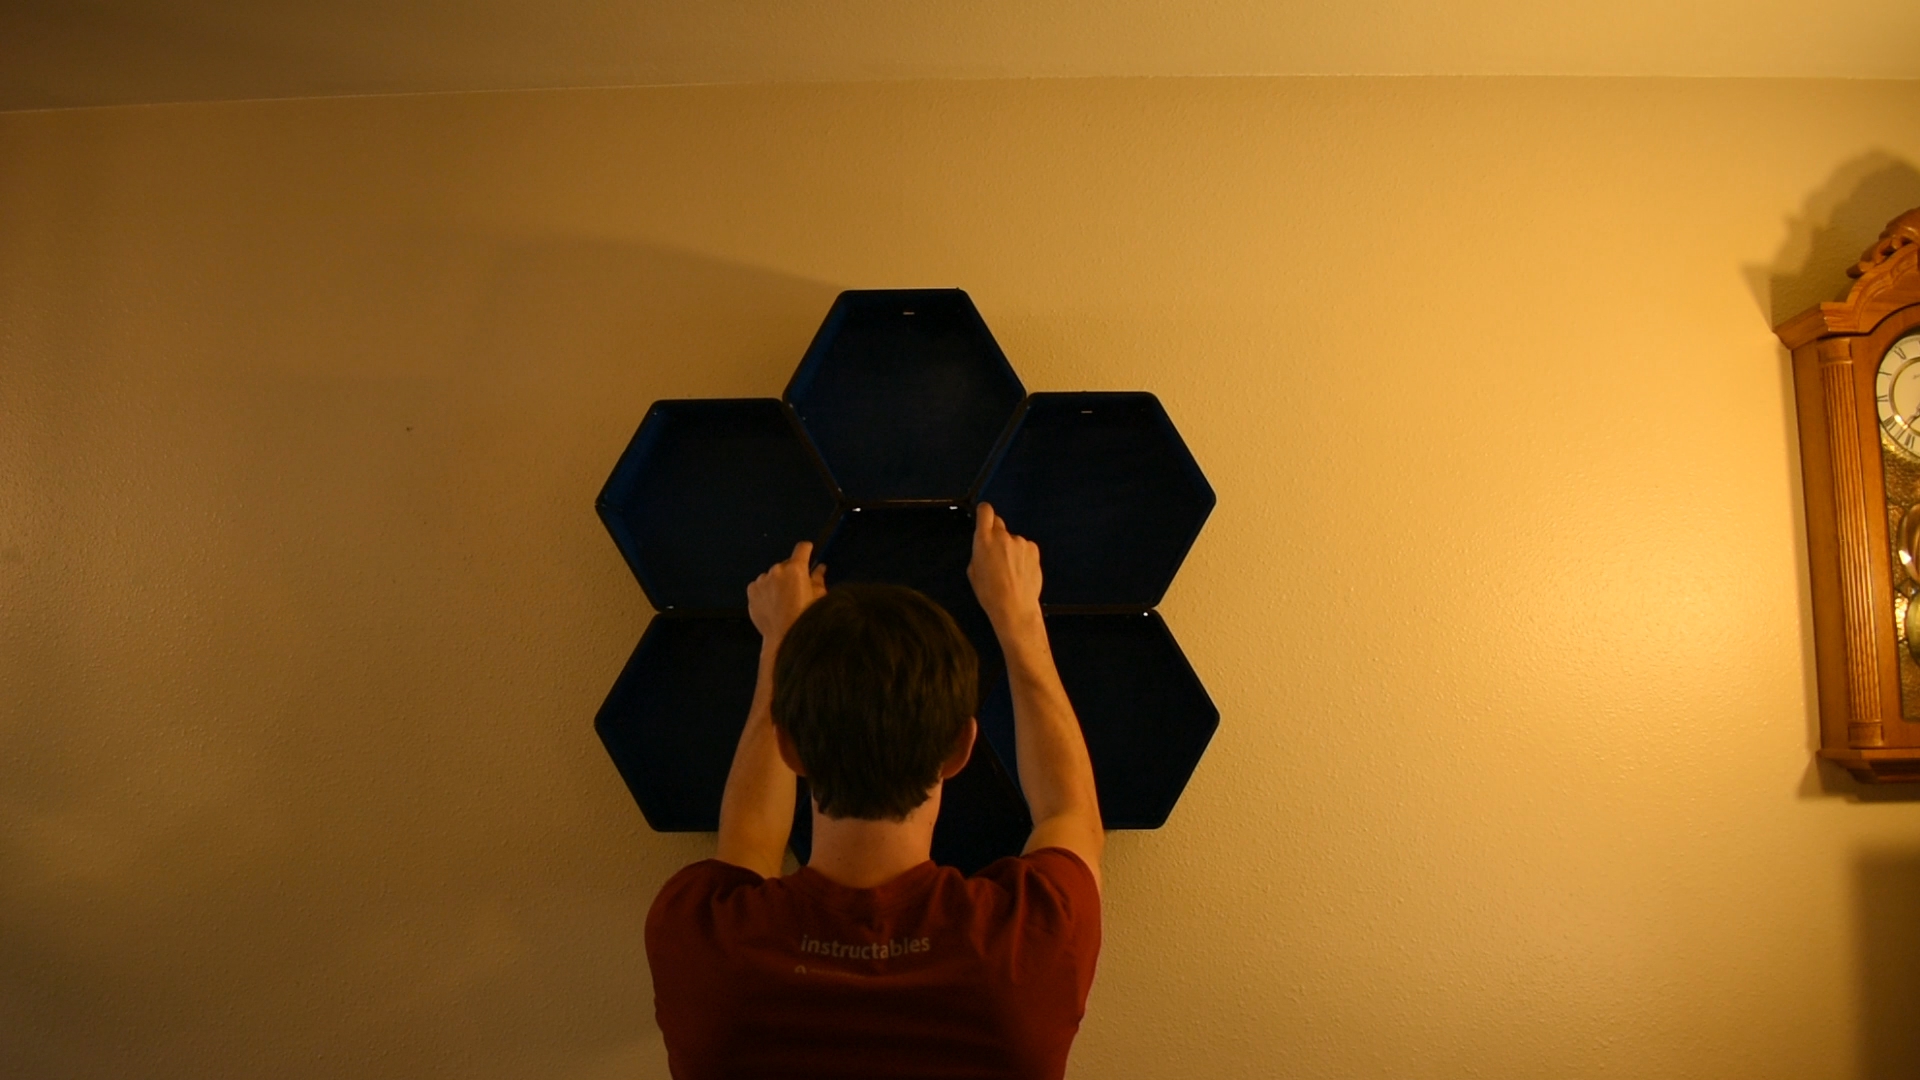
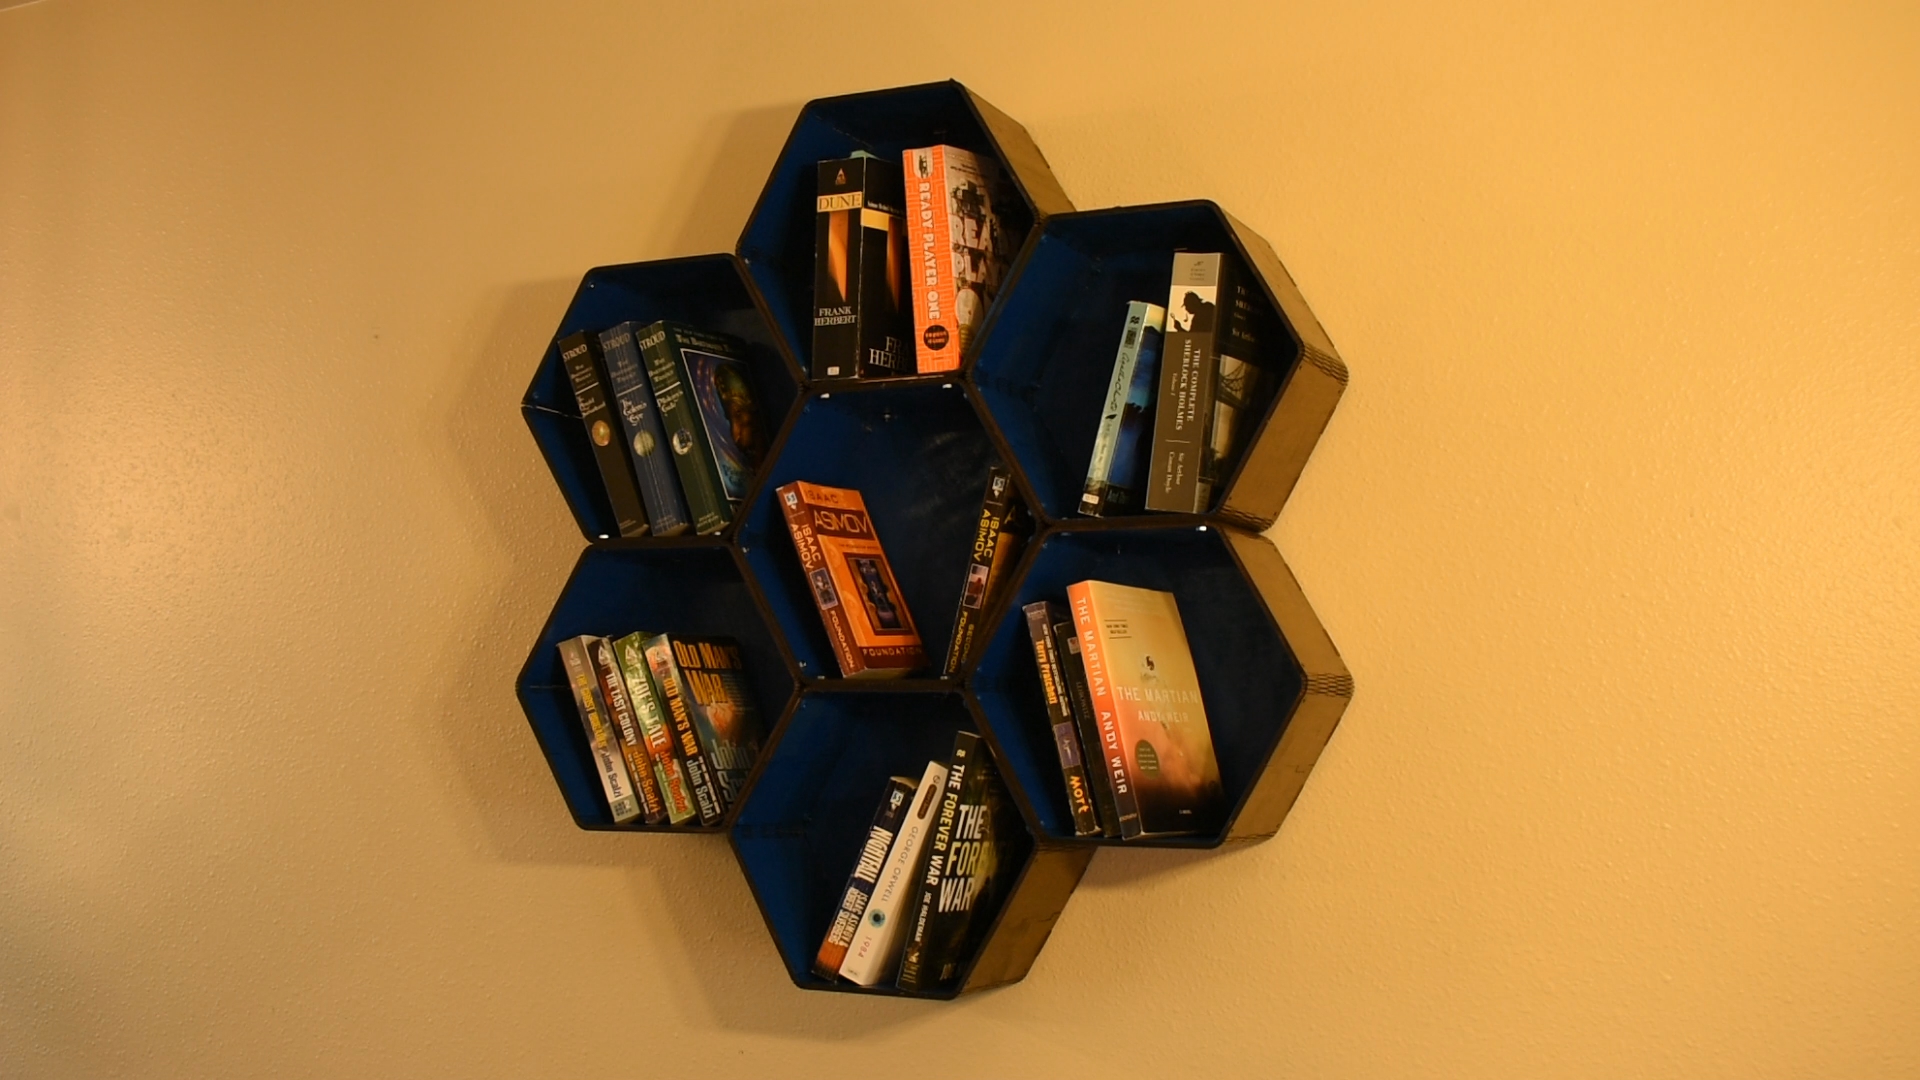
For the final assembly I started screwing together the individual shelves into the final shape that I wanted, which I wanted to be kind of strung out. I then add the hardware that so that I could hang them on the wall. But while hanging it and checking how it was handling the load, I had one of the living hinge corners start to tear because bent to far out of shape and the corners can't support a load. The individual shelves were a bit weaker than I had hoped for, so I decided to go for a different shelf assembly that kept teh shelves compacted together, and was more structurally sound, because the shelves could support each other.
Step 4: Final Thoughts
I had hoped that the gluing process for this technique would be easier since there are fewer pieces needed, but because you need to get glue into all of the joints, I would guess that both gluing processes are equally work intensive. Also, the screw method I used to non permanently hold the individual shelves together also ended up being quite a bit of a hassle. If you have a pretty good idea what you want your shelves to look like, I recommend just gluing the shelves together. The bond joining them would be better, and the process would be quicker. And probably most importantly, compared to the conventional design, I found that the shelves wouldn't be able to hold as much weight, because by way that the living hinge design works, the sides can't hold a load, and so the glue joint between the sides and the back piece have to do all the work.
So if you want larger honeycomb shelves, the more conventional method using would probably be better because it can hold more weight. But if you want miniature scale honeycomb shelves (like for example a honeycomb shelf spice rack), I think that the laser cut method would be superior. The biggest advantage with laser cutting these honeycomb shelves, is that the sides are thinner, so it's easier to miniaturize the design.
If you want to make these yourself, attached below are the files that I used for my 1/4 in honeycomb shelves.