Topographical Push Pin Map
I recently went on a quest to try and figure out how to make a push pin map using multi-layered cork based on topographical features, and after working through the process, I am pretty happy with my first prototype! In this tutorial, I will go through the process I developed to make this map, both what I thought worked well, and what I would recommend doing differently.
The basic process that I will explain in this tutorial is:
How to custom make topographical contour maps
How to convert that into a laser cuttable format
How to laser cut the pieces
How to put all the pieces together, and how to do it in a way that looks good
Supplies:
Cork Board, recommend 1/8" for around a 50W laser cutter.
Plywood for the base (I used 1/4", but 1/8" would work as well)
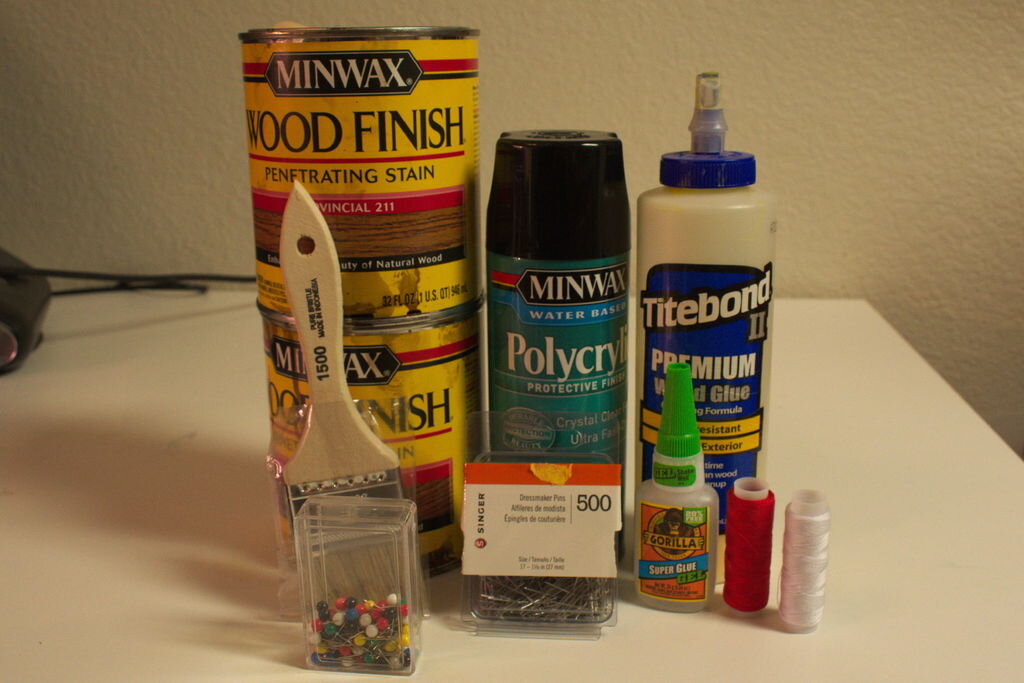
Glue (I used wood glue and quick drying super glue)
String, "Dressmaker Pins", Push Pins (anything you want to put on the board)
Optional: Neodymium magnets (helps hold down the cork board when laser cutting)
Tools:
Laser Cutter
Programs:
Maperitive (or other program that can turn topographical data into maps, like QGIS)
Inkscape (or other vector program like Illustrator)
Step 1: Laser Cutting Files
Thingiverse: https://www.thingiverse.com/thing:4180596/files
Linked above are the laser cutting files I used to make my map of Washington. The SVG file is the original I made using Inkscape, and can be easily edited. The others are the laser cutter ready DXF and PNG files I exported. Each layer DXF and PNG should be sized so that they are exactly the same (meaning you can raster and then cut the same layer without needing to re-home the laser cutter), but I would still double check to make sure. If you just want to make a Washington map, those files should be all you need, and you can skip down to the laser cutting step. The earlier steps will hopefully allow everyone else to replicate my work on other areas so that you can make a topographical map of wherever you want.
Step 2: Getting Topographical Data
Step 2 - Tools and Supplies:
Maperitive (or other program that can turn topographical data into maps, like QGIS)
Choose Your Program:
The first step to making the topographical push pin map is getting actual topographical data. It is possible to find pre-made maps online, but making your own will allow you much greater customization and scaling of the map.
For this process, I used Maperitive, which has some major upsides and downsides. For the upsides:
It's FREE!!! (Can't beat that)
Maperitive is relatively simple, and because of that has a pretty easy learning curve
Even though it is simple, it has just about all of the core tools we need to custom make topographical contour maps
For the downsides:
Maperitive does not appear have a very active community anymore
Meaning some functionality no longer works as designed, and even though I figured out workarounds for most of these errors, it's still inconvenient and limits the functionality
Maperitive doesn't deal with large geographical areas well, and this forced me to manual solutions, instead of some of the more streamlined solutions that are theoretically possible. It doesn't deal with large areas well because it keeps too high a resolution/too much data. For example, I made my map of Washington State, and though Maperitive has an export to vector file functionality, the exported contour map vector file of a State sized map is too large to conveniently deal with in Inkscape (to be explained in the next step).
If I had been fully aware of the downsides before, I would probably have learned how to use QGIS instead. QGIS is similar to Maperitive (particularly that it is also free) for what we need with the notable differences that it has a very active community (great news), and it appears to have a much bigger learning curve (not great), because it has more functionality (good). And of course there are certainly other programs out there that can do what I described.
Getting a Topographical Contour Map From Maperitive
With this is mind, I will go through the process that I used to get Maperitive to work
Download and install Maperitive, it is available at http://maperitive.net/ (Full installation process explained in the 2 minute tutorial linked below)
Go through a couple tutorials to learn the basic functionality. These include:
Two Minutes Introduction To Maperitive
Ten Minutes Introduction To Maperitive
Maperitive Tutorial: A Hiking Web Map In Ten Easy Steps (You may get an error message trying to do this tutorial, with workaround explained below)Now, it's time to generate some topographical contour maps, and this is where we will also run into the major problem with Maperitive.
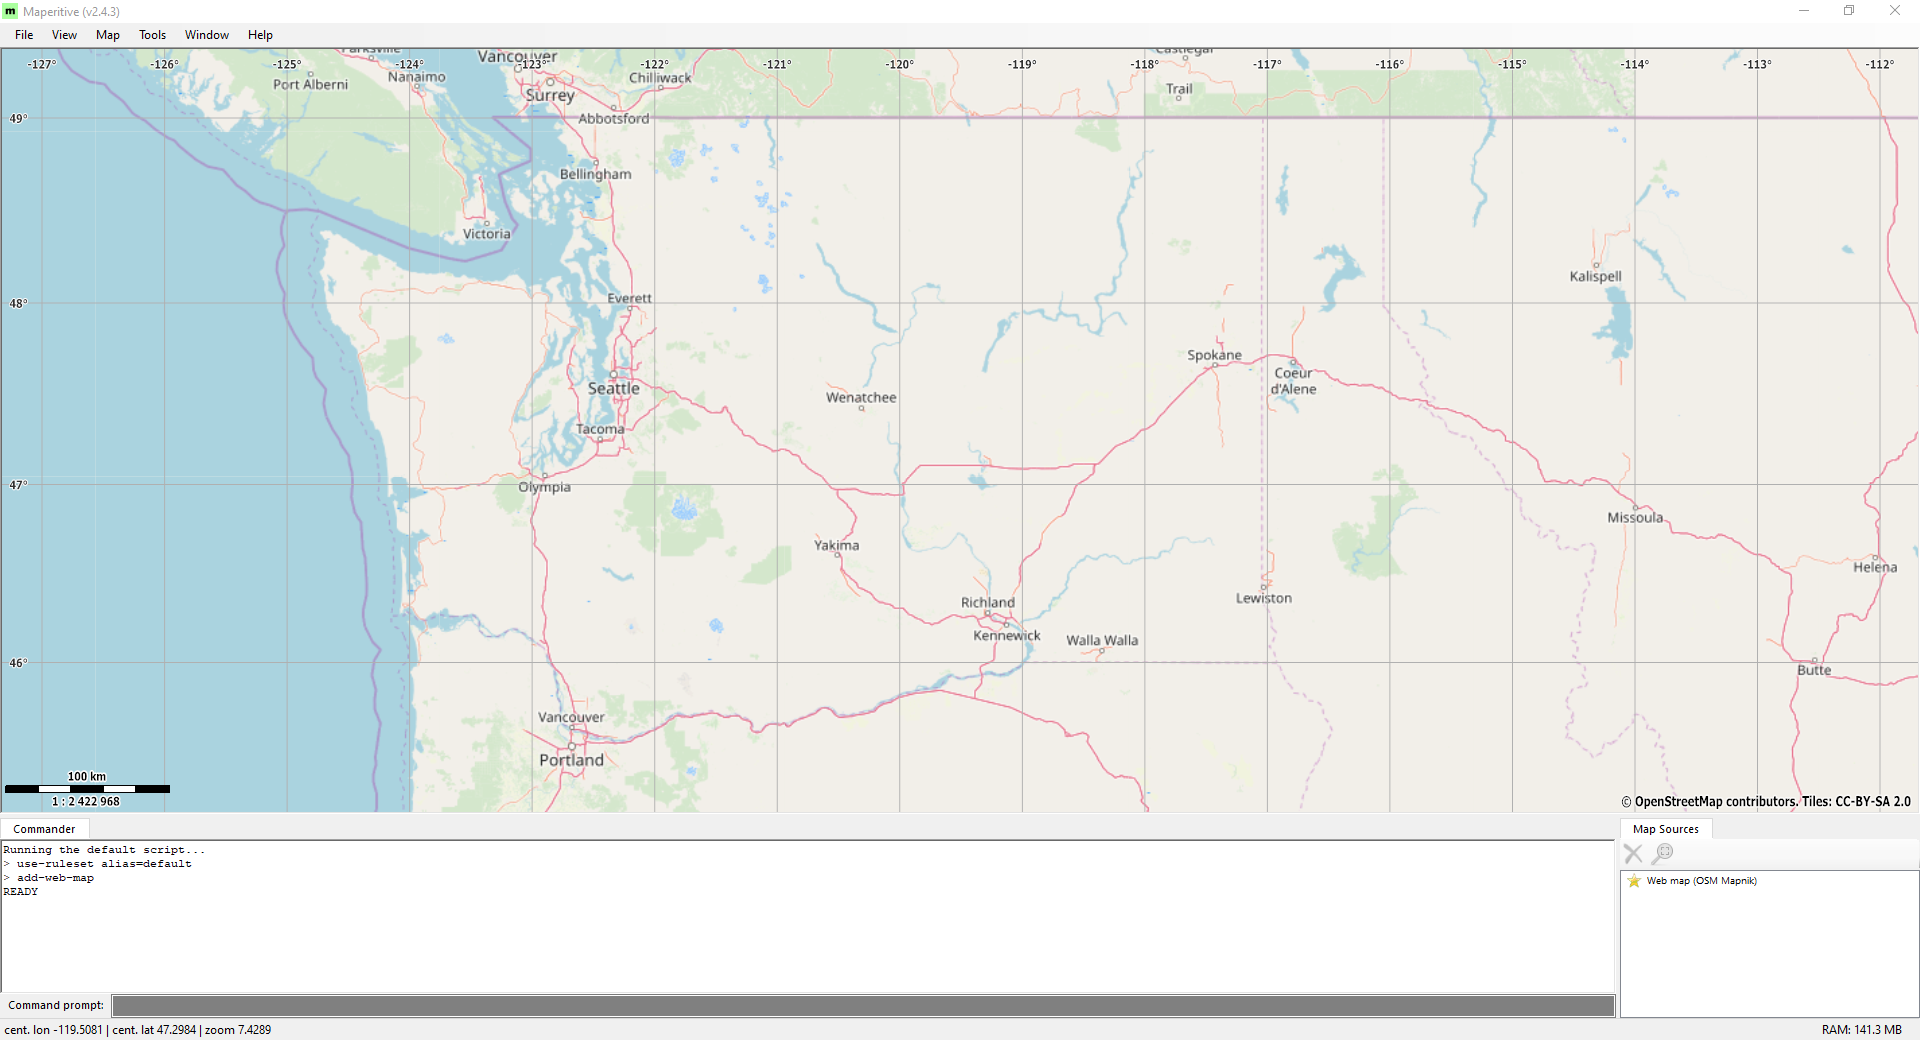
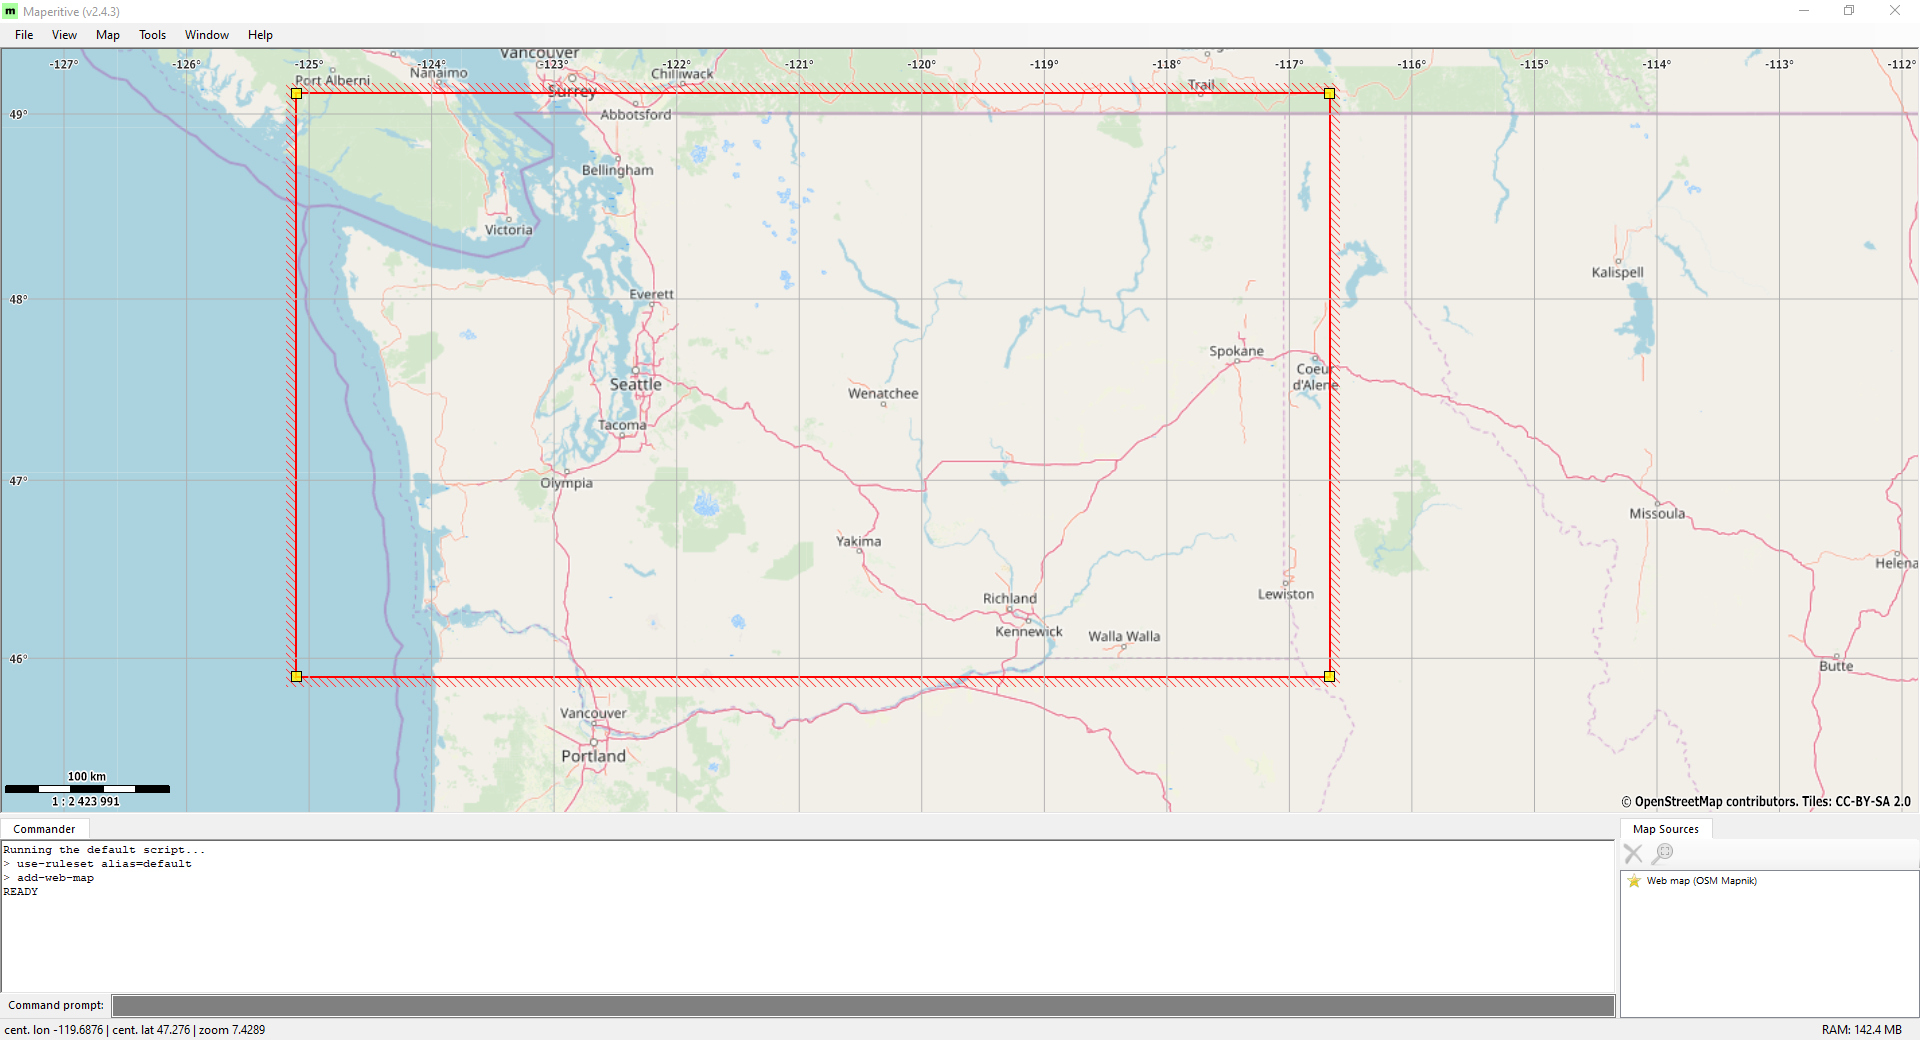
To start, zoom out and pan to the general area of the world that you want to turn into a map, and then right click -> Place Geometry Bounds Here
Expand the bounds to area you want to encompass (these bounds are the limits to which Maperitive will create data)
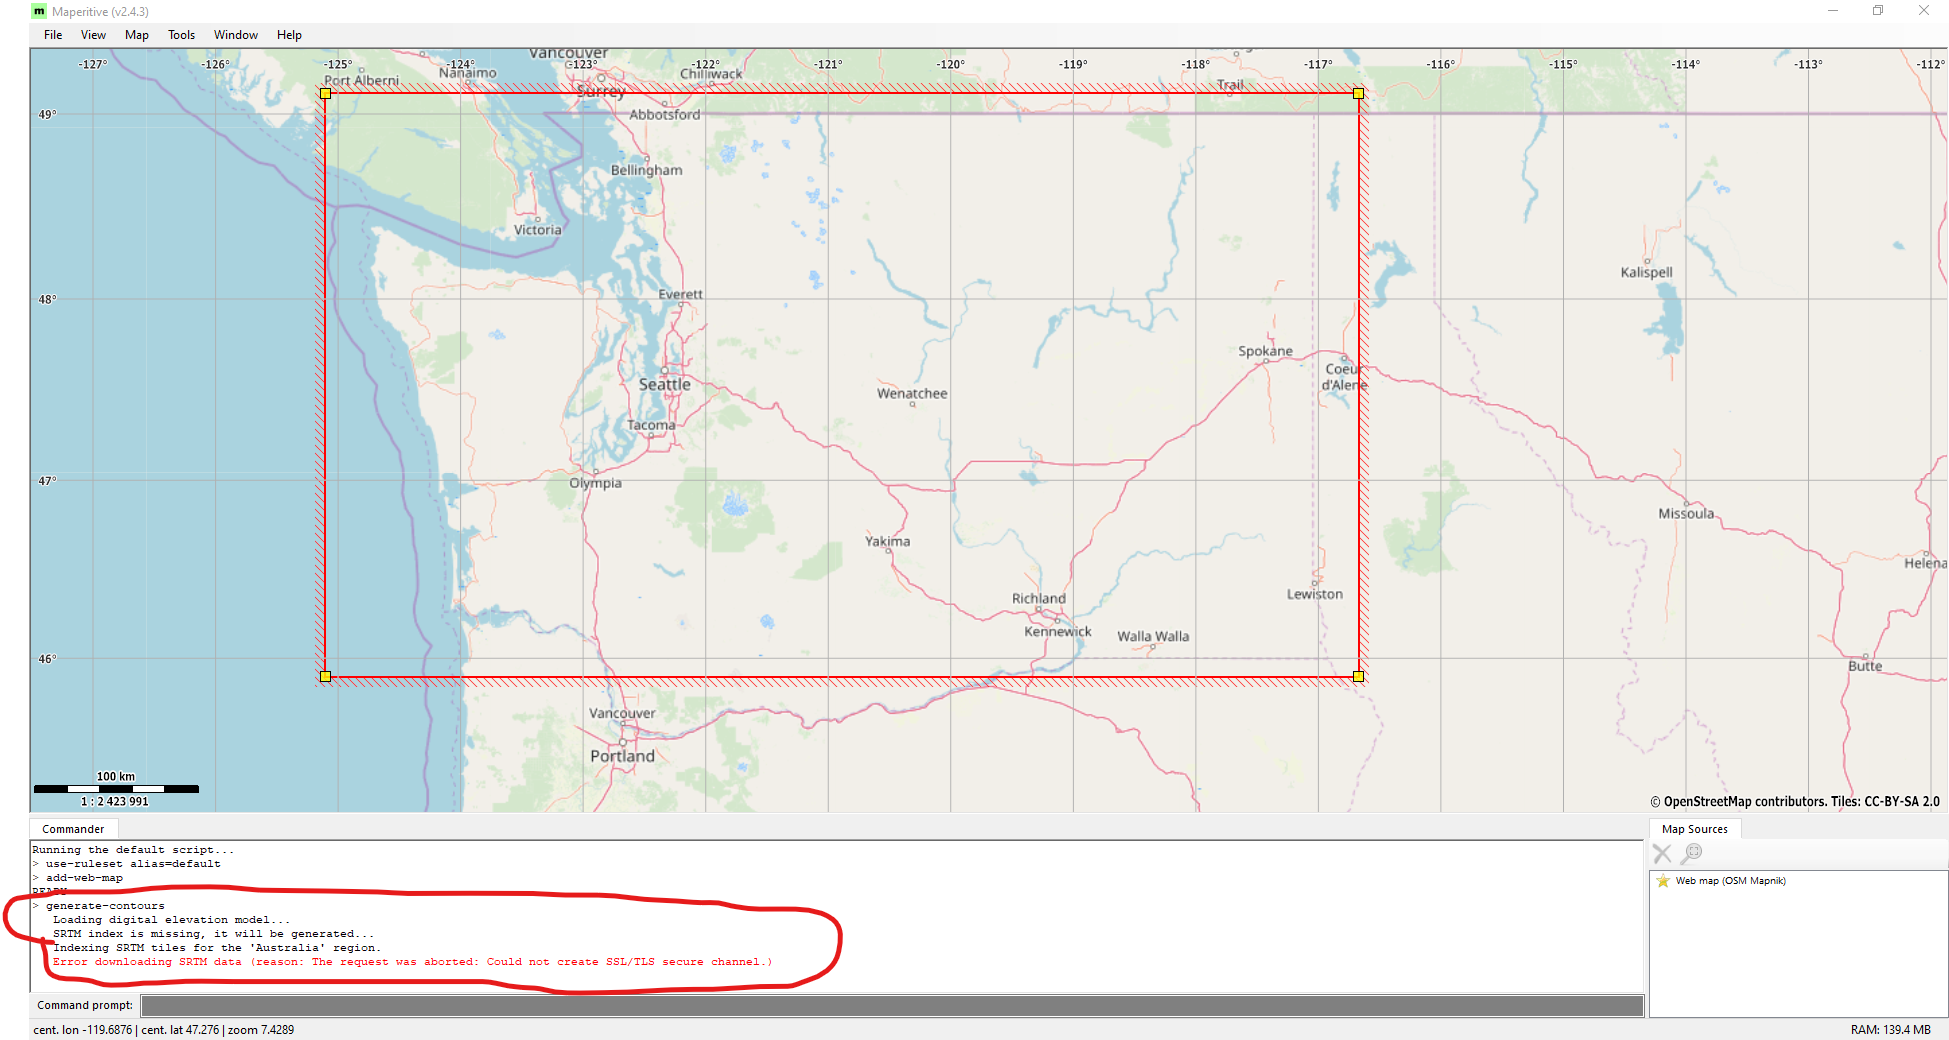
On the upper toolbar, go to Tools -> Generate Relief Contours. You should get the following error
"Error downloading SRTM data (reason: The request was aborted: Could not create SSL/TLS secure channel.)"The problem is explained here: http://maperitive.net/docs/Commands/SetDemSource....and gives a solution that is supposed to work (but as I'll explain, does not). In essence, when you first download Maperitive, it does not have any topographical data to start with. To get it, it automatically goes and tries to download a dataset made available by NASA. Problem is, NASA updated the protocol used to download their topographical data that prevents external applications from automatically going to and downloading the data. The proposed workaround was creating an account with NASA, where you get an "OAuth authentication token" that allows you to download the data, that you can extract from your browser and copy into Maperitives request code, and should theoretically allow Maperitive to automatically download the topographical data from NASA. However, even after trying this patch, it was still giving me errors, so I can't recommend this solution.
The workaround I found was manually downloading the topographical files you need, and placing them in the Maperitive directory that holds the topographical files. The most thorough discussion I found on this problem is here
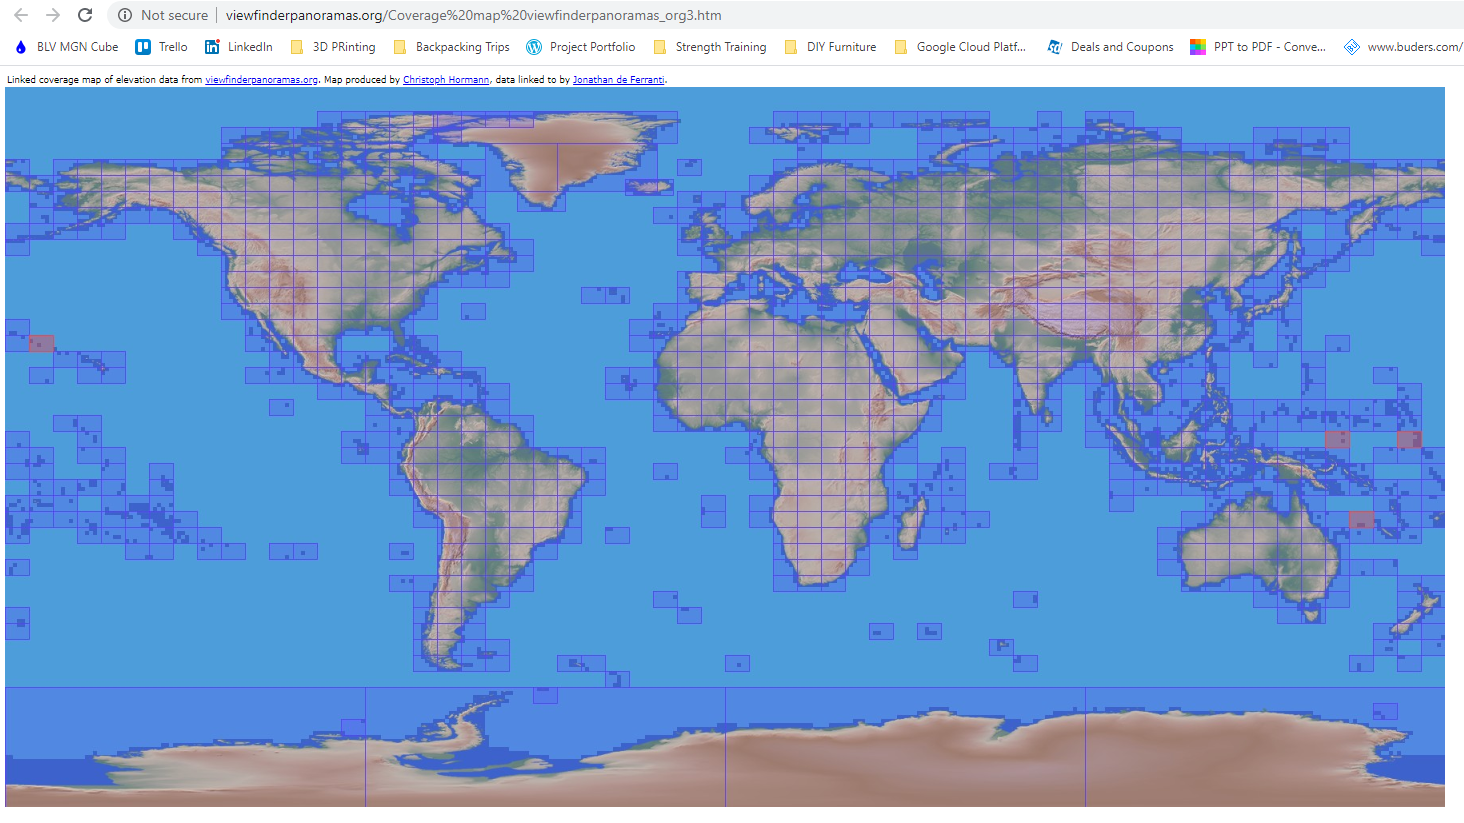
The topographical files that Maperitive uses are ".hgt", and while NASA has them, they are broken down by Latitude and Longitude in a format that is somewhat hard to intuitively understand what specific files you need to cover the area you are trying to make a map of. A website that I found that allows you to visually download them in batches, and is very intuitive, is available here: http://www.viewfinderpanoramas.org/Coverage%20map...
After downloading the needed topographical files, move them to the directory -> Maperitive\Cache\Rasters\SRTM3 (SRTM3 is the default directory; this might be different if you changed it in the options). If you are still getting errors, make sure ".hgt" files you download are not in a folder within the SRTM3 folder (this will happen if you extract the files from the website linked above straight to the cache folder), or try downloading adjacent files to the one that you already downloaded. For example, to get all of Washington, I needed to download L10, M10, M11, L11 before I stopped getting an error.
This is the process that allows you to get Maperitive to use topographical data without getting an error
Step 3: Generating the Contour Maps That We Can Use
Step 3 - Tools and Supplies:
Maperitive (or other program that can turn topographical data into maps, like QGIS)
Now that Maperitive is working, there are two ways to get the contour data.
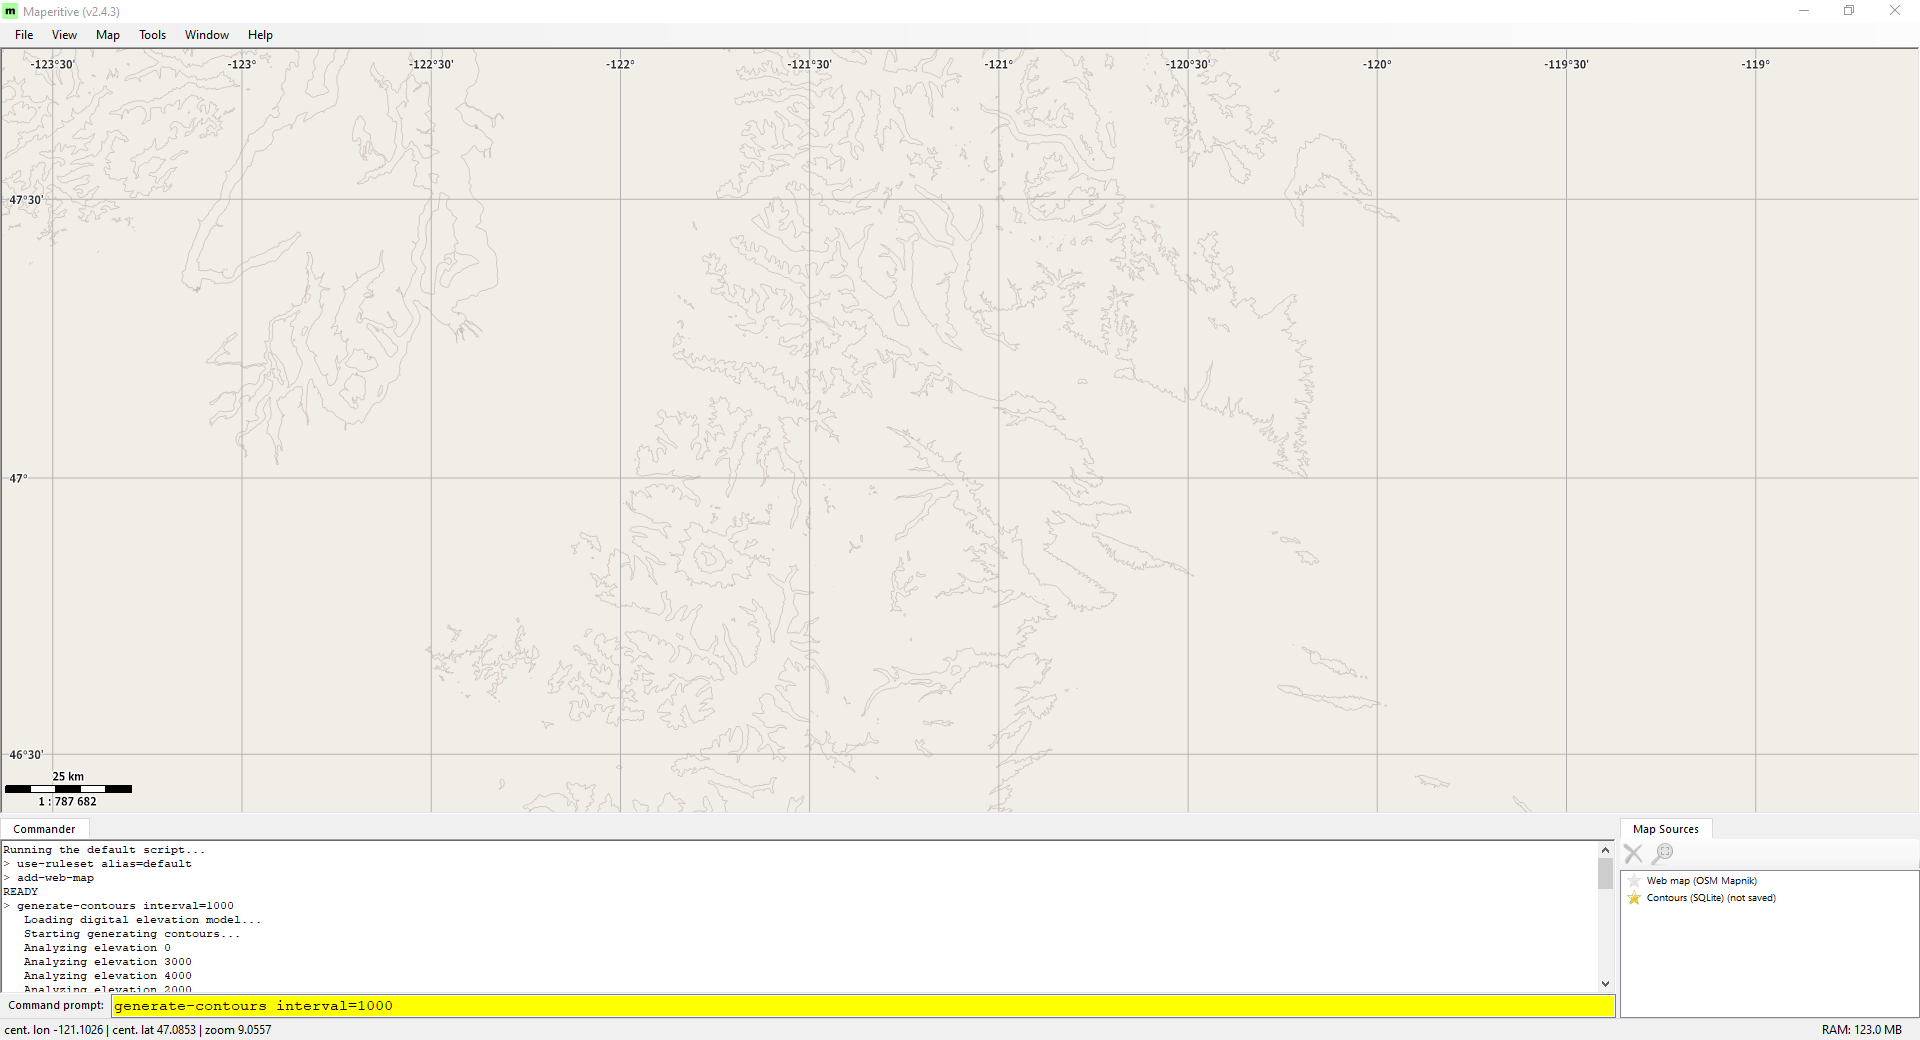
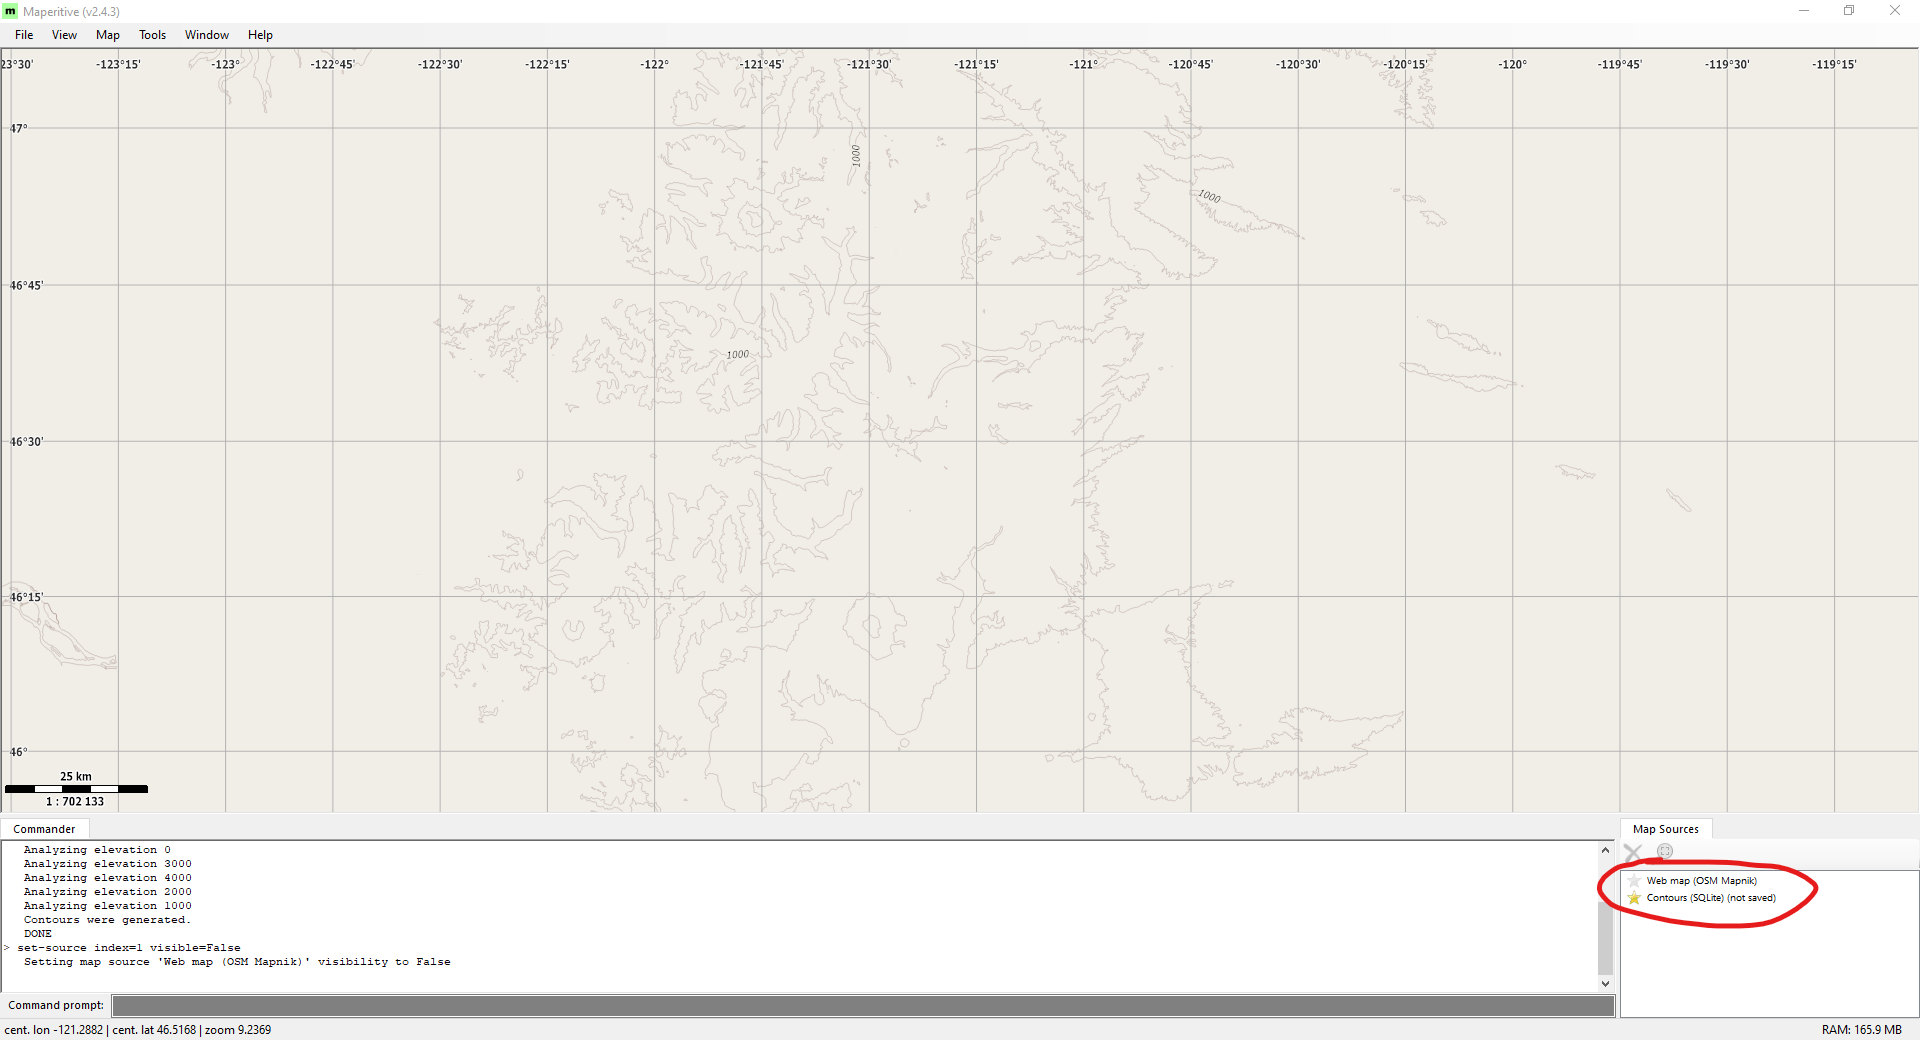
Method 1, which is theoretically the simplest, is to use the generate relief contours function. To control the contour interval you can type and enter into the command prompt at the bottom "generate-contours interval=1000", where interval specifies the interval between contour lines. I recommend this if you are making a small map (like of a city). Problem with this for large maps is that it only saves visible data, so if you are zoomed out too far in Maperitive and the contour lines are not visible, it will not save the contour lines in the exported SVG file. But even if you are zoomed in close enough, it saves the lines in high resolution, which is hard (but not impossible) to work with in Inkscape.
Method 2, which I recommend if you are making a topographical map of a large area (like a State), is to use the generate-hypsometric function in Maperitive. The function, explained here, basically generates an image of a geographical area in multiple colors (color is based on altitude), with the color gradually shaded between specified heights (it's kinda hard to explain). But key to us, it allows us to generate contours that we can export to and use in a vector graphics program like Inkscape. The reason why explained in the process below:
Like before, you need to start by right clicking -> place geometry bounds, over the region that you want to turn into a map. This time I also recommend right clicking -> place printing bounds, and expanding the region to just larger than the geometry bounds. This is because...
KEY DETAIL: Making sure that each hypsometric image that you export has the same geometry and printing bounds will keep each image the exact same size and location. This makes it MUCH easier to line up the generated contour lines in Inkscape.
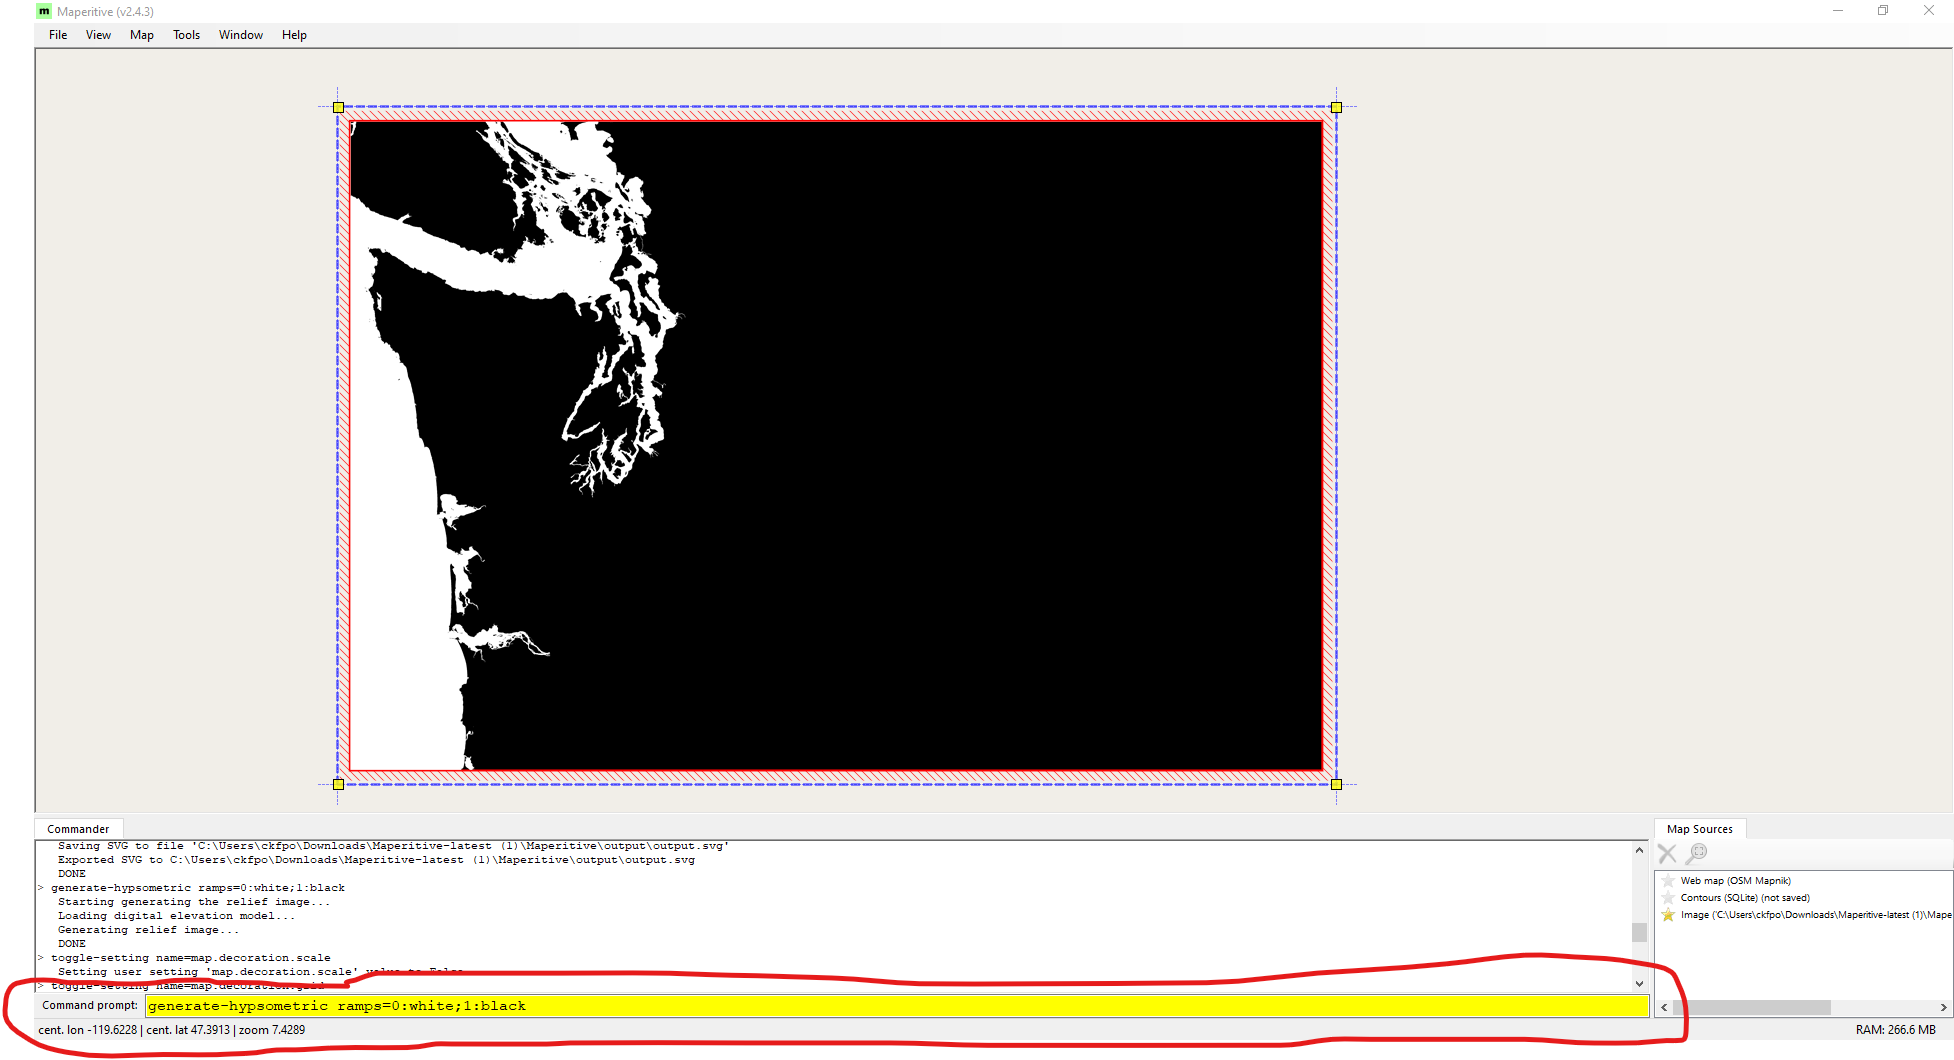
Now for the magic. To generate a hypsometric map, in the Command prompt on the bottom, enter the text "generate-hypsometric ramps=0:white;1:black". The colors "white" and "back" specify the two colors used in the generated image. The values "ramps=0" and "1" specify that any location 0 meters and below is white, and 1 meter and above is black. Any terrain with altitudes between those two values will be shaded a gradient of the two picked colors; in our case we don't want a gradient, so we set the difference in the numbers to 1. This allows us to pick where our contour lines will be.
Now for my map I made 5 layers using the following 5 commands
generate-hypsometric ramps=0:white;1:black
generate-hypsometric ramps=250:white;251:black
generate-hypsometric ramps=500:white;501:black
generate-hypsometric ramps=1000:white;1001:black
generate-hypsometric ramps=2000:white;2001:black
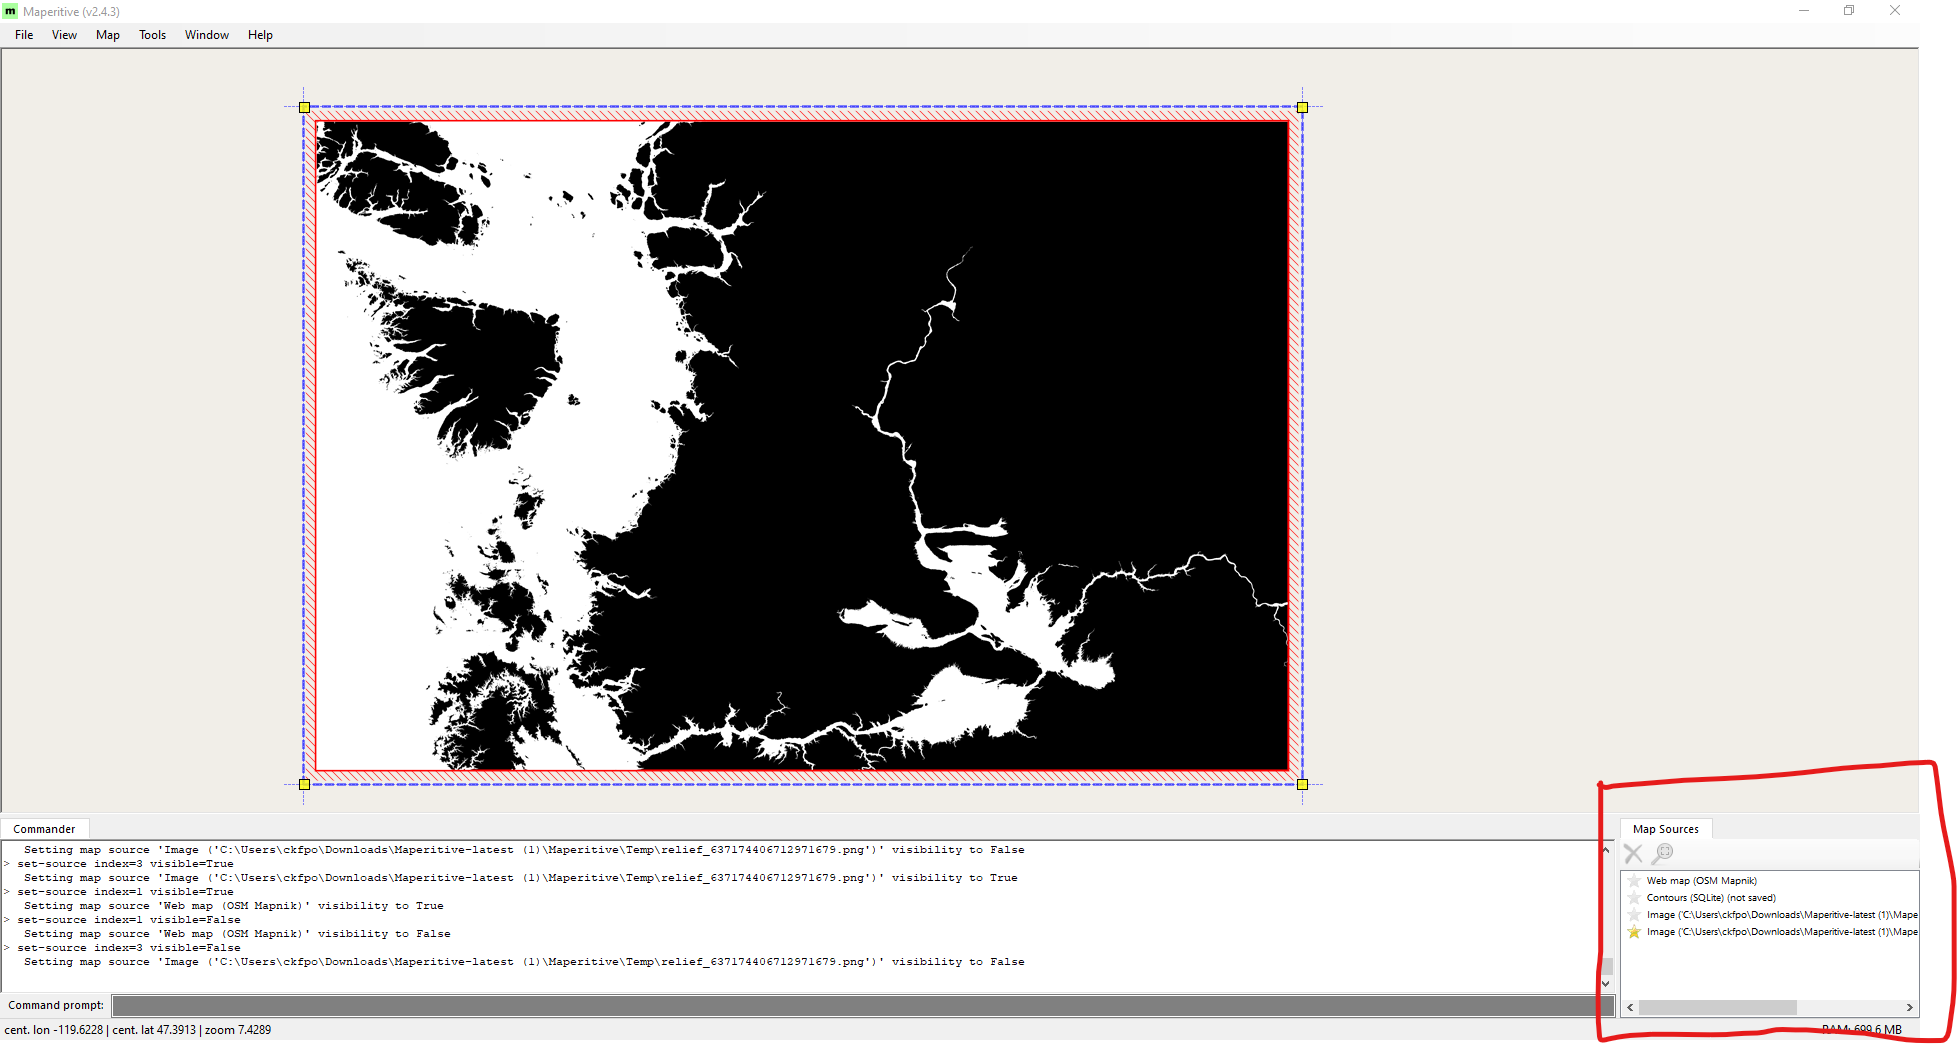
The elevation values that I picked were somewhat arbitrarily chosen; I played around with the function until I got a layer distribution that I liked.Each layer is generated on the "bottom" of all layers, so you will need to "uncheck" every layer above it in the bottom right to see the layer you just made (see screenshot in images)
Once you've generated all the layers you want, next, in the top tool bar, select Map -> and then uncheck both show map scale and show grid (these both get exported in the image as well and make it harder to accurately get the contour data in Inkscape)
Now to turn these into images, we will use the export bitmap function, explained here. Enter the text "export-bitmap file=Layer1.png dpi=200". The "dpi=200" controls the resolution of the image; because we don't need a high resolution image (bigger only makes it harder to work with in Inkscape), it's better to have a lower dpi, but set it to whatever you want. Replace "layer1.png" with a unique name for each picture you export (or it might get overwritten).
Note: for whatever reason this exports the images to the main folder "...\Maperitive" instead of "...\Maperitive\output" (just another quirk of the program).
And that's essentially how you generate topographical data!
Step 4: Pick Your Program - Round 2
Step 4 - Tools and Supplies:
Inkscape (or other vector graphics program like Illustrator)
What do We Have, And What do We Need?
In the following steps I am assuming you used Method 2 (it's the method I used). We now have a number of PNG images with topographical data, and while laser cutters can use PNG images, they use them for rastering, not cutting. So we need to somehow convert these PNG images to vector lines so that a laser cutter can cut these details.
What Program to Use?
For this step, I am going to use Inkscape, which is free and open source, available here: https://inkscape.org/. Other vector graphics programs like Illustrator will be able to do similar things to what I demonstrate below in Inkscape, but it almost certainly won't be in the same way explained in the steps below. This program unfortunately has a larger learning then Maperitive, so while I am going to try to explain my process in-depth enough that someone with little experience using Inkscape can follow along, I am undoubtedly going to skip over unintuitive steps. If you are interested in learning how to use Inkscape, I recommend following along with the videos made by Logos by Nick. He does a great job showing how to use the core functionality in Inkscape, and even though he is using the program to design graphics (not really laser cuttable formats), I still learned a lot following along with his videos.
Organization
Before we even start, it will make things much easier in the long run if we plan out how to organize our work. Inkscape has a Layers functionality that we can take advantage of. For this first part, my recommendation is to have two layers for each topographical layer that we import; one for the imported image and our work turning that into a vector line (calling it "Layer 1 - Draft"), and another layer to copy and paste the final vector line into (calling it "Layer 1 - Final"). On top of that, have one more layer where we will do all work in (called "working layer"). This well help keep the draft and final layers separate without deleting the draft work (in case we make a mistake and need to refer back to the draft).
Also key, is not to scale ANYTHING, until the end. As long as everything is the same size, it is simple to put together into a single template at the end. The caveat to this statement is that sometimes the imported images do not seem to always be imported at the same scale (I'm not sure why), so always check your original image with the one you just imported to make they are the same size, and if not, scale the new one to the original.
Step 5: Turning the Topographical Data Into a Laser Cuttable File
Step 5 - Tools and Supplies:
Inkscape (or other vector graphics program like Illustrator)
Key Inkscape commands that I will refer to:
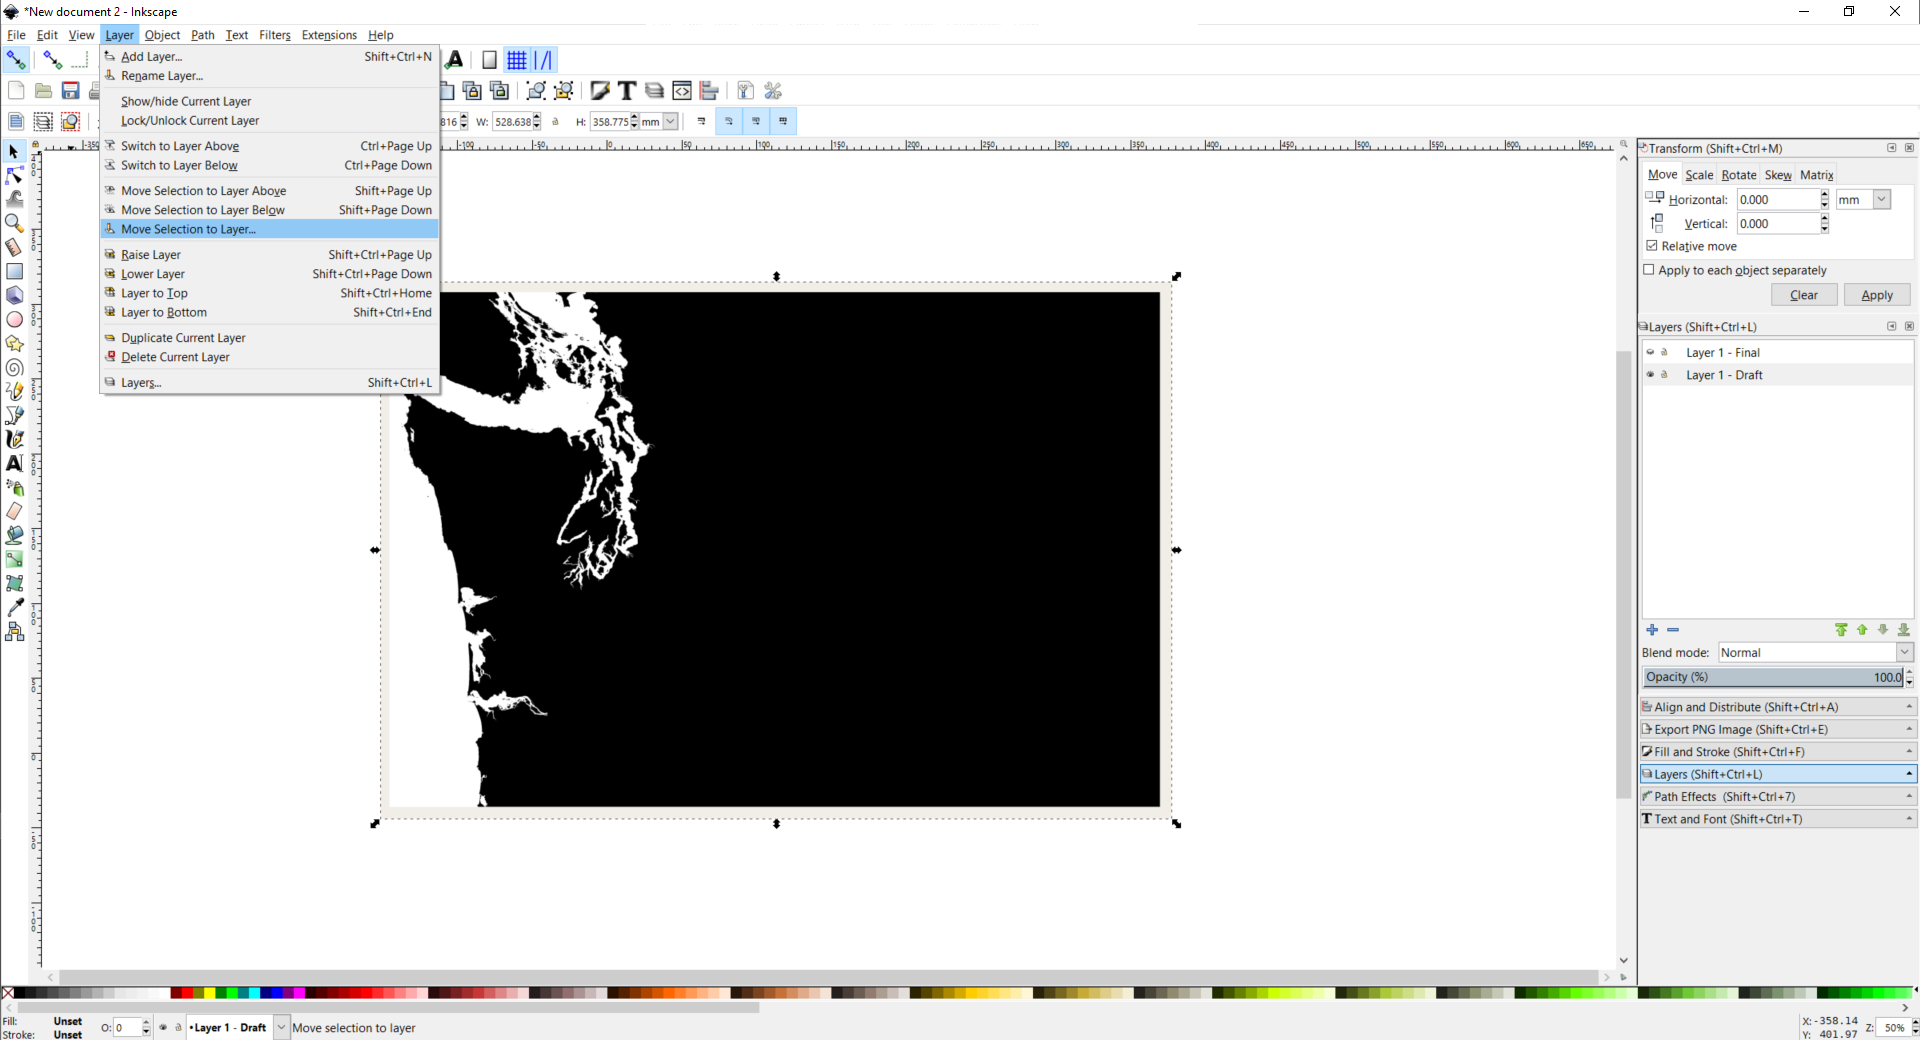
Move to Another Layer: To move an object (be it an image or vector line) to a different layer, you need to select the object, then in the top toolbar go to Layer -> Move Selection to Layer -> then select the layer you want
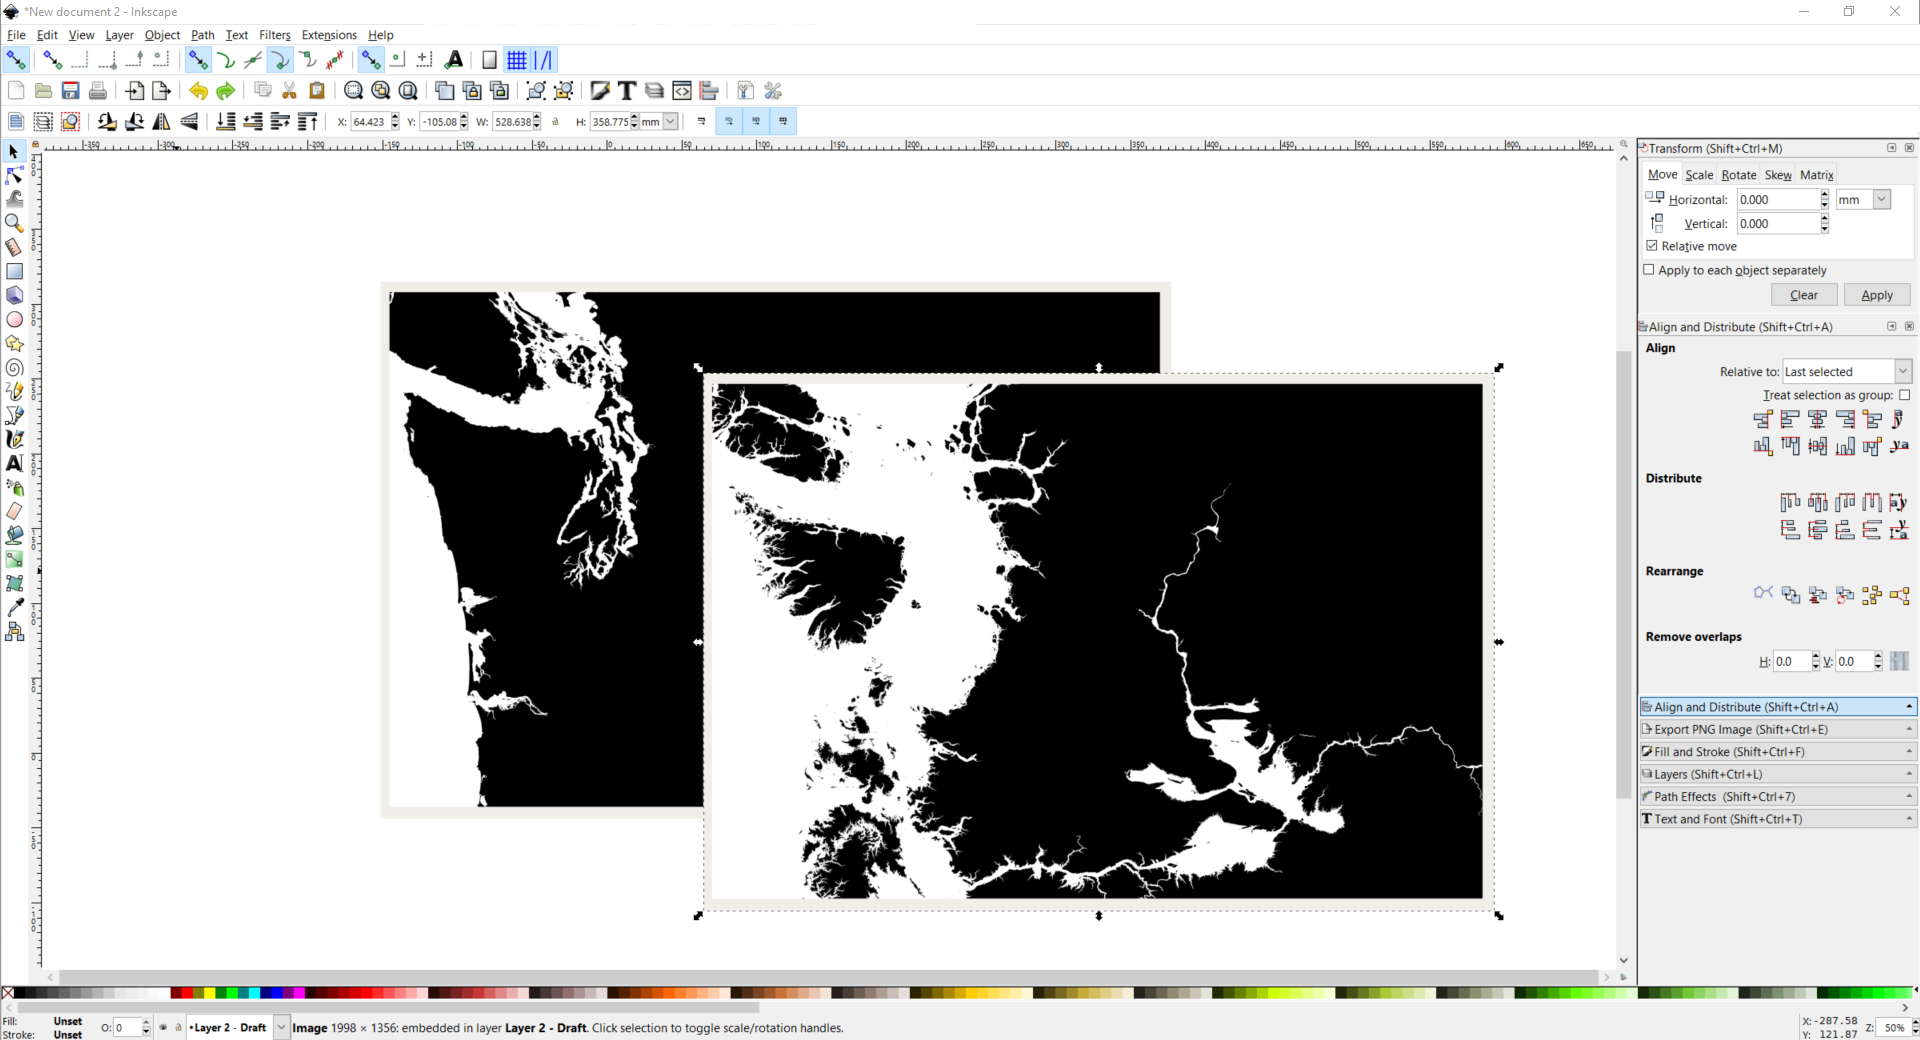
Center Objects with Another: When you import a new image, the first thing you want to do is align the new image with the first one you placed down. This done by clicking selecting the new image FIRST and the first layer image SECOND (this moves the new image to the 1 layer image's position; reversing selection does the opposite which we really don't want), then going to the "Align and Distribute Tab" (Shift+Ctr+A if you don't know where it is), and selecting both "center on vertical access" and "center on horizontal access". Now the new image is aligned.
The basic process:
In the top toolbar, go to File -> import, then select the first topographic image that you generated. Default import settings are fine
Once imported, make sure that the image is in the correct layer, and center it where you want (this is where you will want to center all future objects that you import)
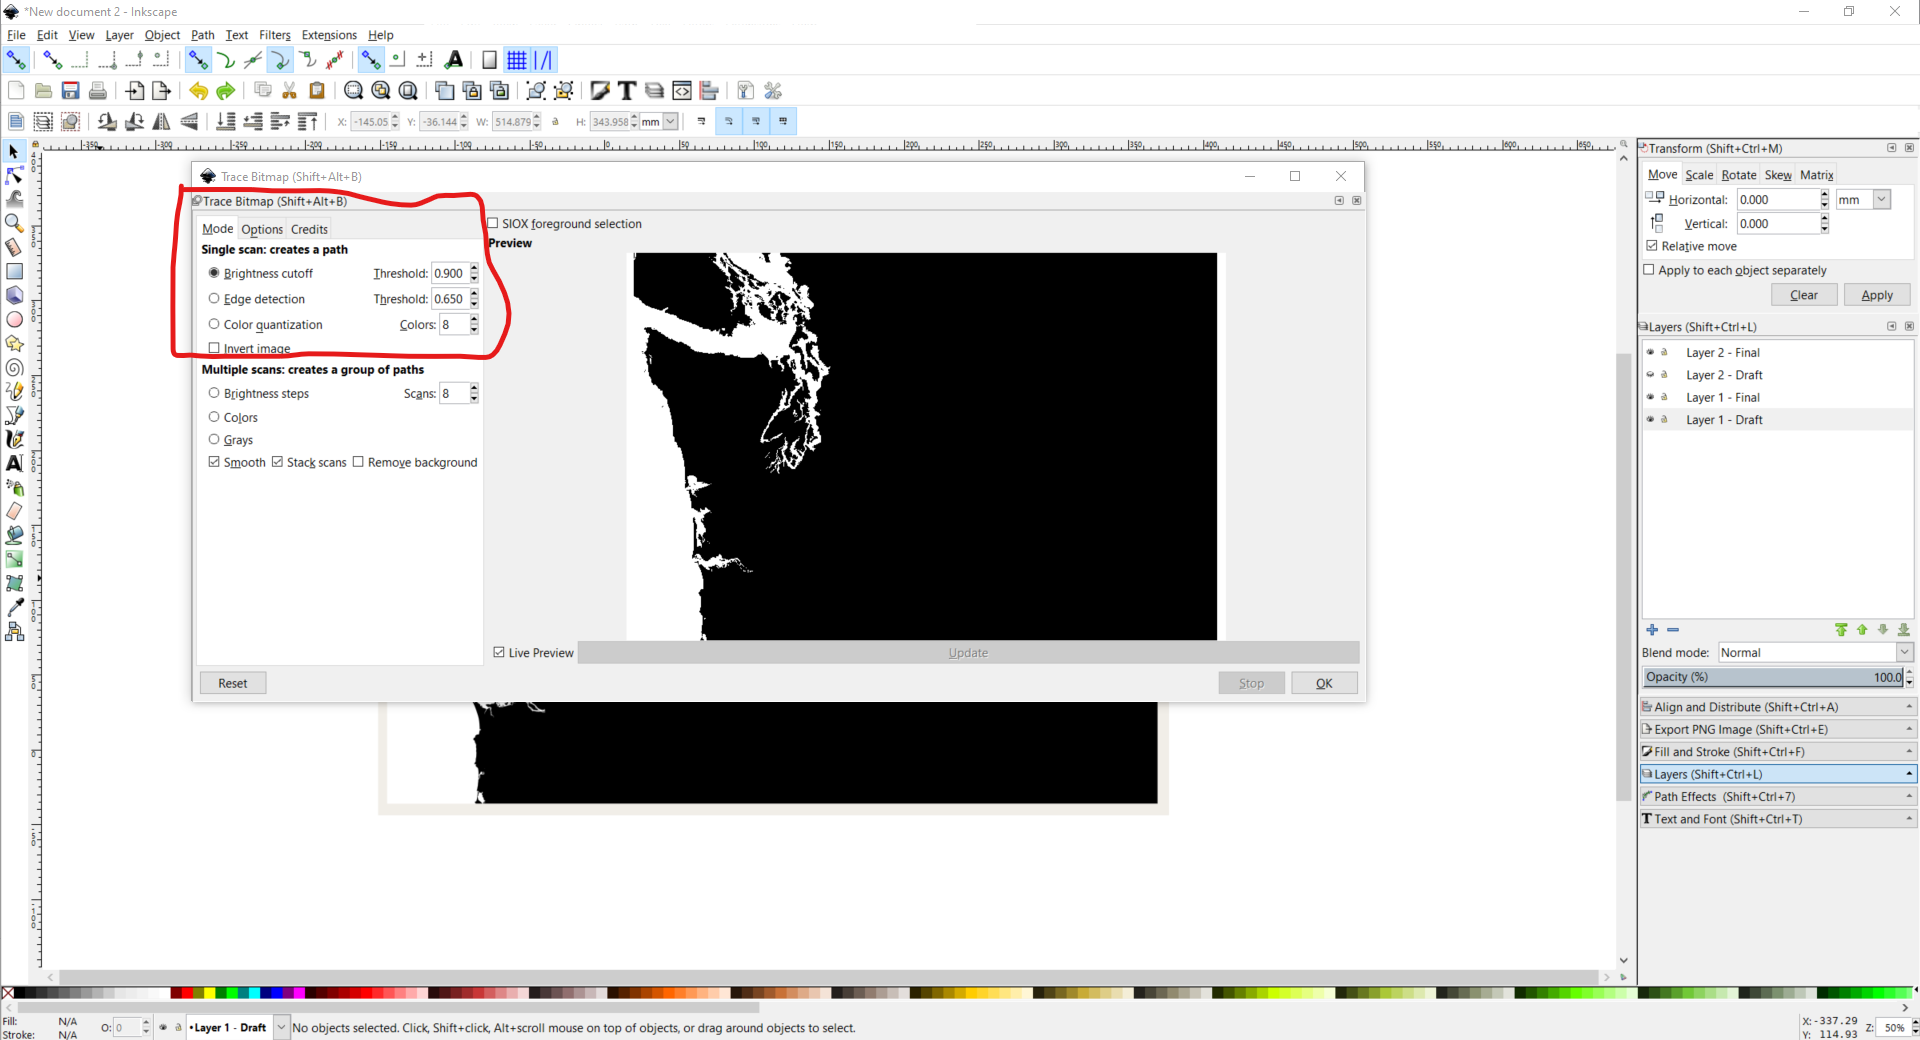
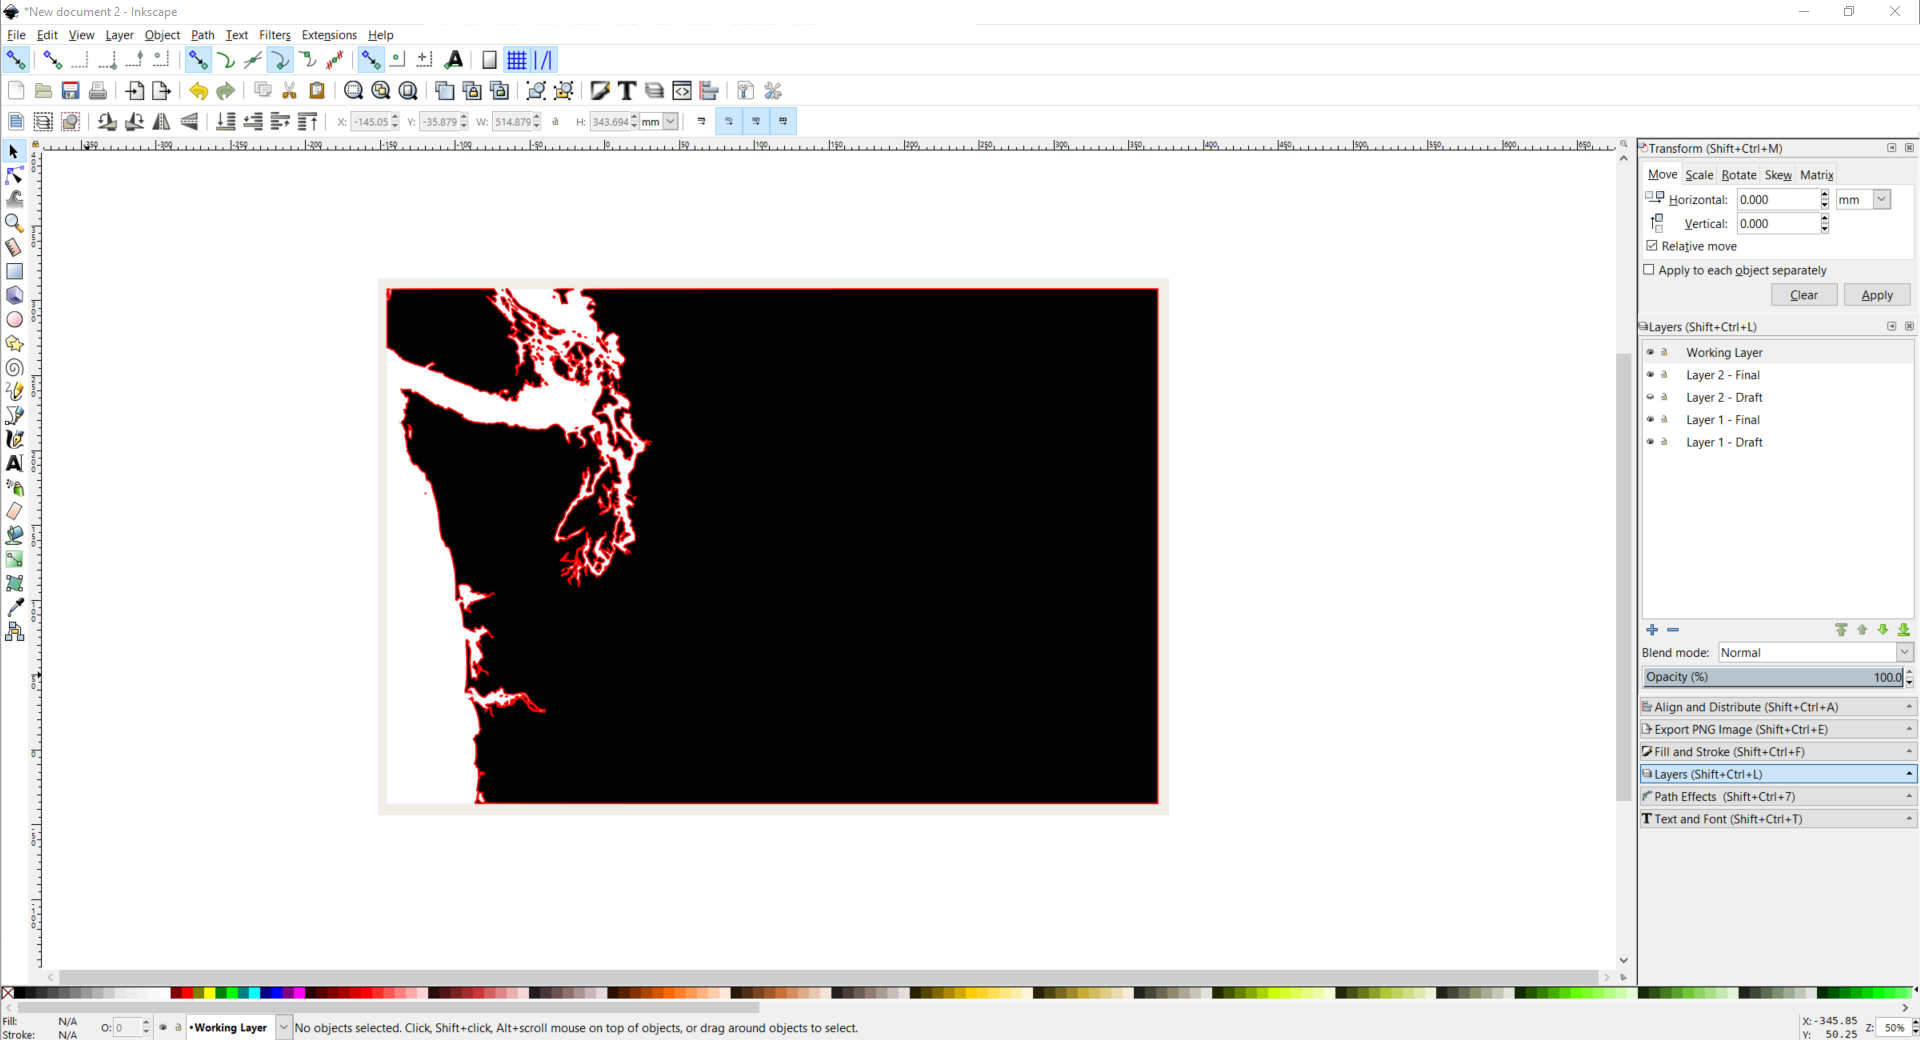
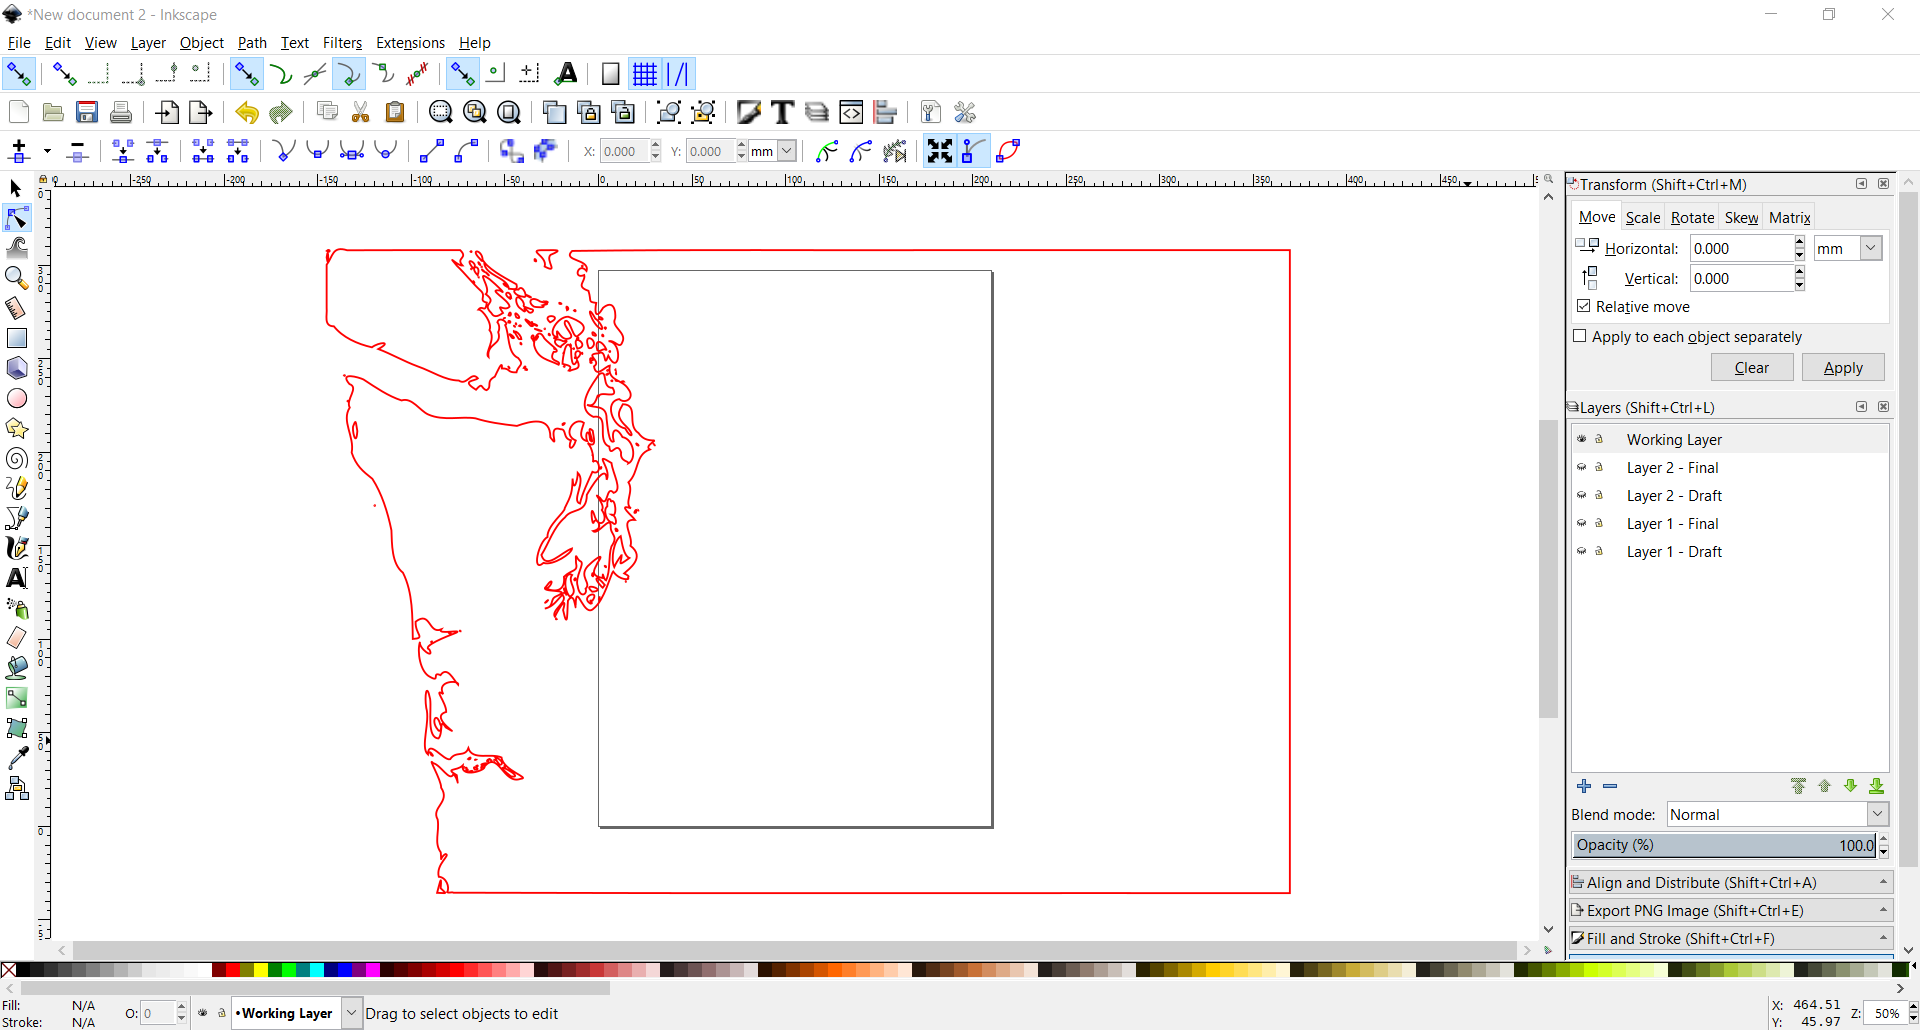
Now select the image, on the top toolbar go to Path -> Trace Bitmap -> use brightness cutoff (should be selected by default; feel free to play around with the threshold, but it shouldn't matter much for a black and white image), and select okay and exit out of the window.
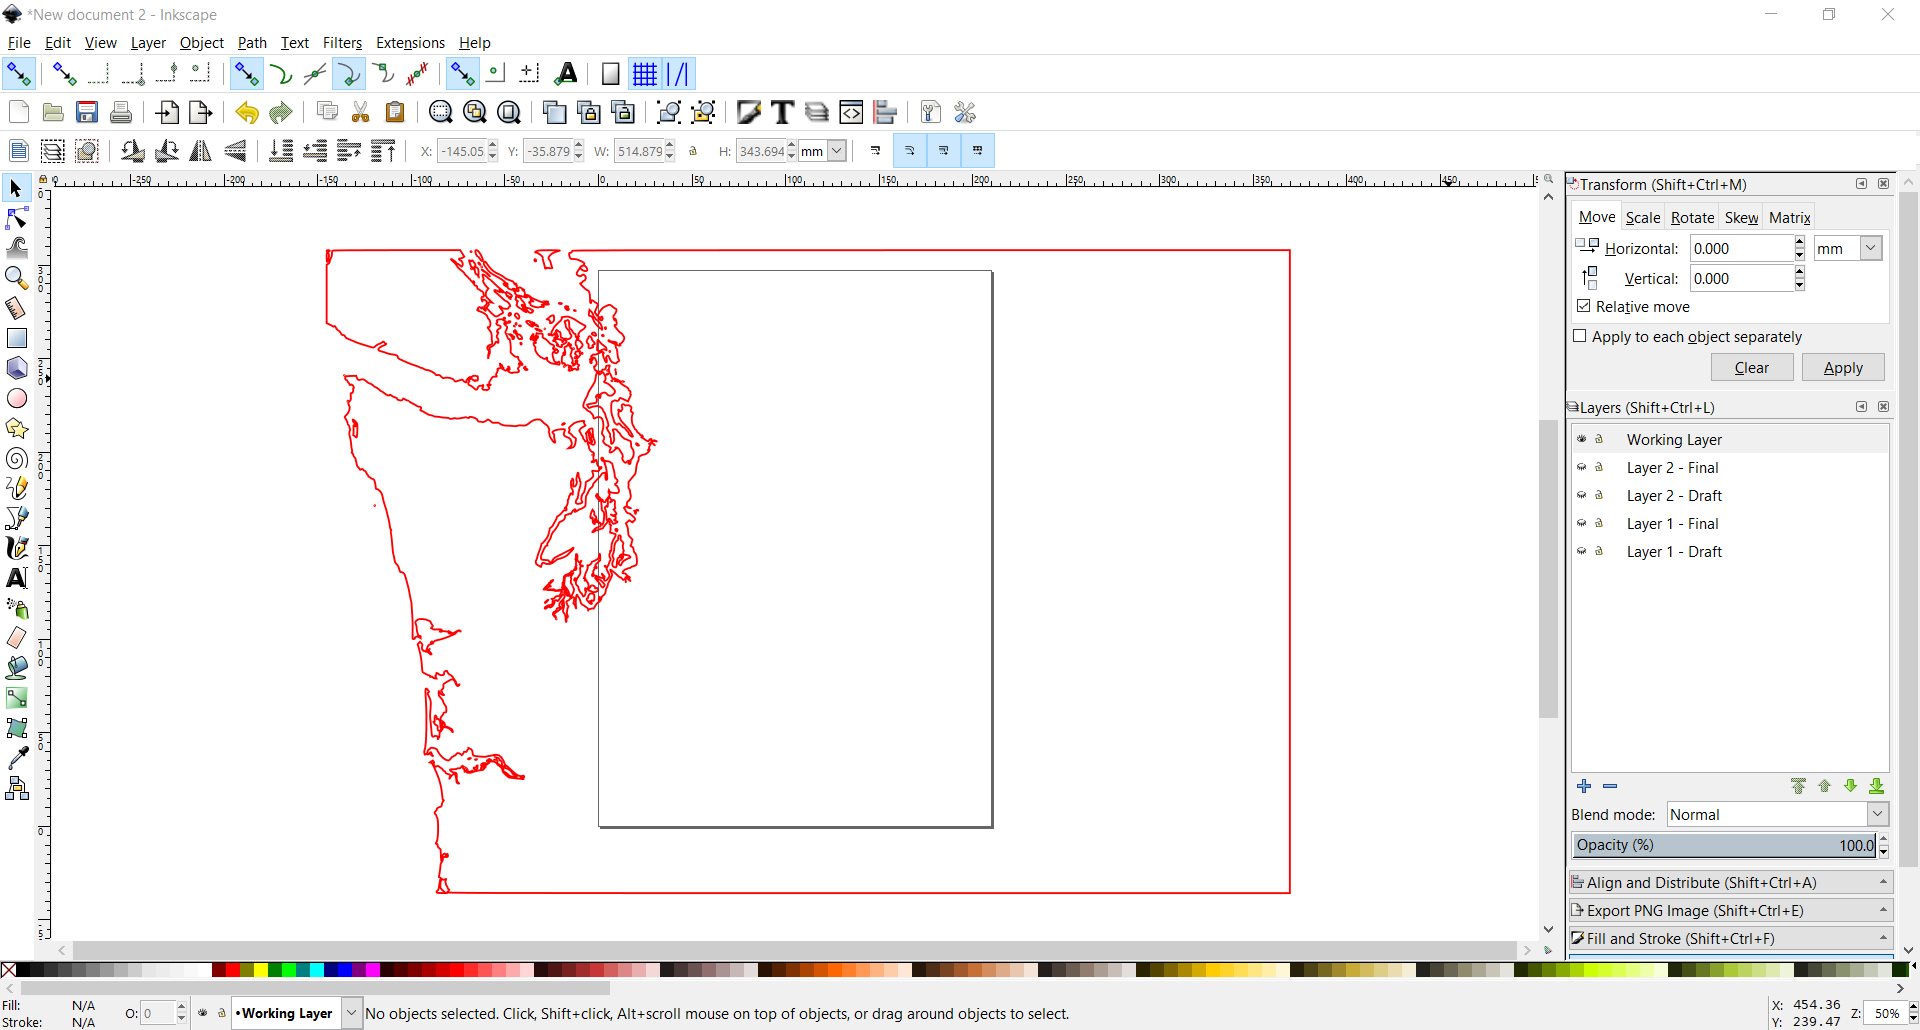
It's not immediately apparent, but we now have a black path on top of the image that we can now work with. By default the new path should be selected. To make it more visible, while the new path is selected, go to the bottom left, and first click the red x in the very left-most corner, and then while holding down shift, click the red box.
The colors on the bottom change the color of the object; clicking the red x removes the black shading in the new object we created, and clicking red while holding shift turns the object's outline red.Then move the now red outline to the working layer, and hide all other layers (except the working layer) by clicking the eye icon on each of the layers. You should now only see the red outline
Now this is where the manual work comes in, and this may vary depending on how large a scale map you are making, and finicky you want to be (I was very finicky)
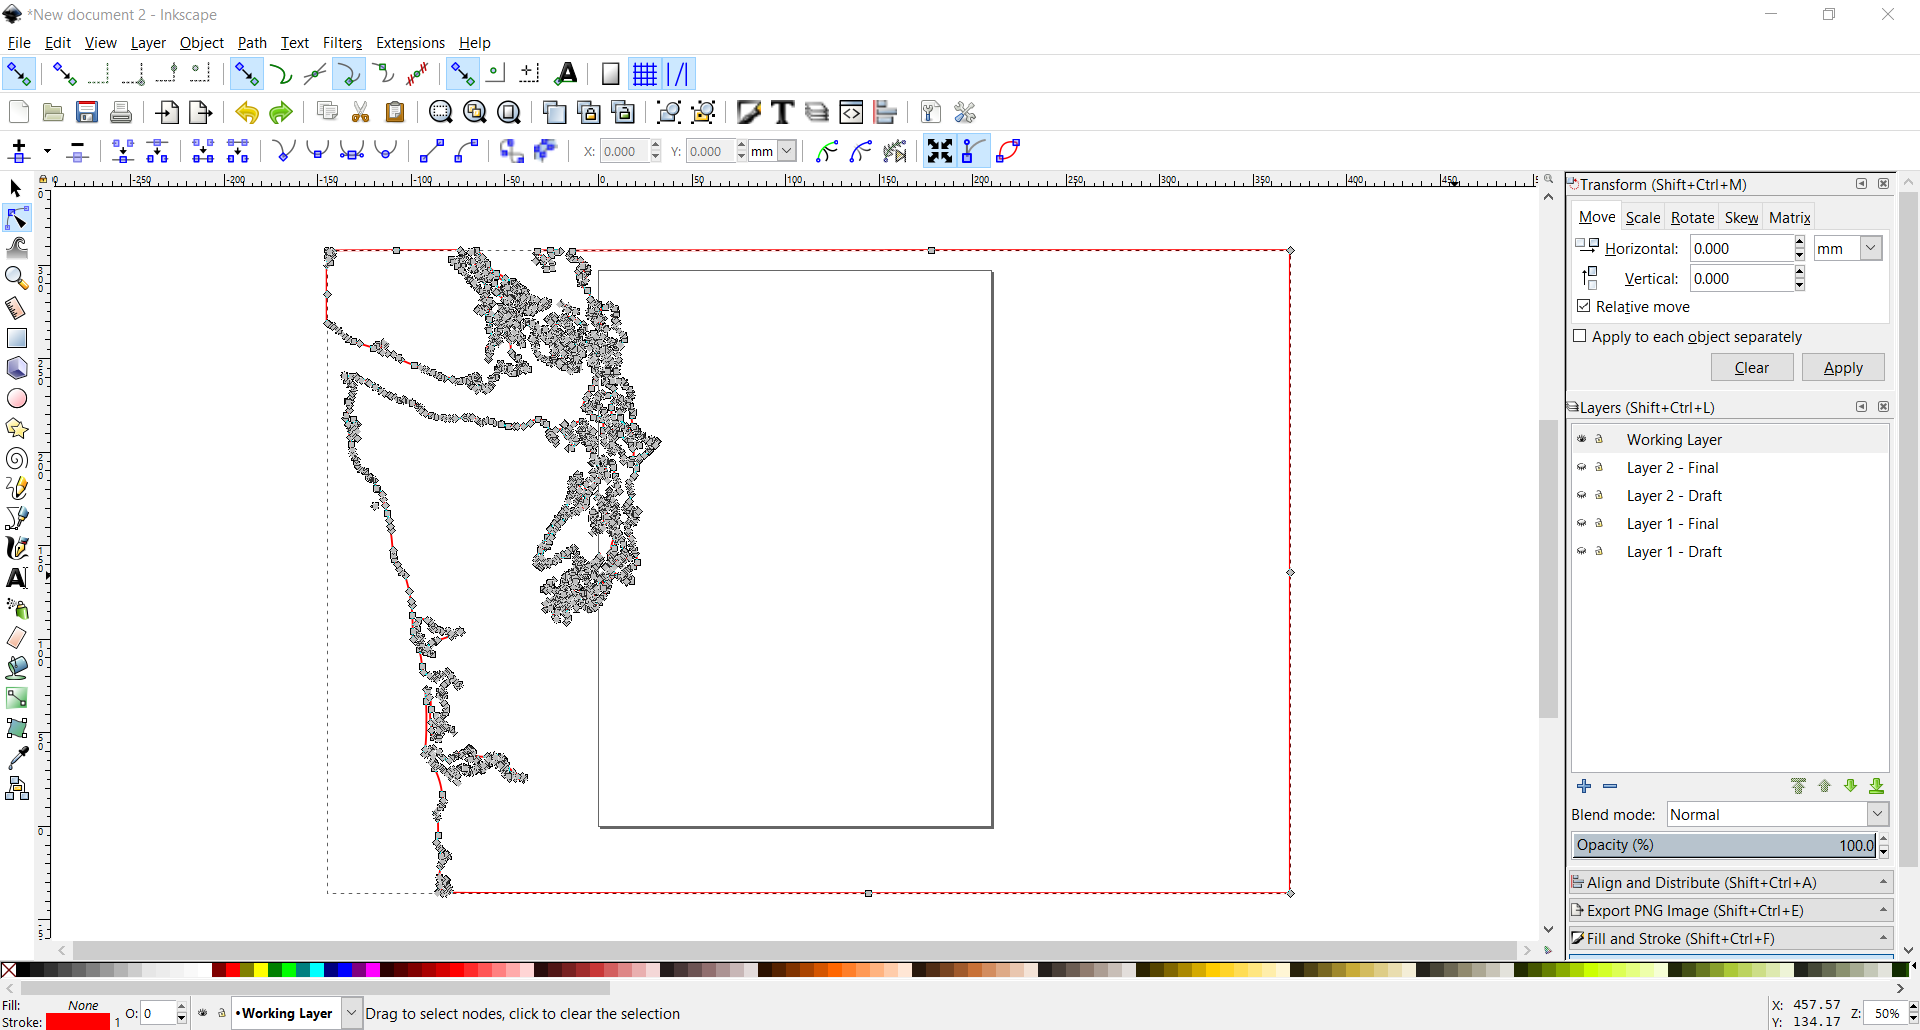
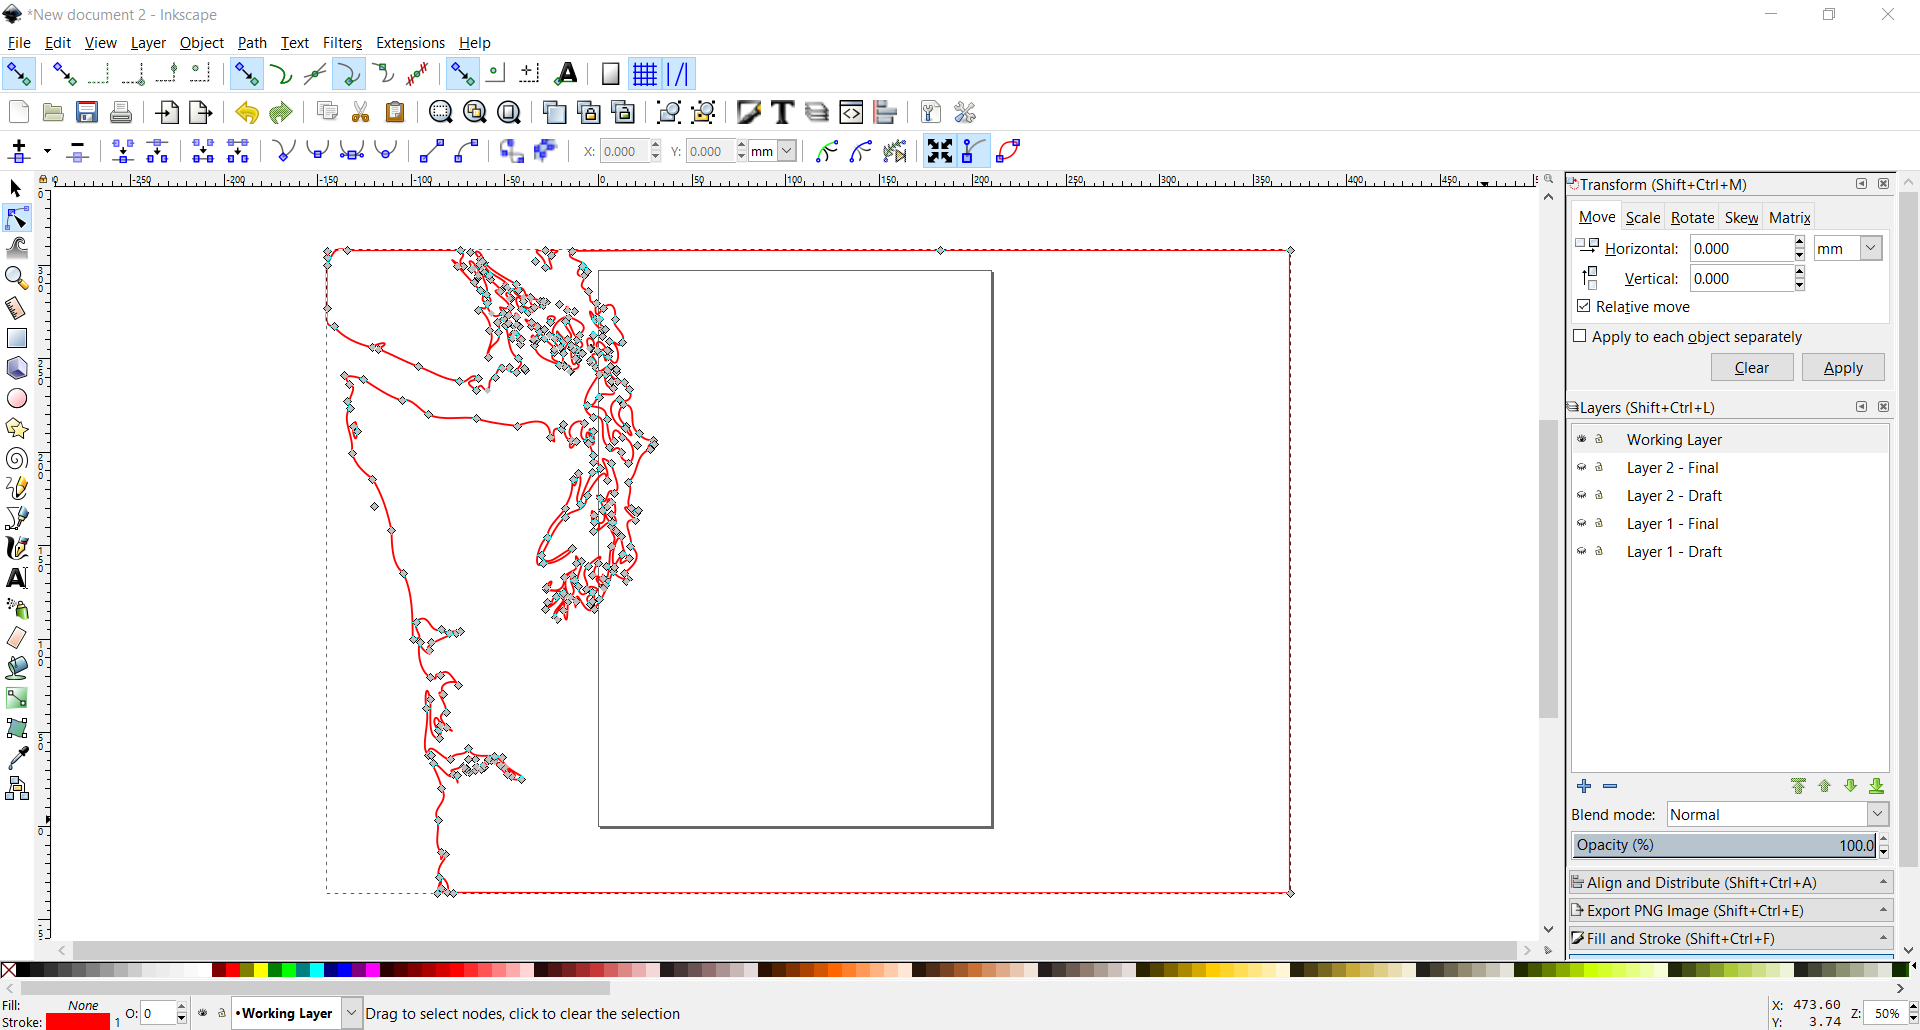
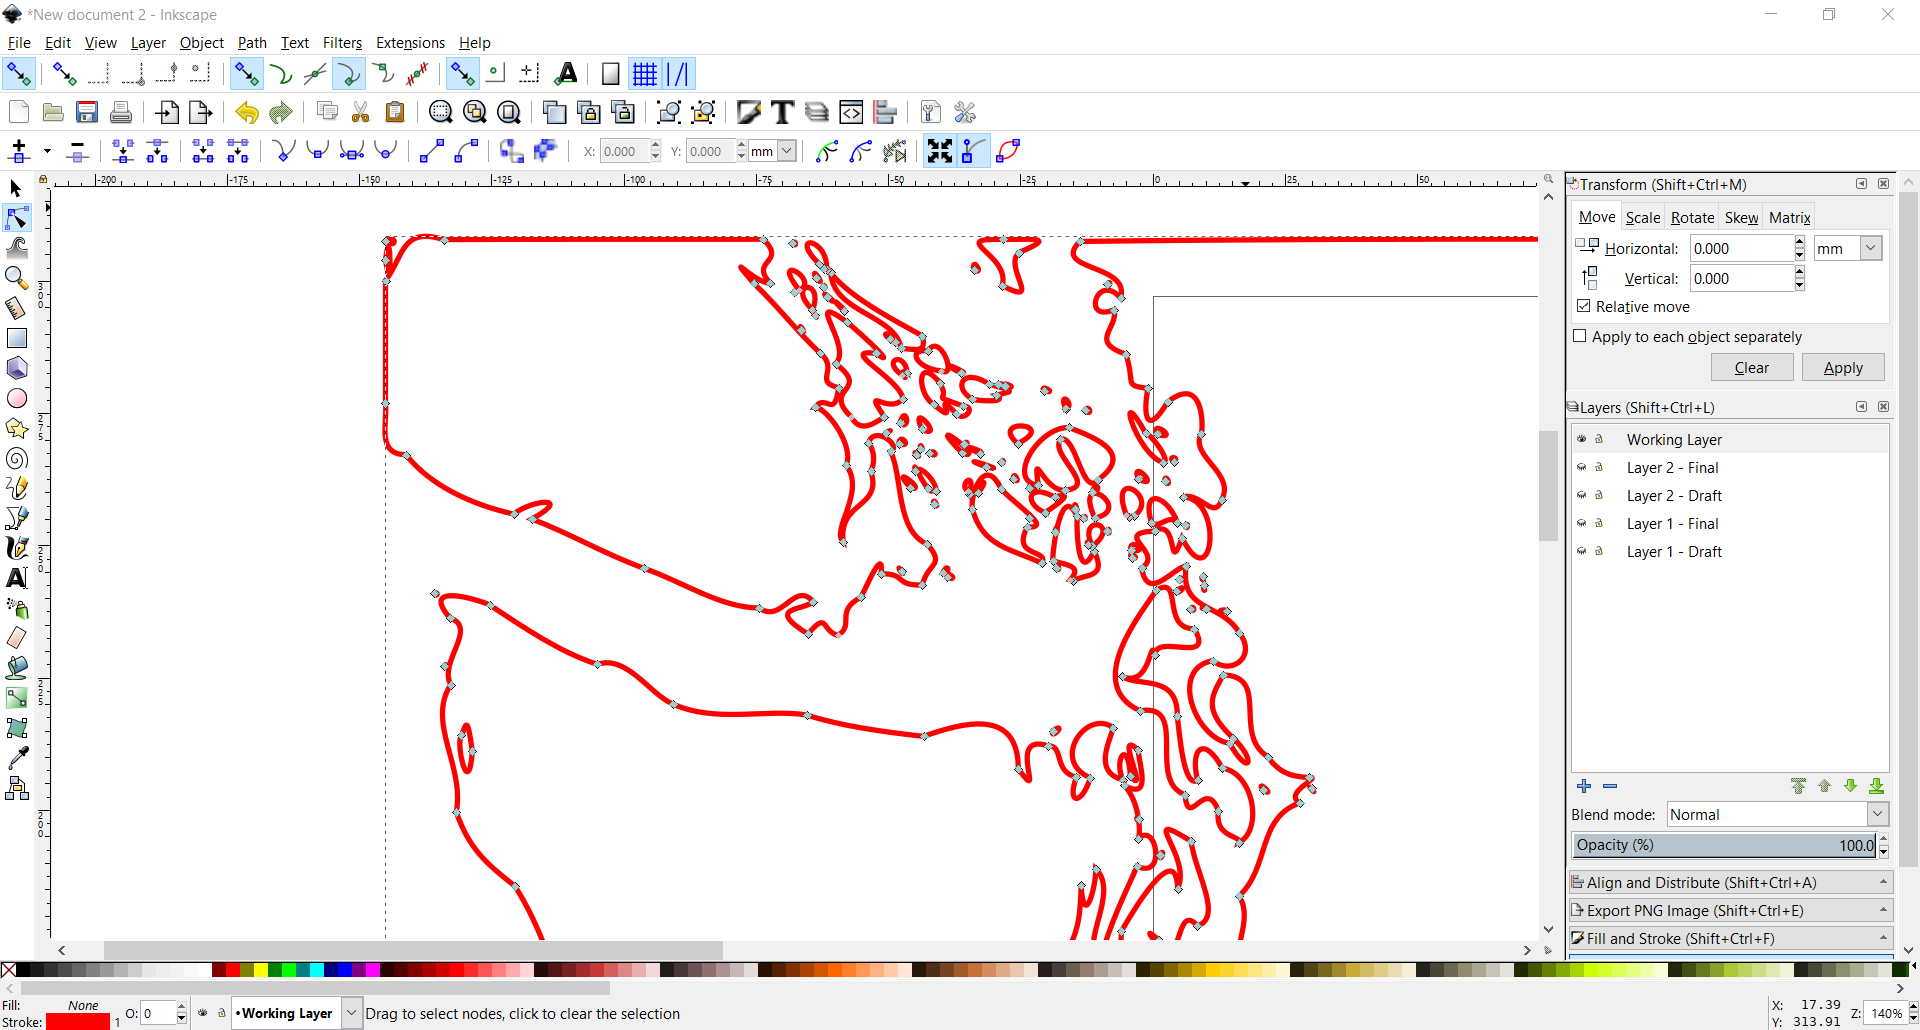
Using my example, the map I have of Washington (specifically the islands and coast around the Puget Sound) has too fine detail for laser cutting. You are going to get a relatively large kerf (the width of material cut by the laser cutter) when dealing with cork (it doesn't cut easily). So you are probably going to need to simplify your map at least somewhat. There are two main methods I recommend.Method 1, and the fastest one, is to use a nifty function called Simplify. You can go to Path -> Simplify, to try it out. This simplifies the geometry, and greatly reduces the number of nodes. To edit how much the Simplify function actually simplifies, you can go to Edit -> Preferences -> Behavior -> and then change the simplification threshold. This may be enough for you, but if you need to "spot edit" specific areas you can select the "Edit Paths by Nodes" selection on the left. From here, you can move, delete, or change the type of node (I recommend looking for online tutorials for editing nodes if you need more information).
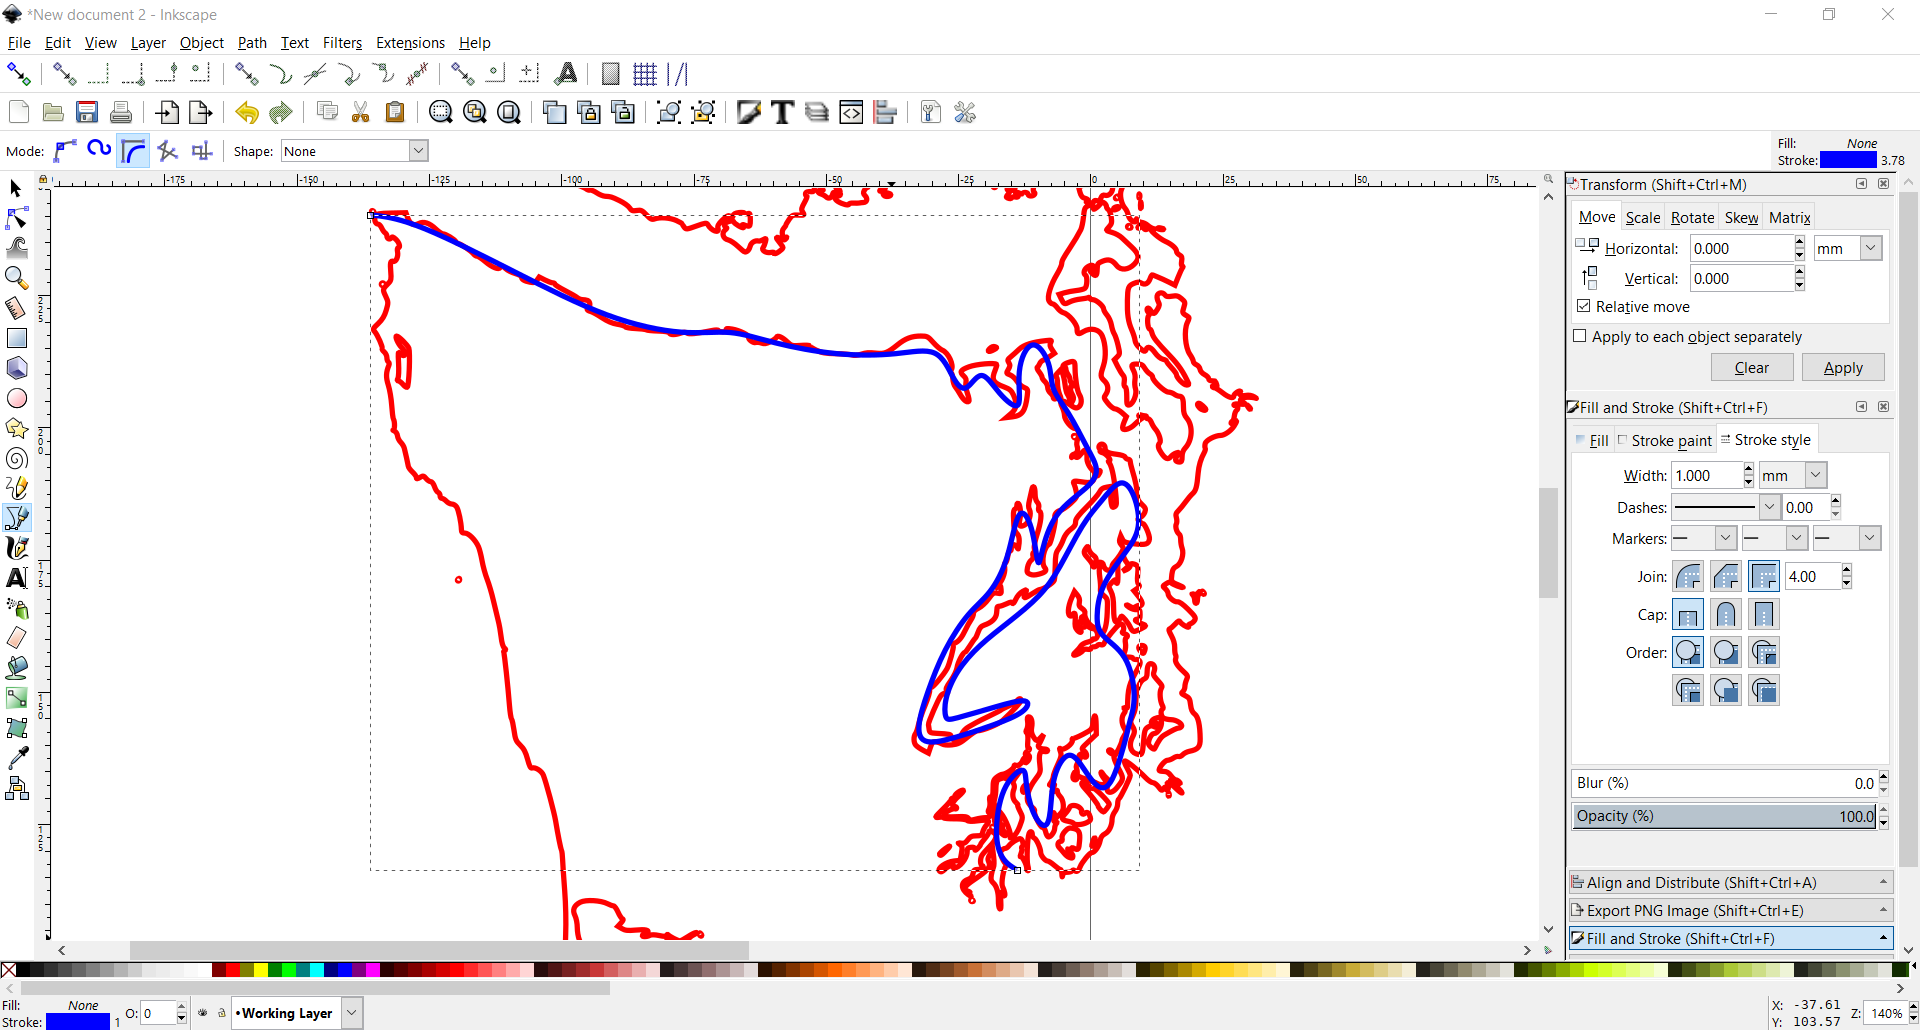
Method 2, which is slower, is simply manually tracing a new path over the generated one to get the desired simplification that you need. This can be done by selecting the "Draw Bezier Curves and straight lines" option on the left panel, and using one of the three mode options (I recommend BSpline for this), then tracing the line by clicking to place nodes. Even though all of this is manual, it can be pretty fast.
Side note: You will probably want to turn off "snapping" for this (option in the top left corner)
And with that, you should have one complete layer now. For organizational purposes, I recommend making a copy of the final path you made, then moving that path to "Layer 1 - Final", hiding that, then moving the rest of the objects you made to get the final project back to "Layer 1 - Draft", and hiding that as well.
After this, just rinse and repeat the previous steps to make each topographical layer for the map, making sure to center the newly imported image with the first one.
If for whatever reason Inkscape imports the new image at a different size then the original, use the snapping tool (make sure bounding box corners is selected), to rescale the new image to the same size as the original.
Step 6: Optional - Add Other Things to Your Map
Step 6 - Tools and Supplies:
Maperitive
Inkscape (or other vector graphics program like Illustrator)
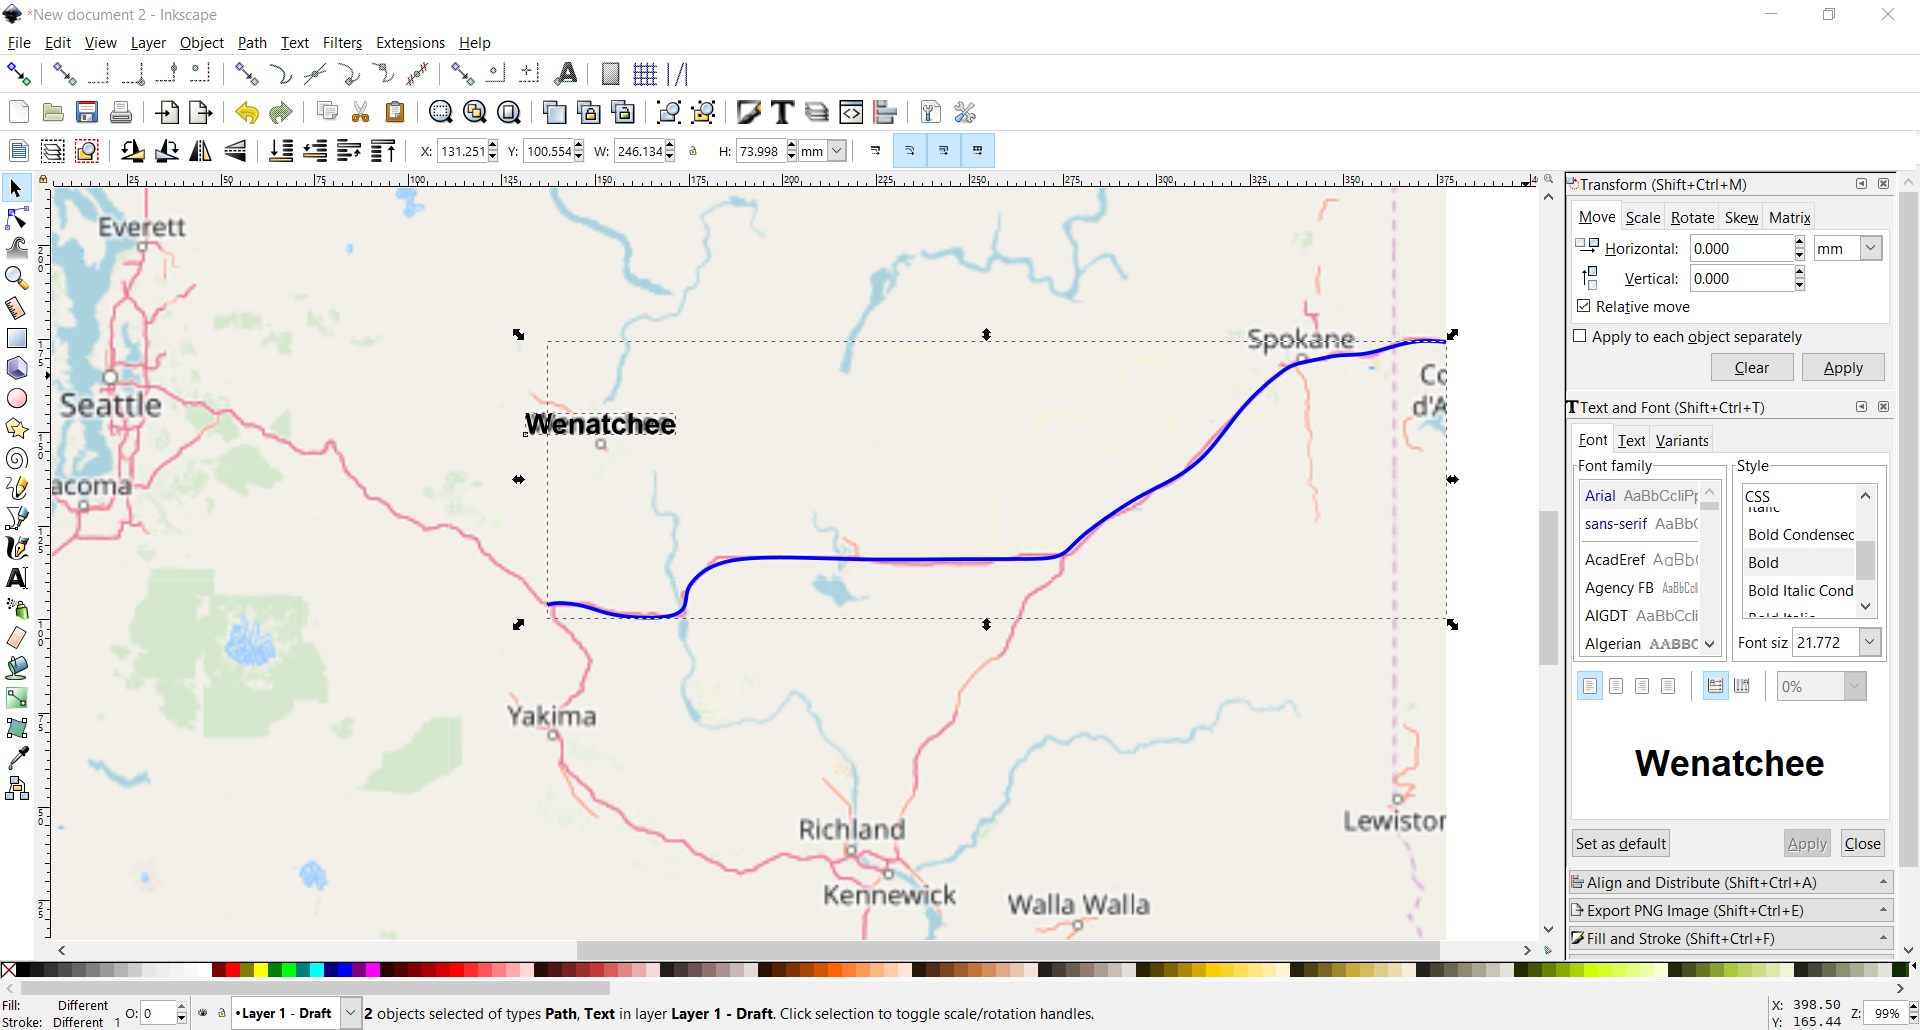
The previous step will give you everything you need to cut out the layers for the topographical map, but maybe you (like me) want to add just a bit more detail to your map, like for example major cities, roads, and mountains.
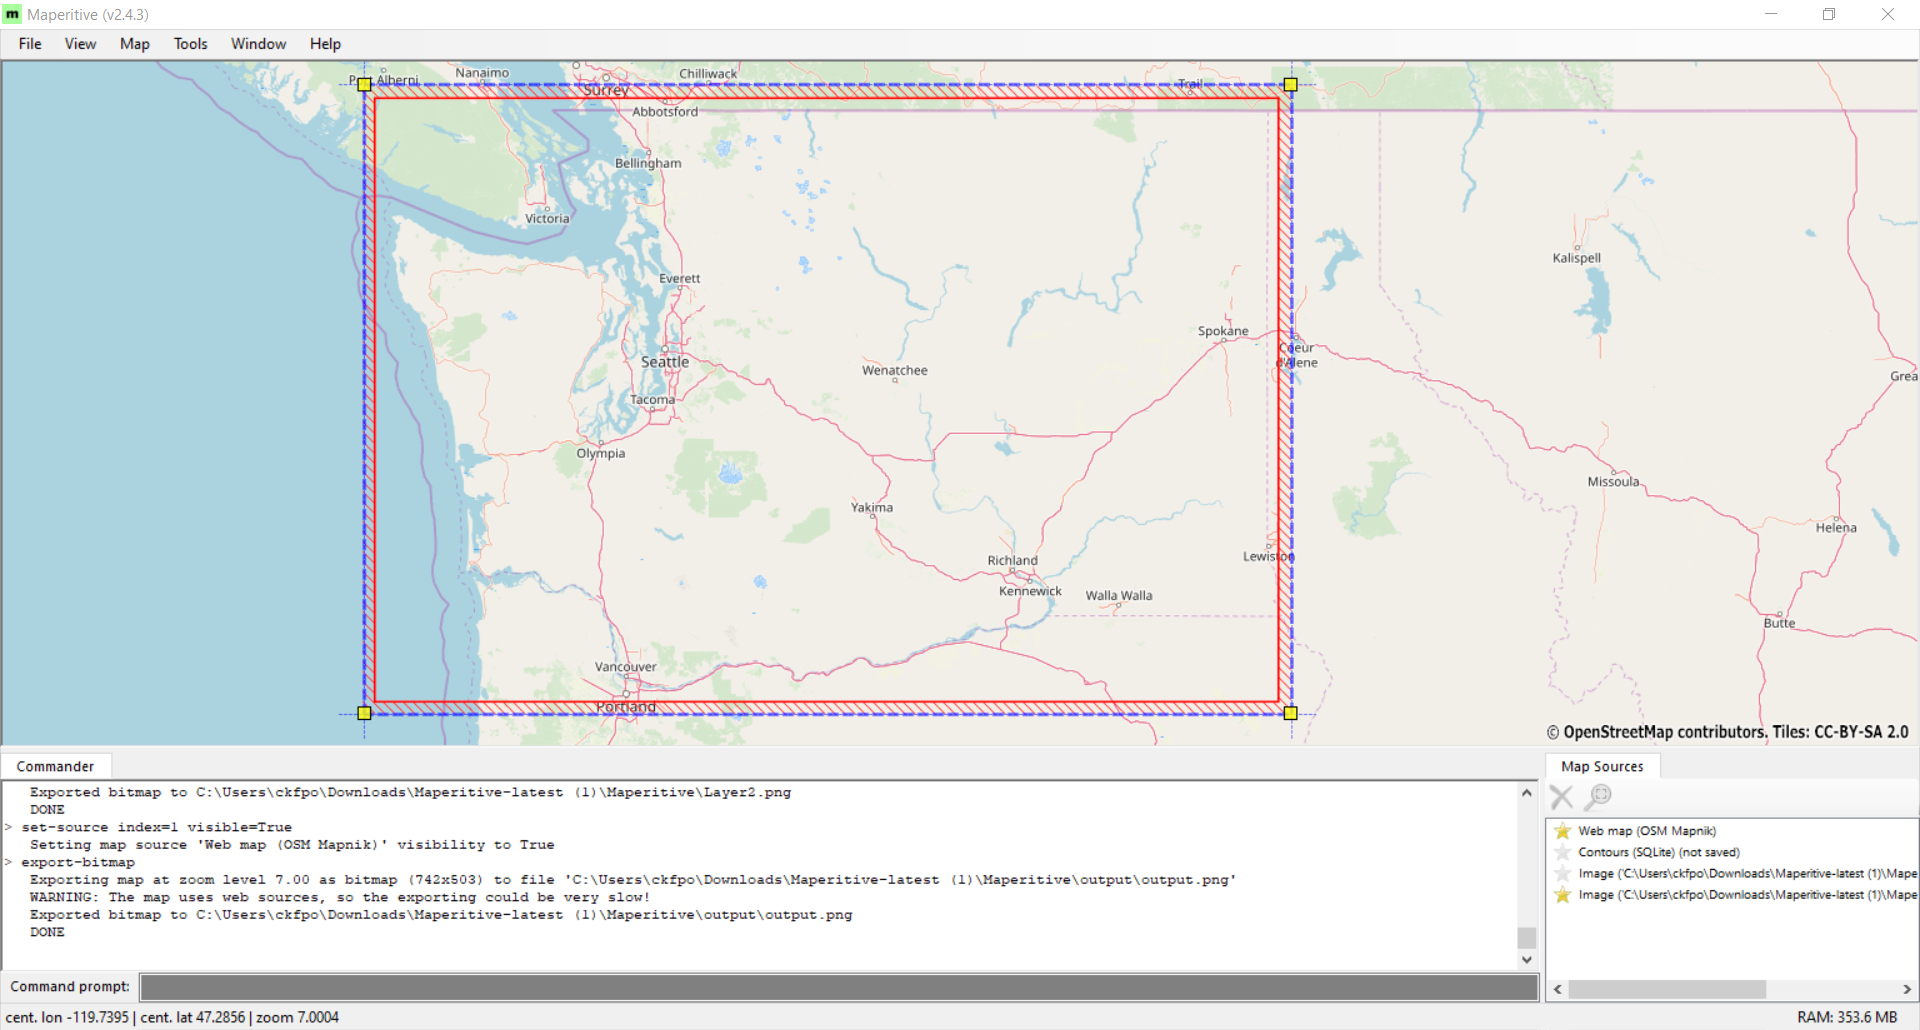
This information can theoretically be exported by Maperitive (using information from Open Street Maps) to an SVG format. But problem is, no matter how large a geographical area you export from, it gives you every detail it has. This can quickly generate a file too large to be useful in Inkscape.
The quickest way I found was:
Using the basic OSM Web Map layer in Maperitive (making sure it is visible in the layers box on the bottom right), and exporting it to PNG like we did for the hypsometric contour data. It will really help if you have the same "Printing Bounds as your hypsometric map exports (it keeps everything at the same scale.
Next, import this into Inkscape, utilizing the same Draft/Final layer scheme recommended before.
To get the roads I simply used the "draw bezier curves and straight lines" option on the left panel, tracing the roads.
To get the cities, I used the text option also on the left panel, resizing and lining it up with it's counterpart on the map (use the shift-red x on the bottom left corner to remove the outline of text, just keeping the fill). I personally used Arial as the font for cities.The OSM Map data didn't show mountains, so I found a map of Washington online with major mountains, then copy/pasted that into Inkscape, manually centering and resizing it to the correct location and scale, then copying the mountains over like I did for the cities.
There are certainly better ways to automate this, but this is the best method that I figured for adding locations
Step 7: Optional - Add a Background
Step 7 - Tools and Supplies:
Inkscape (or other vector graphics program like Illustrator)
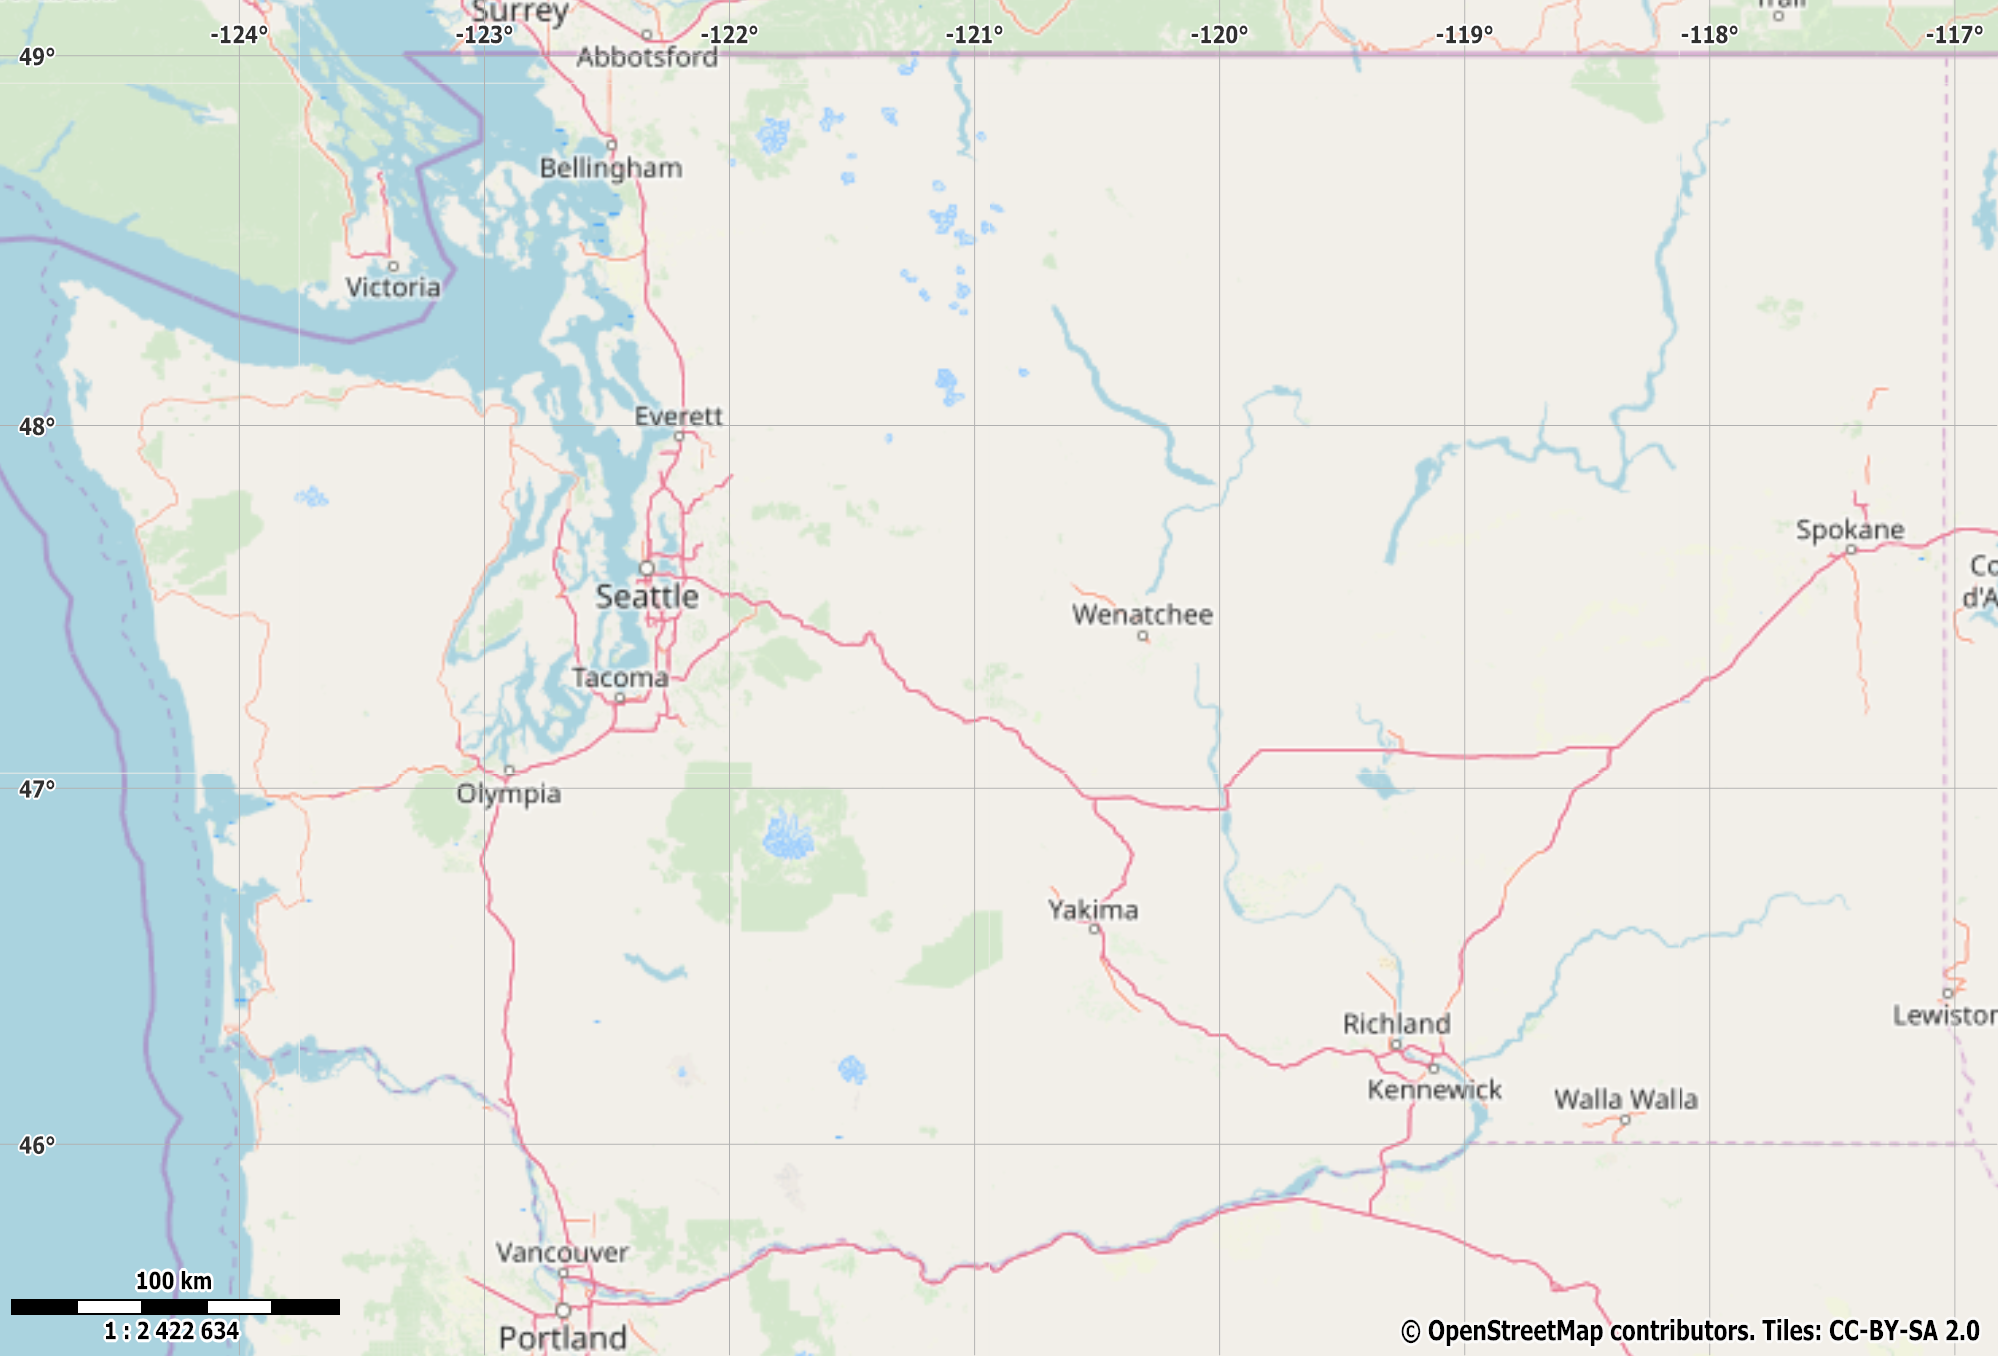
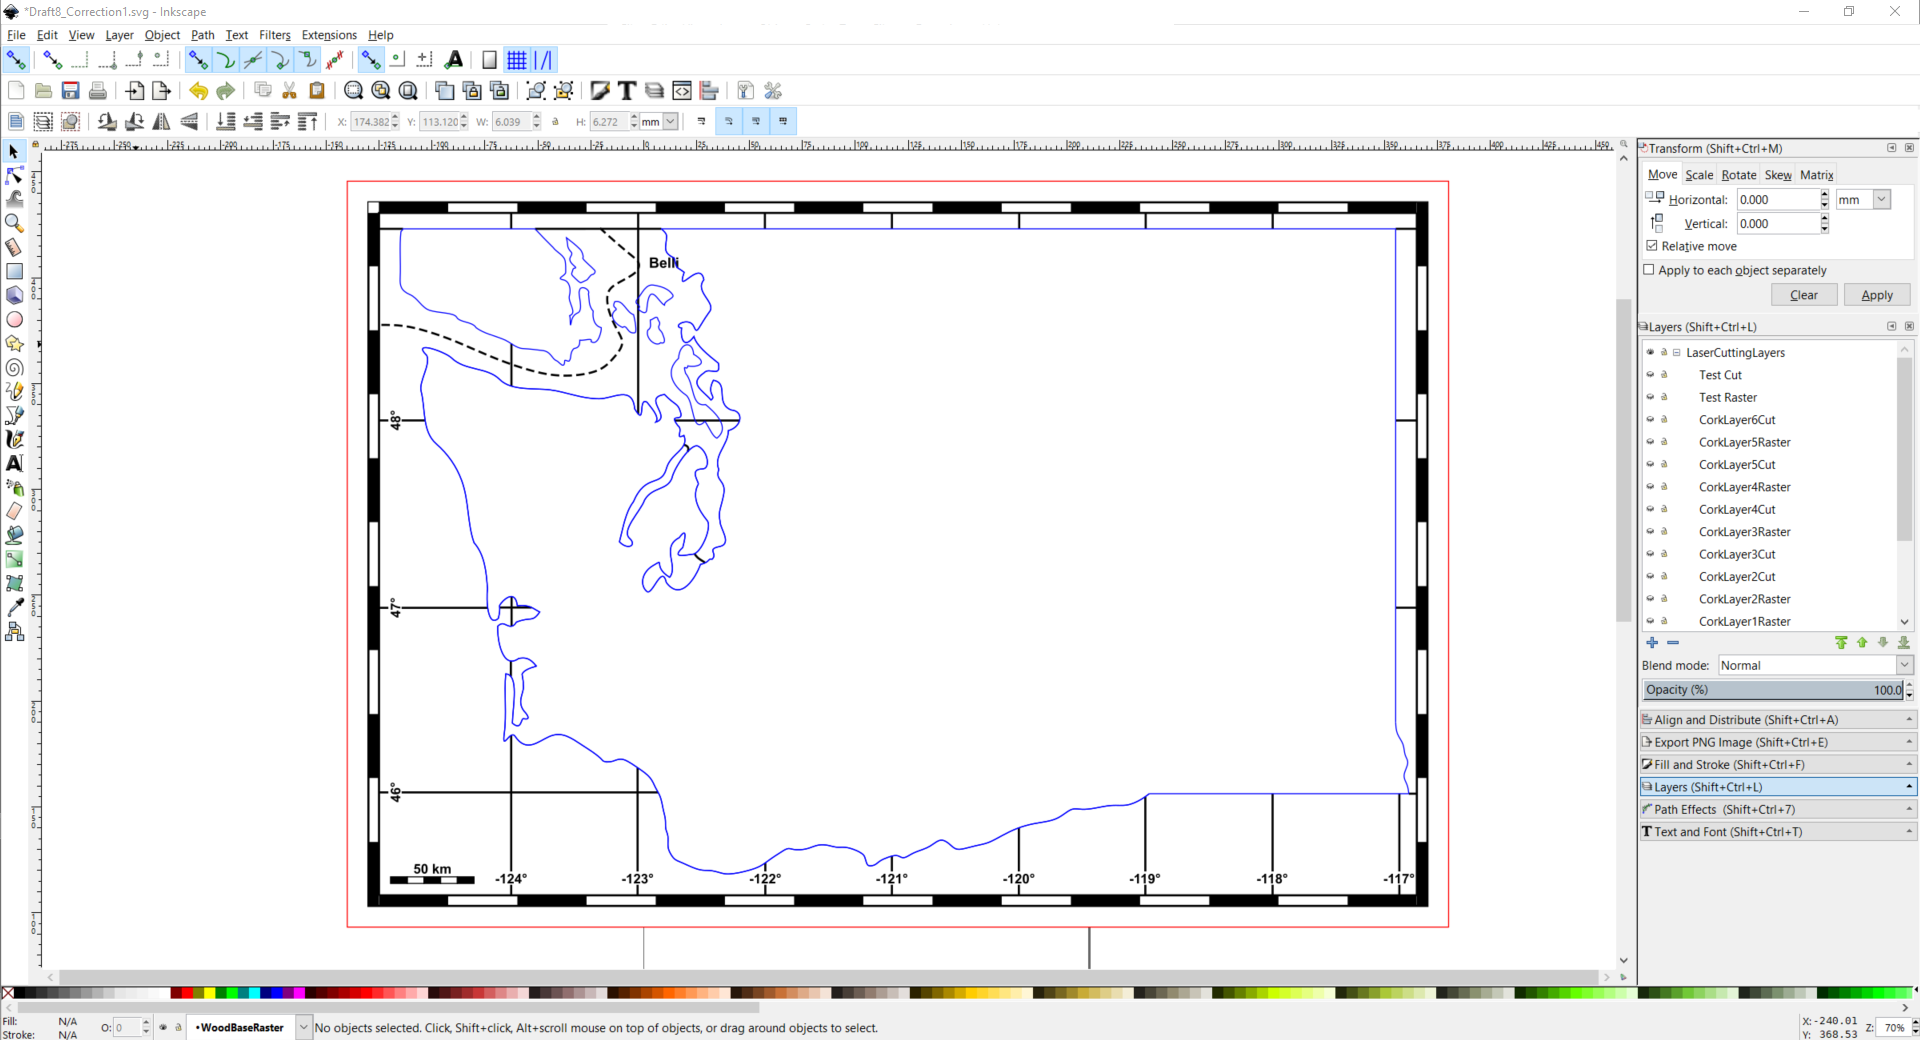
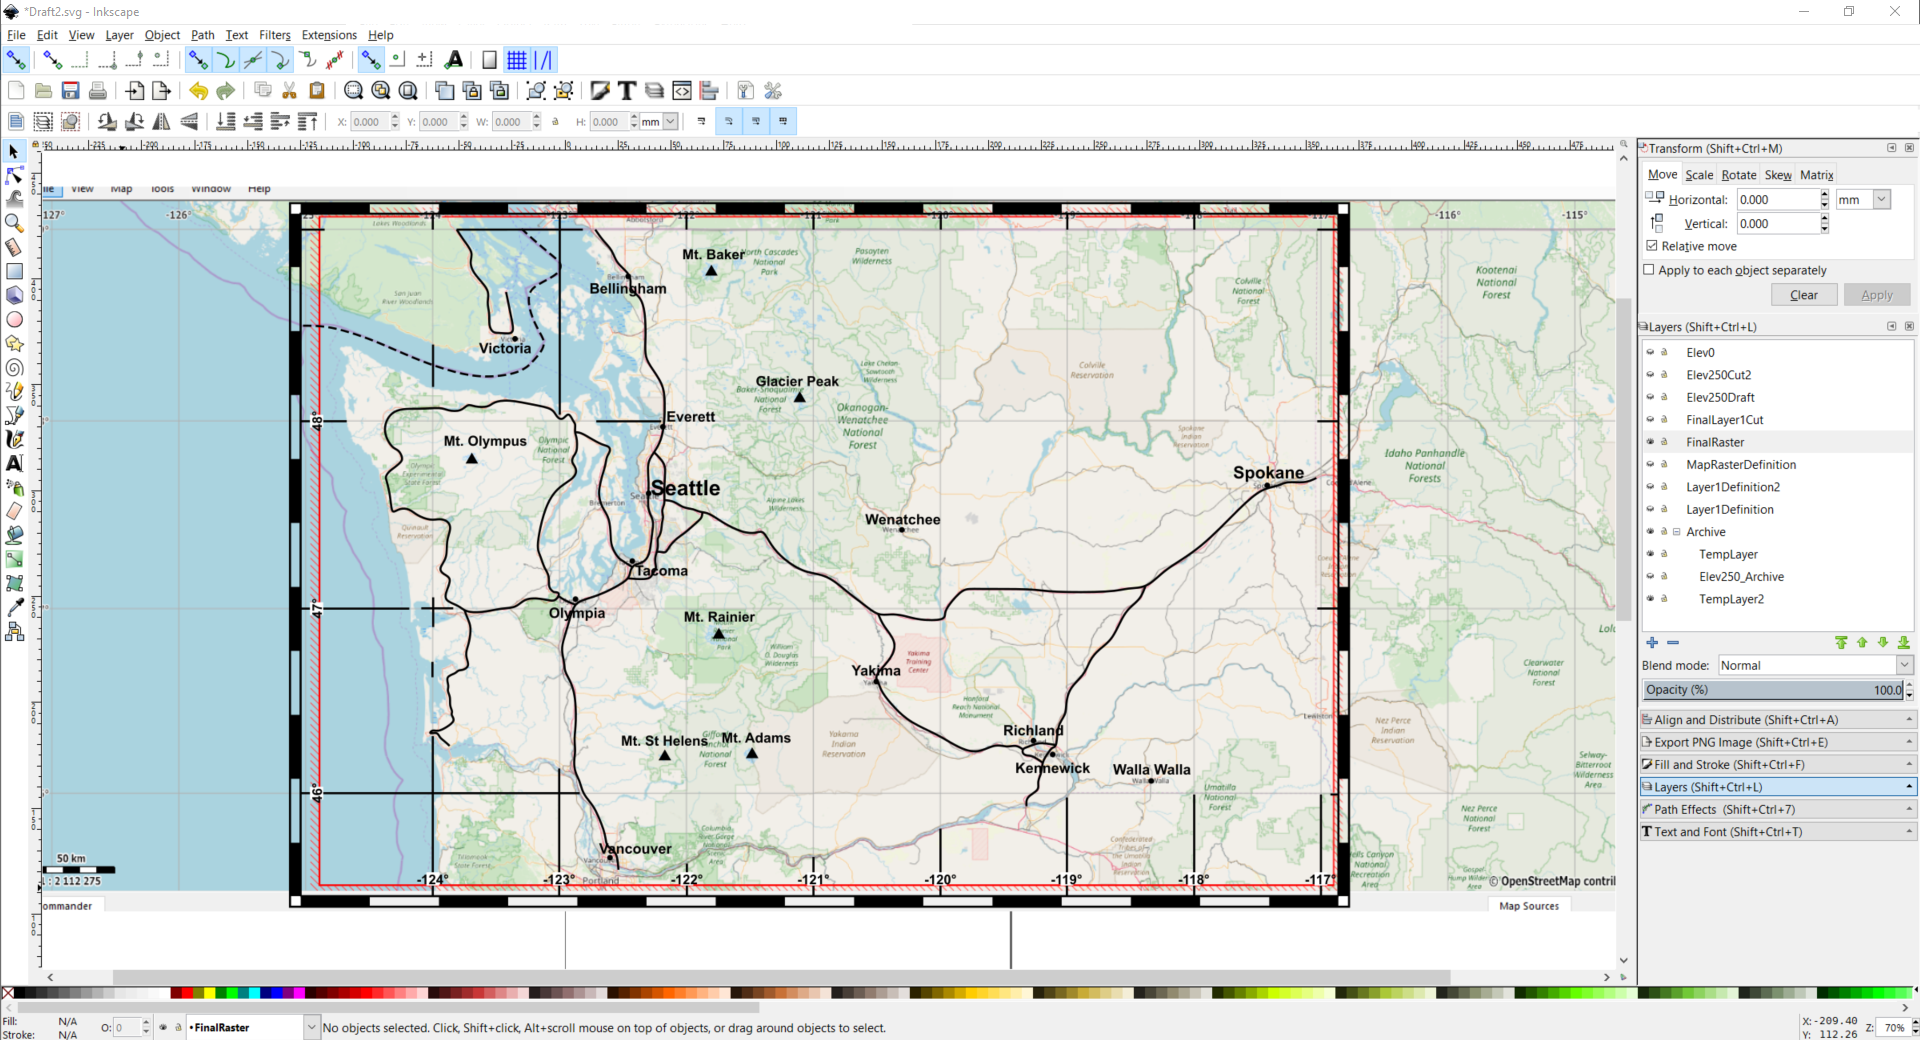
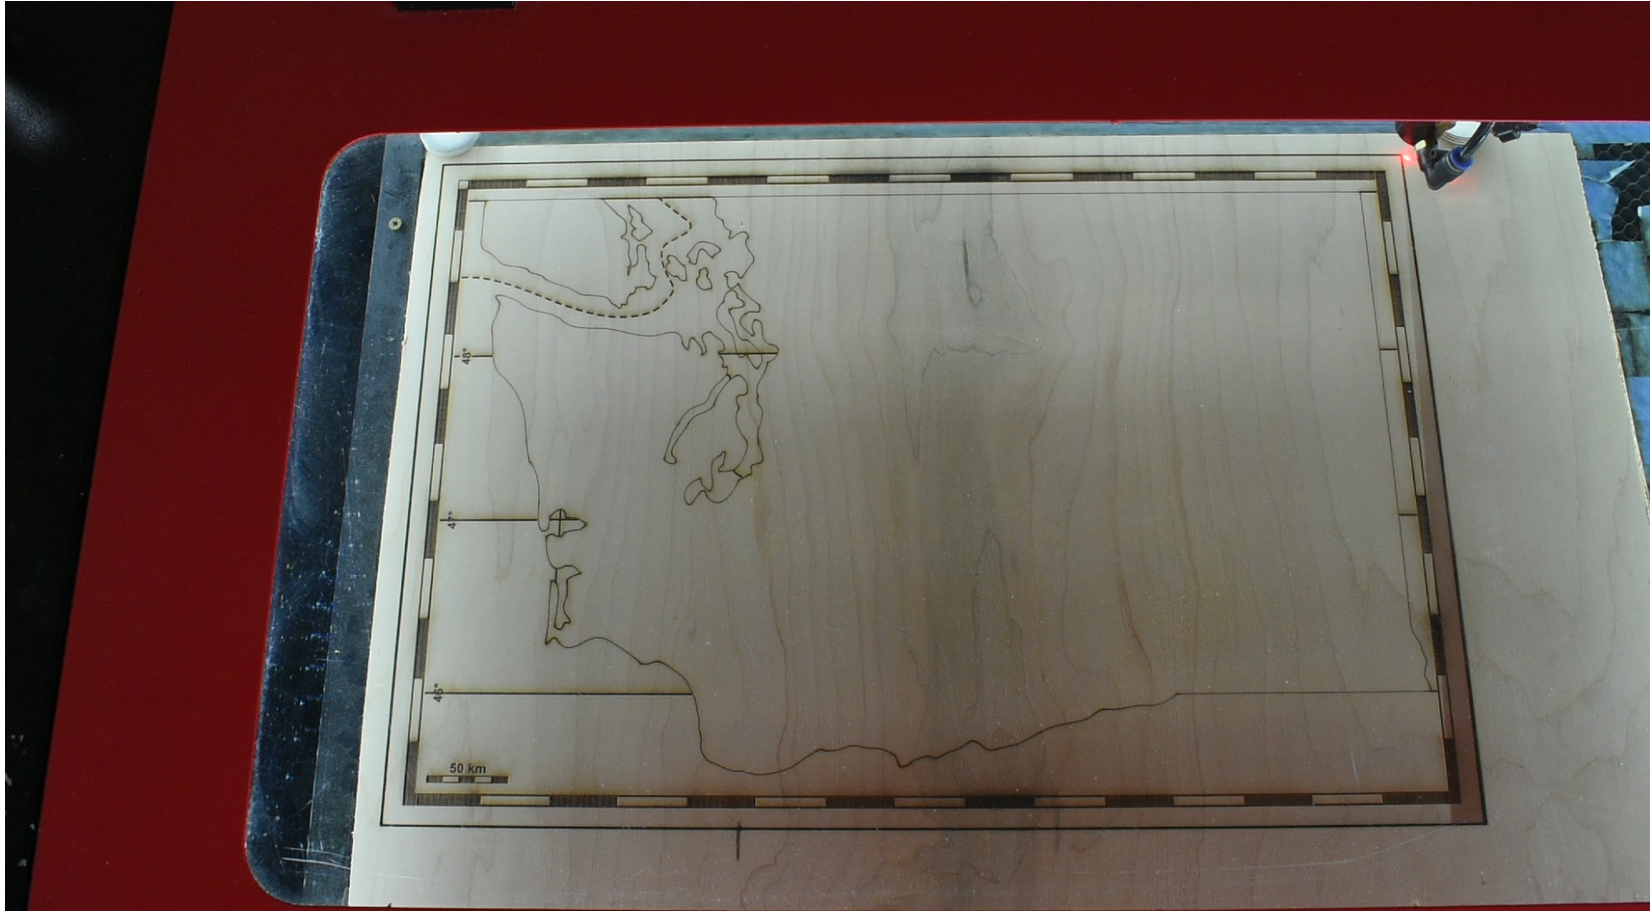
Another optional step is adding a "background", or what goes on the plywood base. The key elements that I have on my background are latitude/longitude lines, a scale, and a border. All of these help give it a "map" like look
In Maperitive with the "Web Map (OSM Mapnik)" layer checked, make sure that you have have both the "Show Map Scale" and "Show Grid" enabled in Map on the top toolbar. Then you can export the image using a command like "export-bitmap file=Base.png dpi=200", which can be imported into Inkscape
Once imported into Inkscape you need to manually trace the longitude/latitude lines using the draw "Bezier Curve" option on the left side, add the longitude/latitude degrees using the text option on the left, and a combination of both of these to trace the scale.I used "Cut Path" (explained in the next step) to trim the latitude/longitude lines back to the state border. To get the text, I simply used Inkscape's "text" to make each number for the latitude/longitude lines and scale, then centered them to the latitude/longitude lines.
I also used the "Bezier Curve" and "Square" option on the left to add a border (as seen in the screenshot in the step), and replicate the map scale in the bottom left. Both of these help make it look like a map.
Step 8: Final Clean Up of File
Step 8 - Tools and Supplies:
Inkscape (or other vector graphics programs like Illustrator)
The final clean up of the file is going to involve:
Trimming off extra geometry we have left over/adding the final geometry boundaries
Scaling all of the geometry up to the size that you want it to be (at once)
saving the cutting and raster files
A key function is cut path: This function trims lines using a reference line. The reference line (which specifies where the target line will be cut) is generally made using either existing geometry or place using the "Bezier Curve" option, and laid down using the snapping rules (defined right under the top toolbar). Cut path is in Path -> Cut Path, and splits the target line into two new lines while deleting the reference line. Notably, the reference line is deleted when using Cut Path, so if you need to use the reference line more than once, you will need to duplicate it (Ctrl + D). I recommend tutorials on this if you haven't used it before.
Basic Process:
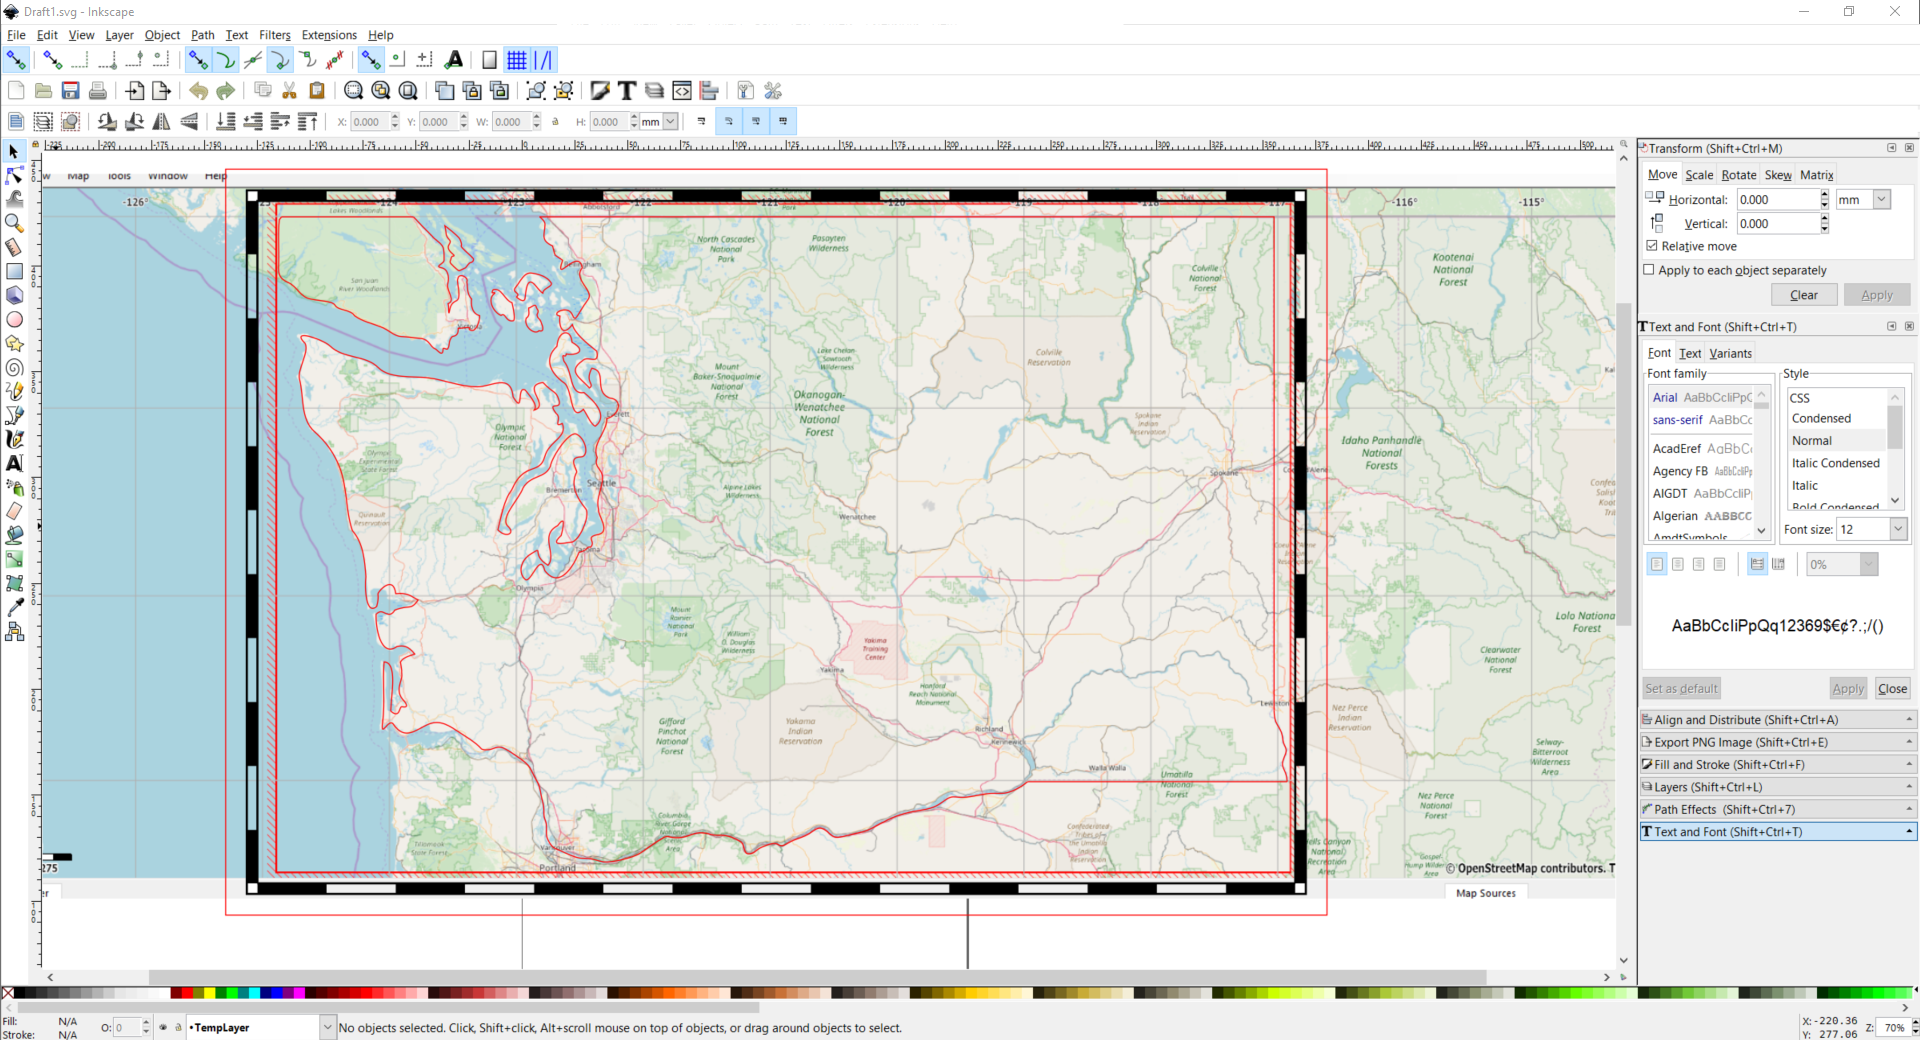
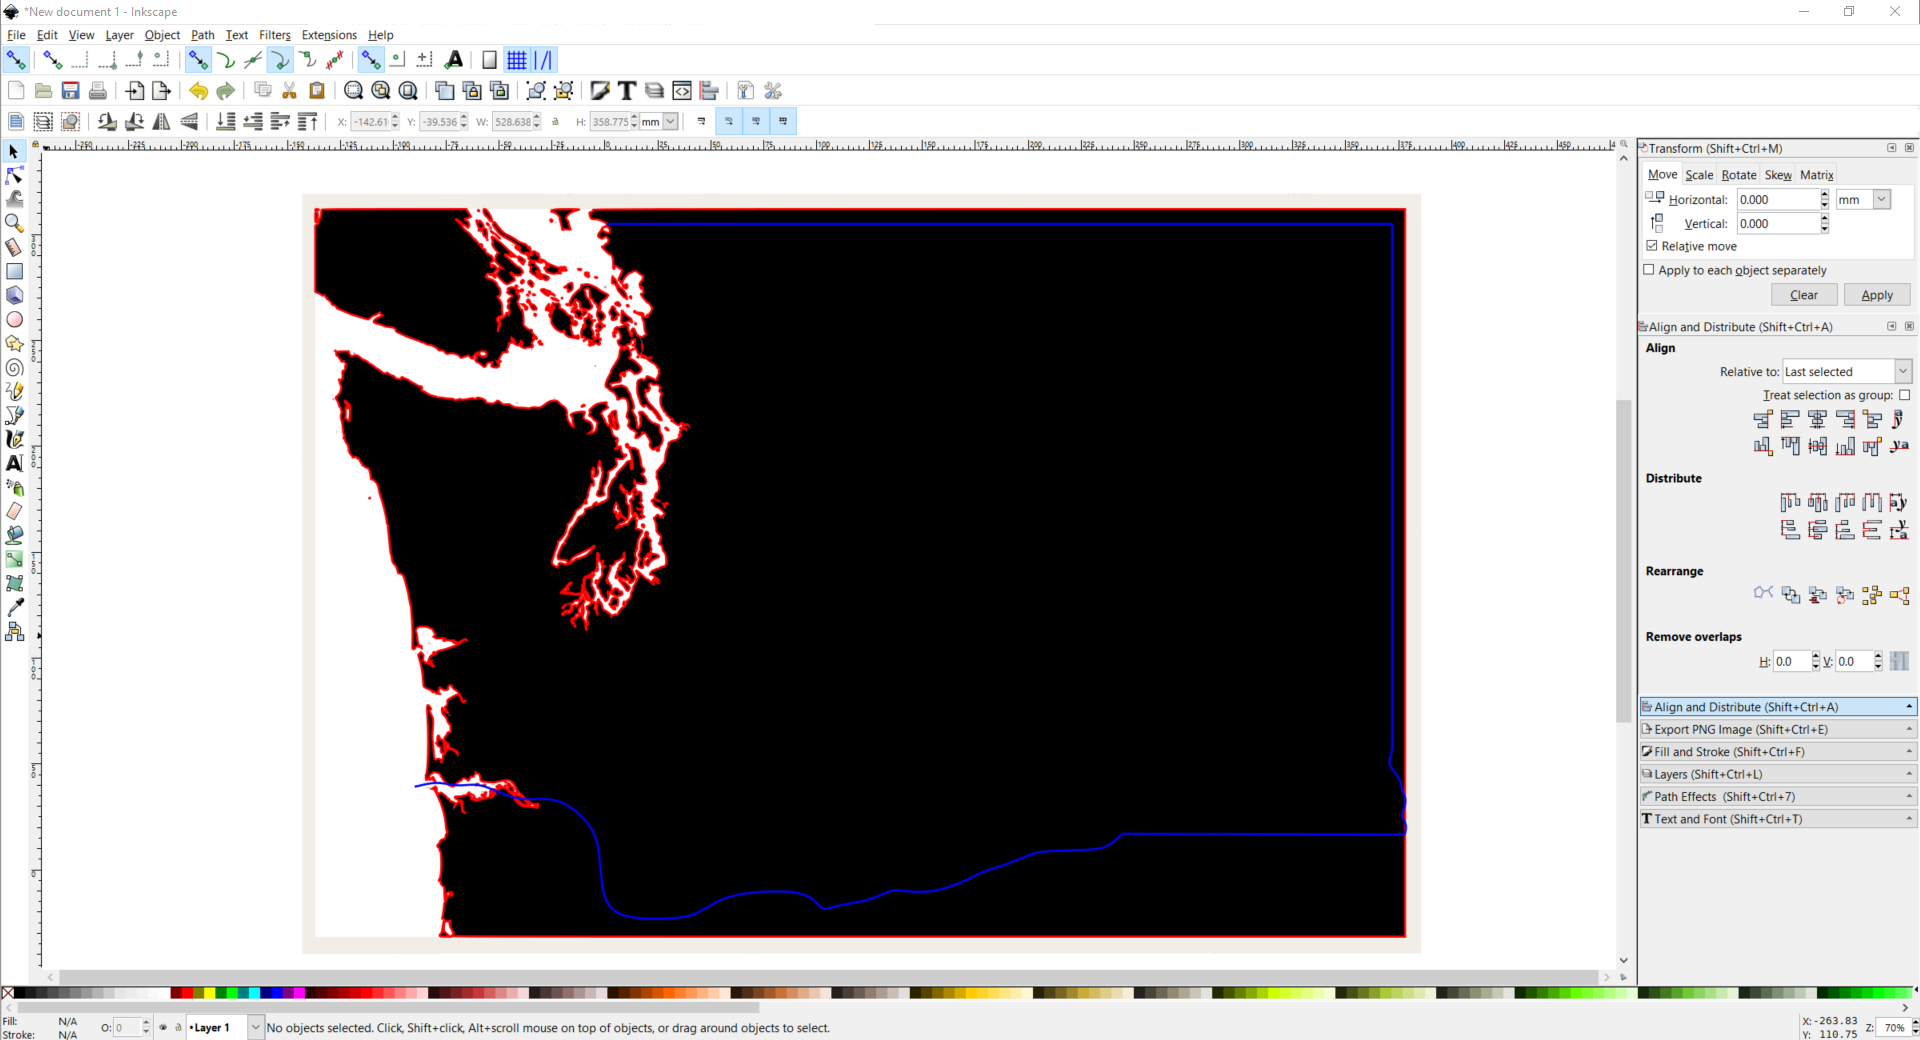
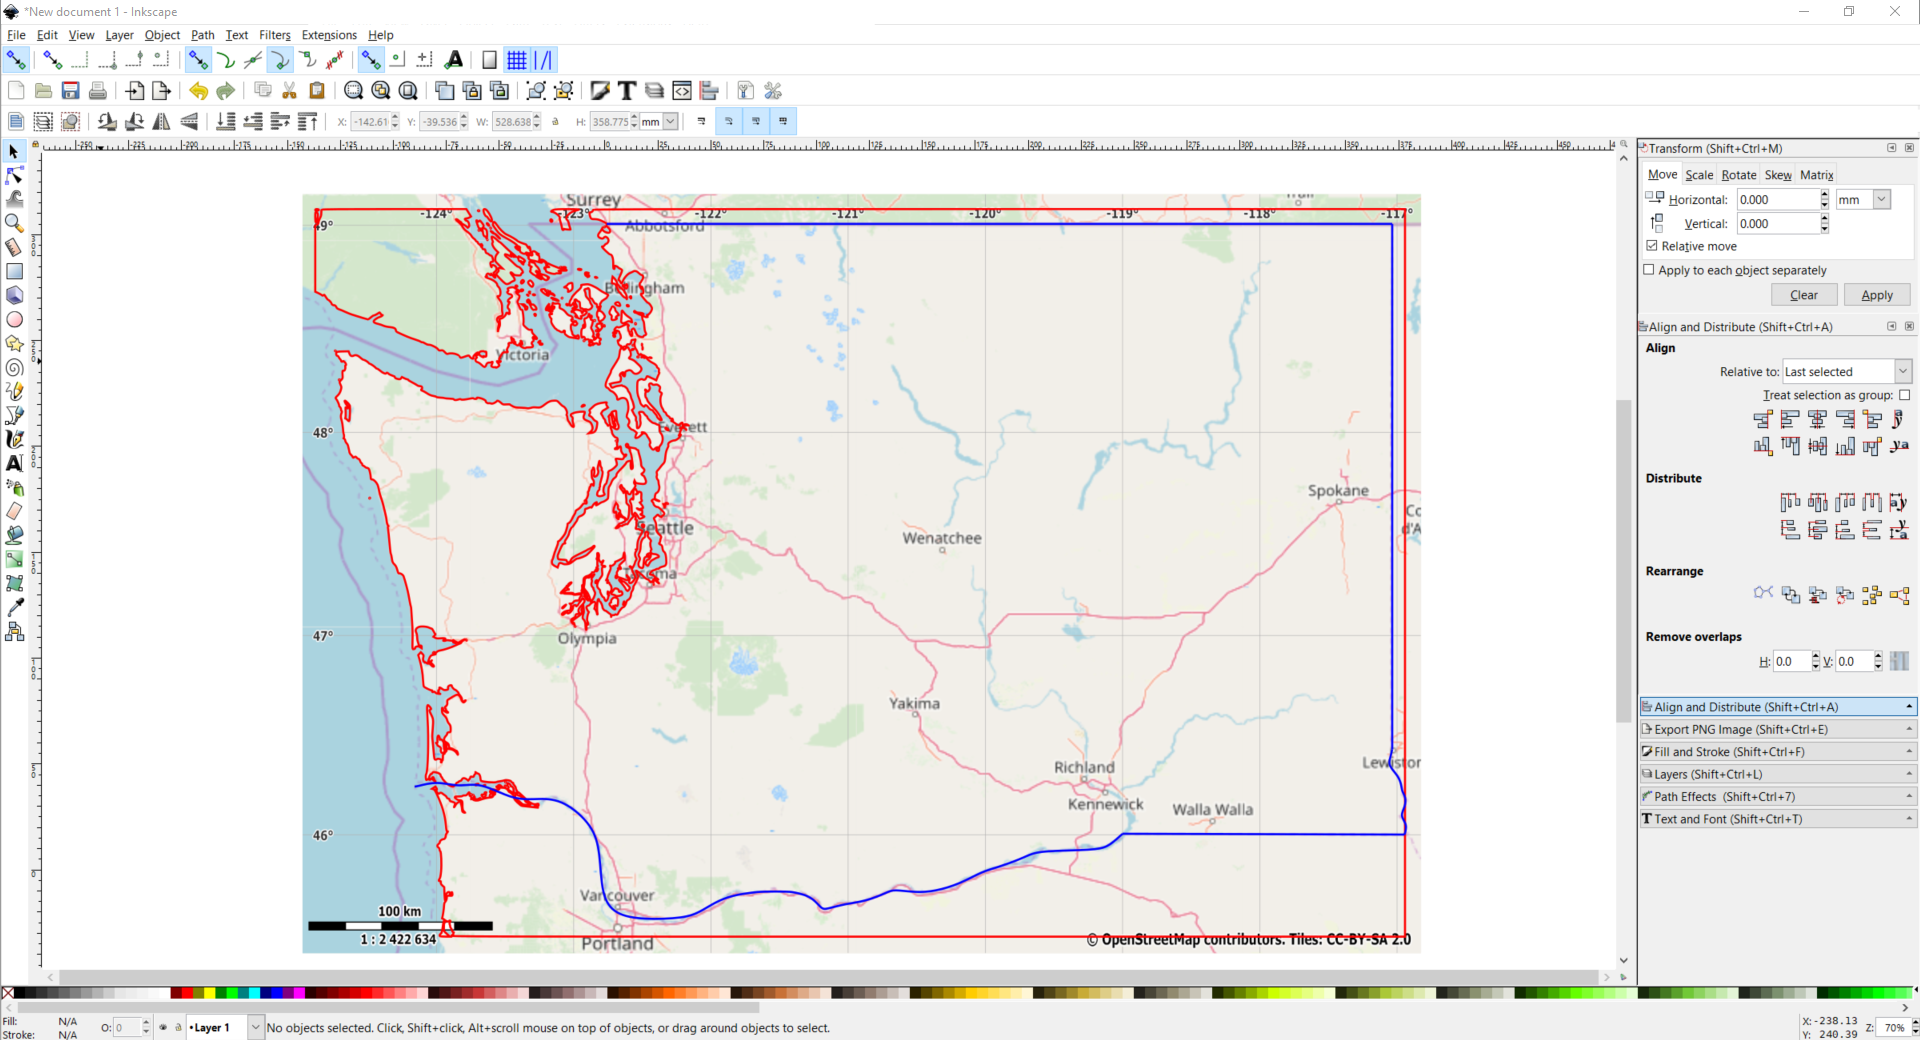
We now have all of the layers, but need to trim it down to the final size. Ideally, the geometry that you imported is slightly larger larger than what you need, so it needs to be trimmed down before being sent to the laser cutter. Your border is likely either a box, or a state/country boundary. If it's a box, simply create a box along the edges that you want. If it's a State/Country border, use a screenshot imported from Maperitive to trace the border (similar to how imported in previous steps).
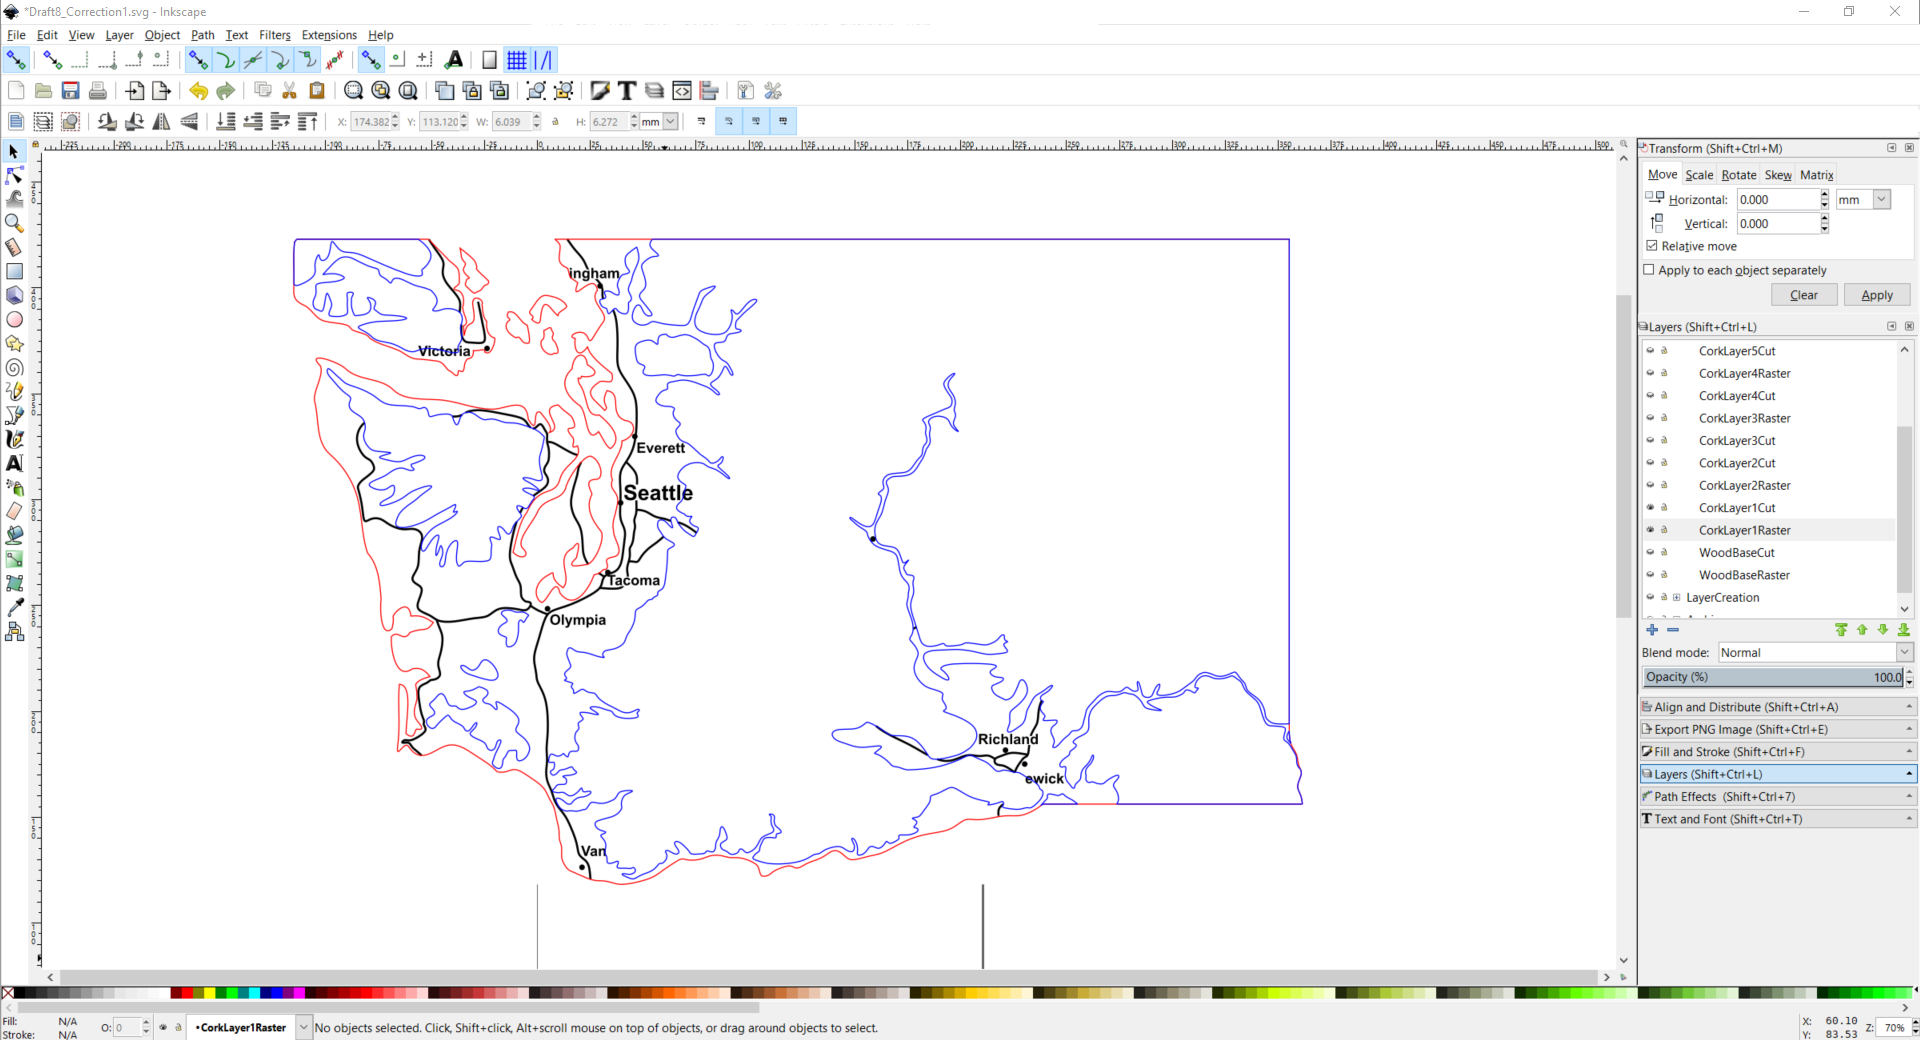
Use the box/borders you just made to trim of any of the topography that lies outside of the border. Washington is a great example of this. The West is bounded by the coast, the South mostly by the Columbia River, and the North/East by border lines. You can see in the step pictures how I traced the boundaries (in blue), which I can use to remove excess geometry (in red).
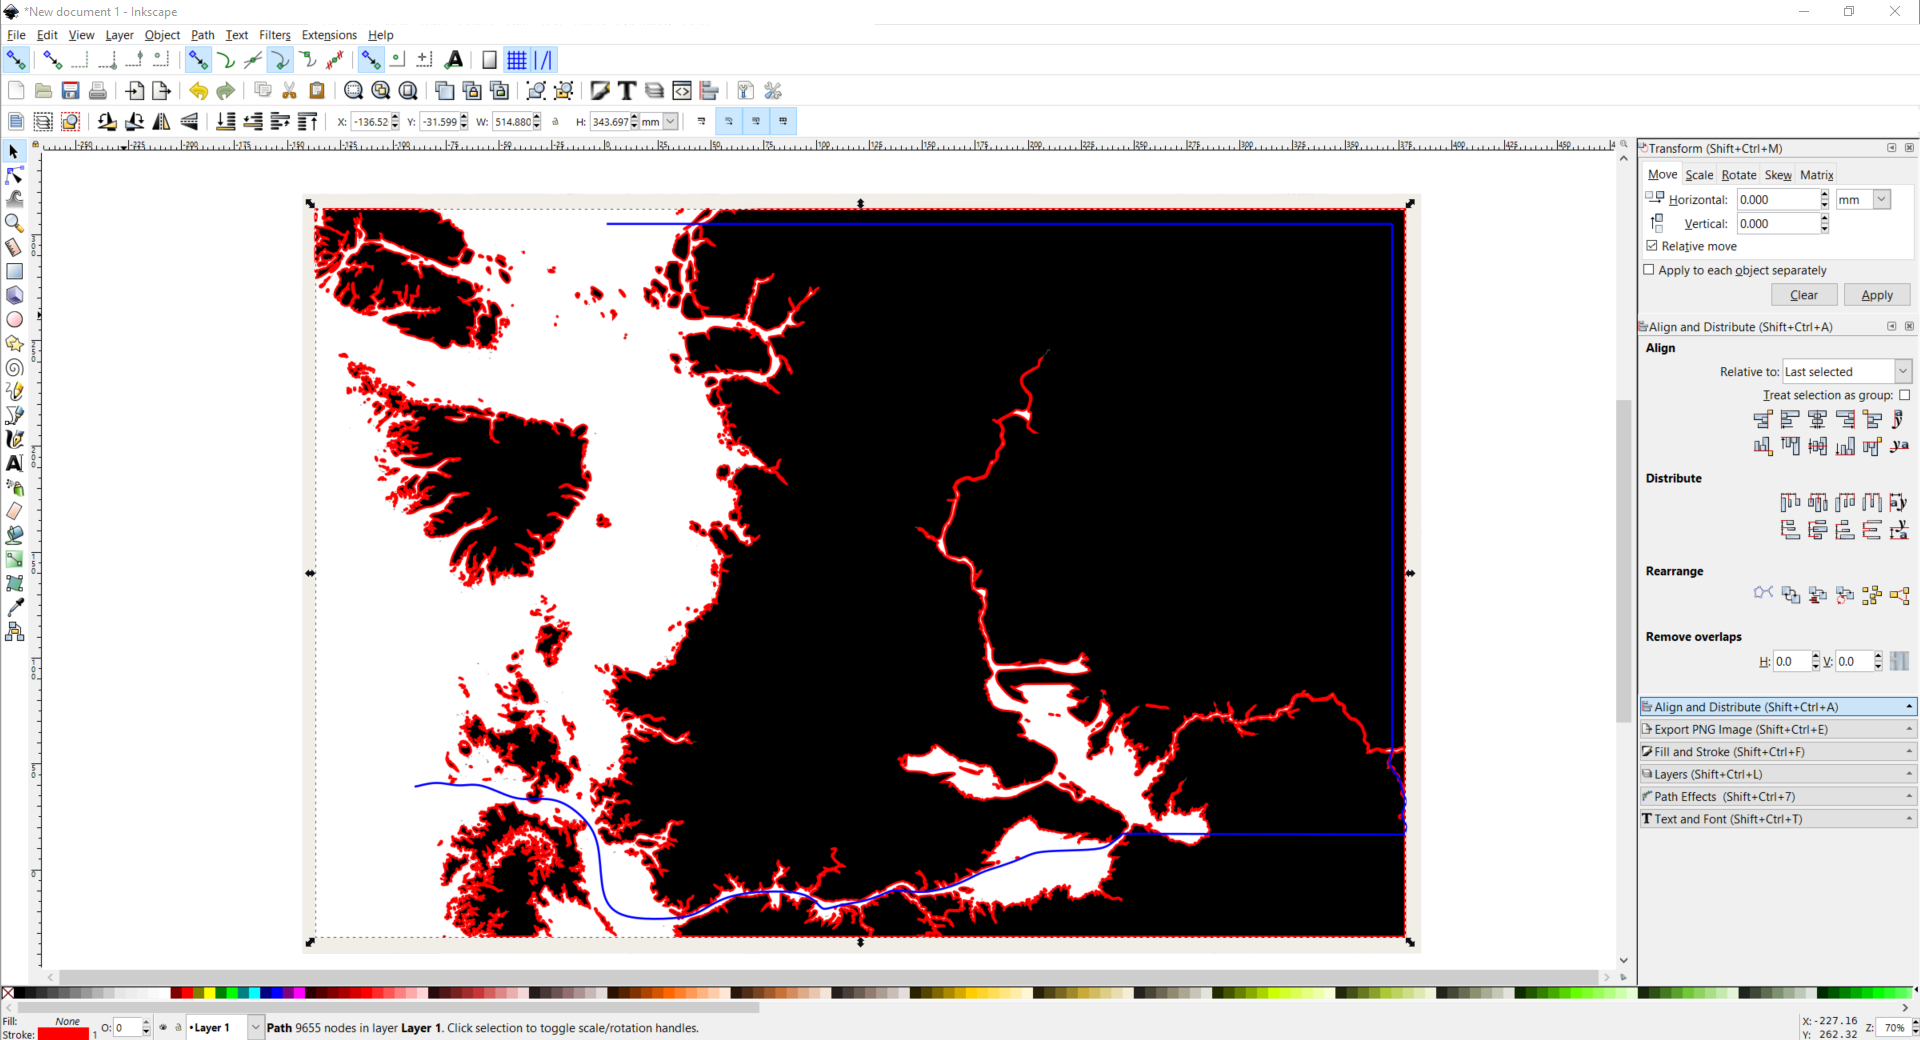
As a last check, go through each layer and make sure that the layer above does not extend past the layer below (especially if you manually trace the lines). After you laser cut the layers out, you don't want find out that the layer above another extends over the one below it.
Another big recommendation is to trace the next layer on to the layer being cut when laser cutting. This will make it much easier to place each consecutive layer onto the next one (it essentially becomes a puzzle). This can be done by making a copy of the next layer up and moving it into the layer below, and changing the color (blue is common for engraving). Depending on the laser cutter you are using, this will allow you to change the cutting settings for those lines so that they are only etched and not cut all the way through. Example in step pictures.
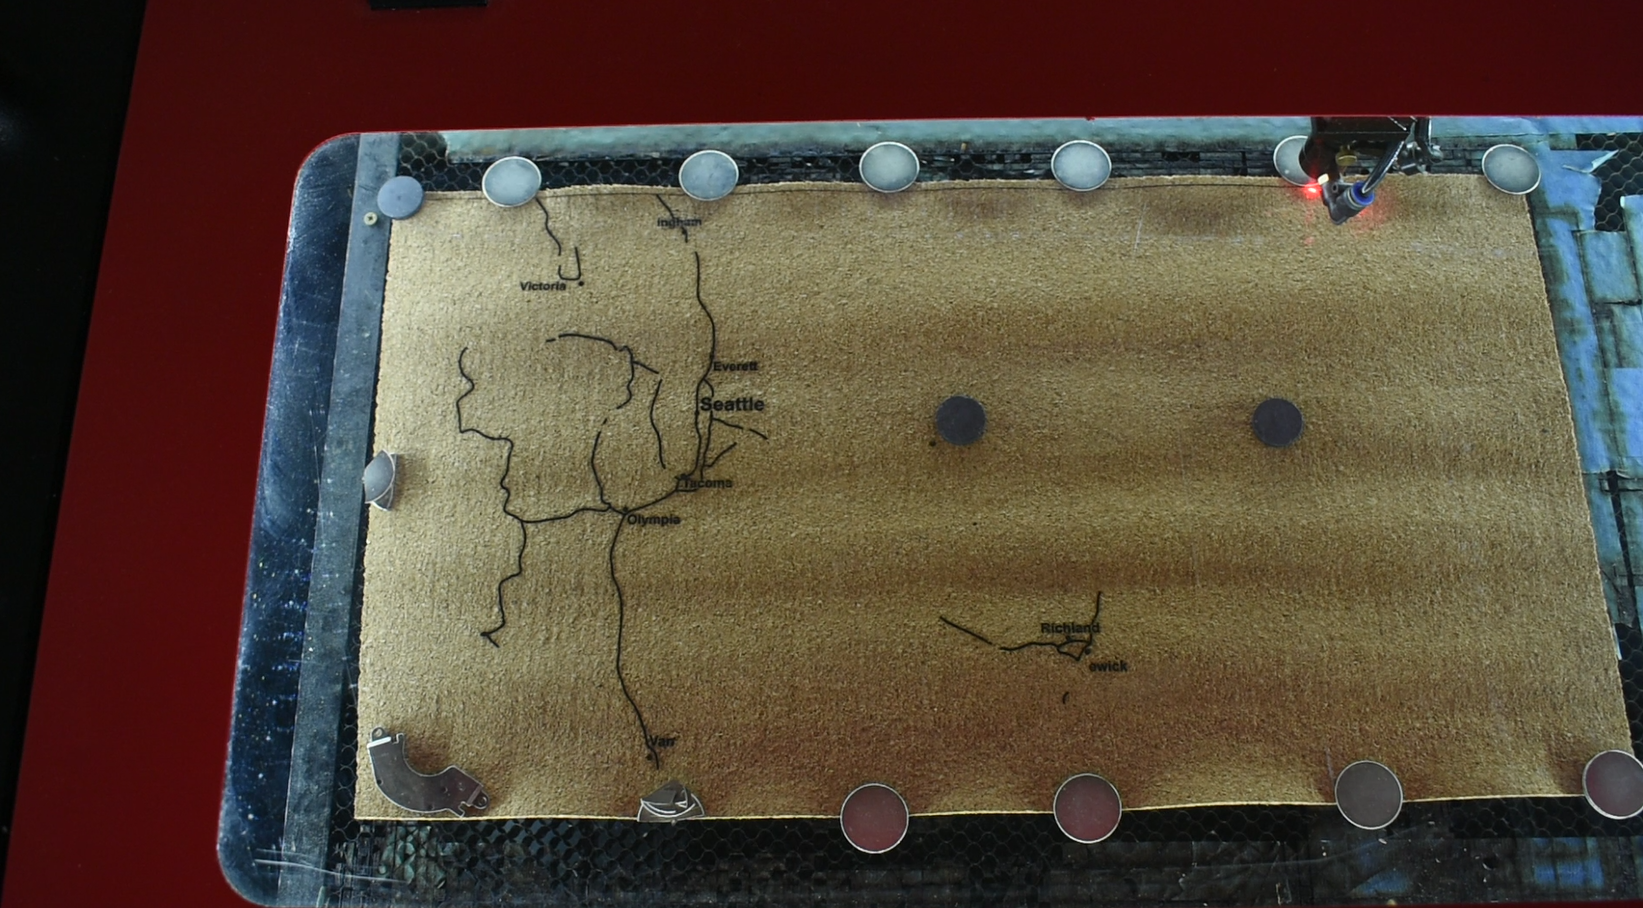
The last bit of cleanup (if you included the optional step of adding roads/cities/mountains ect.) is to break up the raster etching into what needs to be engraved on each layer. The roads can be split using the cut path tool, and the text can simply be duplicate and moved to each raster layer. Example of my first layer in the step pictures, specifically how I only have the rastering for the first layer between the red lines (which are cut), and the blue lines (which are the boundaries for where the next layer will be stacked on).
Step 9: Laser Cutting
Step 9 - Tools and Supplies:
Laser Cutter
Cork Board (1/8" recommended)
Plywood (I used 1/4", but 1/8" will also work)
Optional: Neodymium magnets
Initial Testing:
Cork does not play nice with laser cutters (it's tree bark, which is designed to resist burning...), so I started with testing.
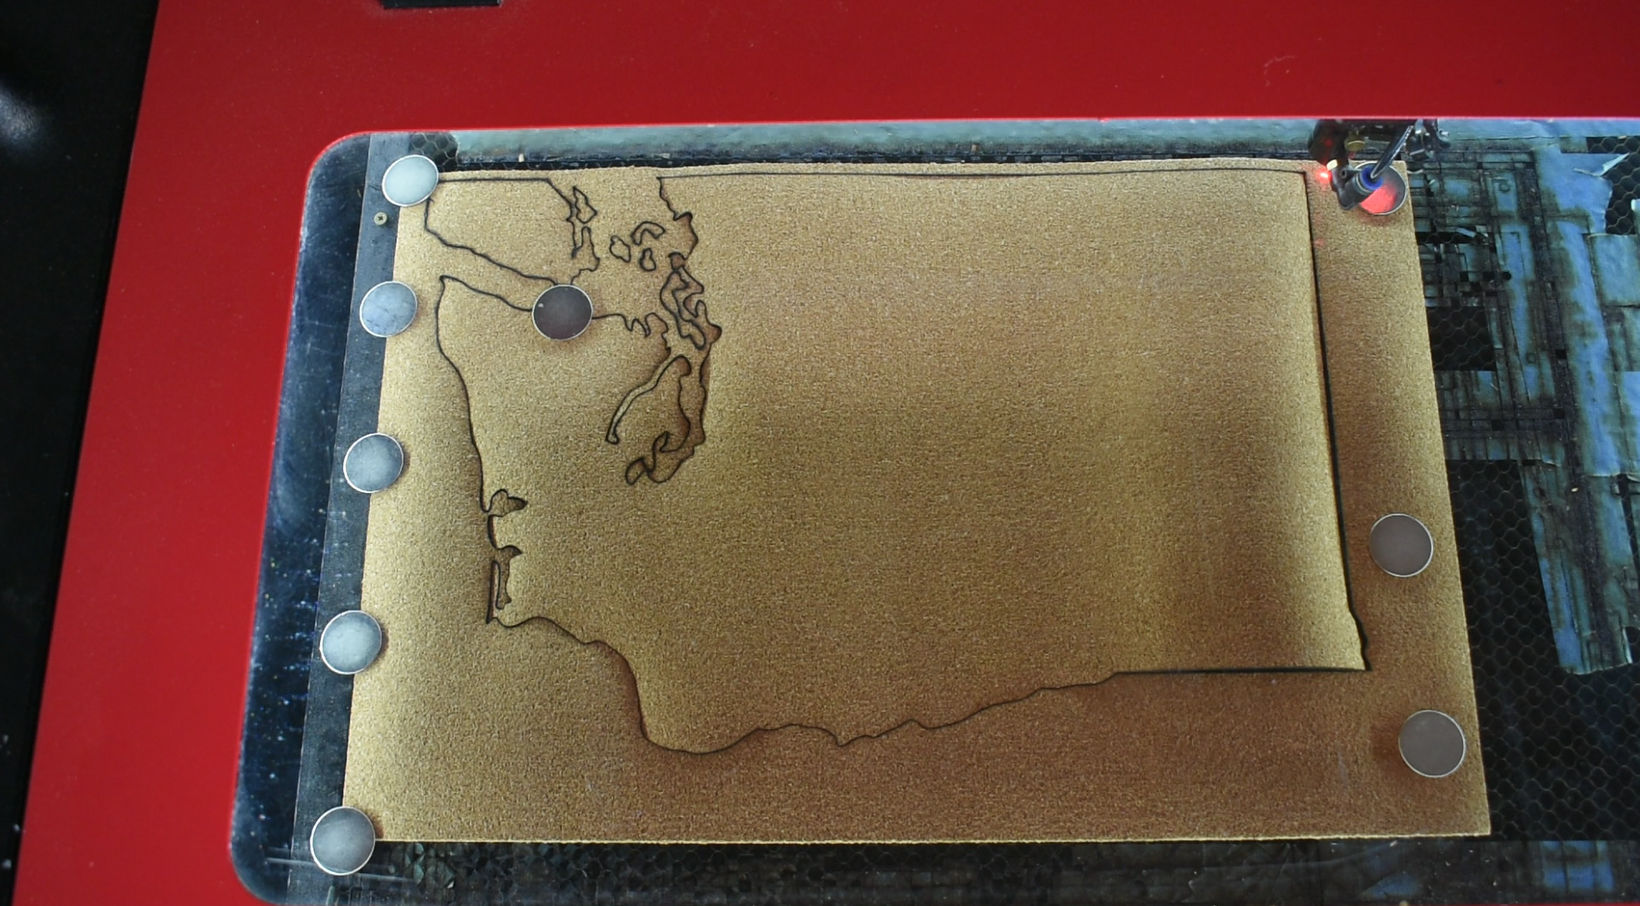
I started by cutting and engraving two different thickness cork sheets, 1/8 inch and 1/4 inch. Both did reasonably well at engraving, but my laser cutter struggled at cutting the 1/4", even at very low cutting speeds and high air nozzle pressures (~20 psi). So i decided to go with 1/8" cork board for the laser cutting. Unfortunately, how well it cuts may be partially dependent on the glue used in the cork, which you won't really know until you try cutting it. So there may some trial and error. I tried two different sources (the one from Amazon linked at the start), and personally didn't have any trouble cutting.
As a starting point for laser cutting settings, these are the settings that I used for 1/8" cork. For reference, I have a 50W Chinese laser cutter.:
-Cutting: 20 mm/s at 75% power
-Line Etching: 150 mm/s at 6% power
-Raster Engraving: 150 mm/s at 10% power
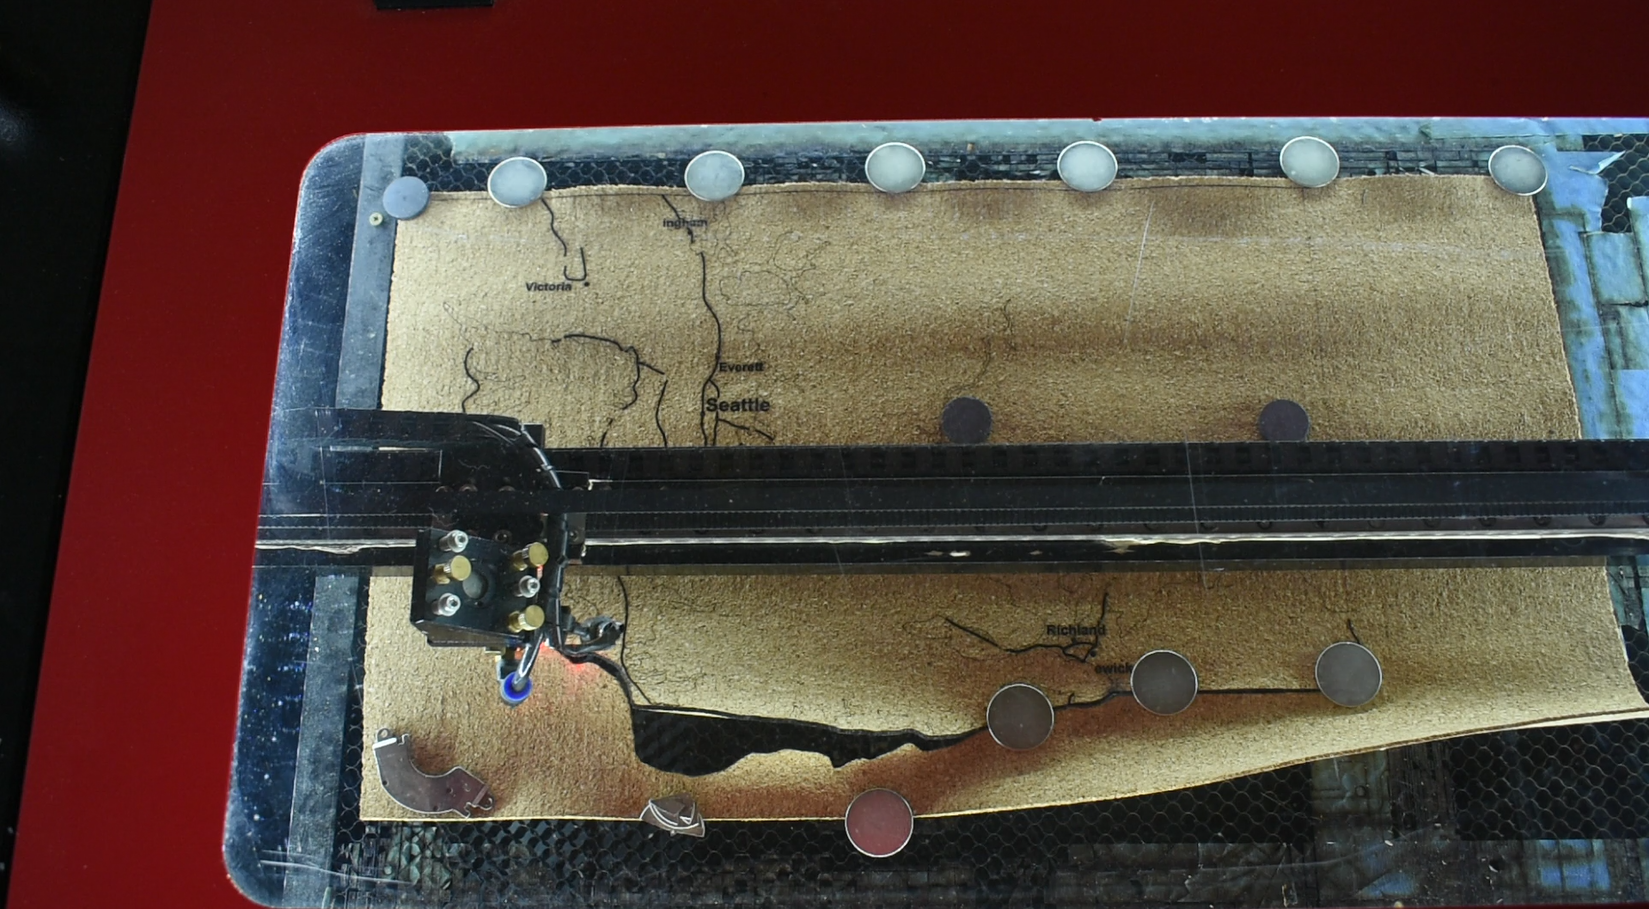
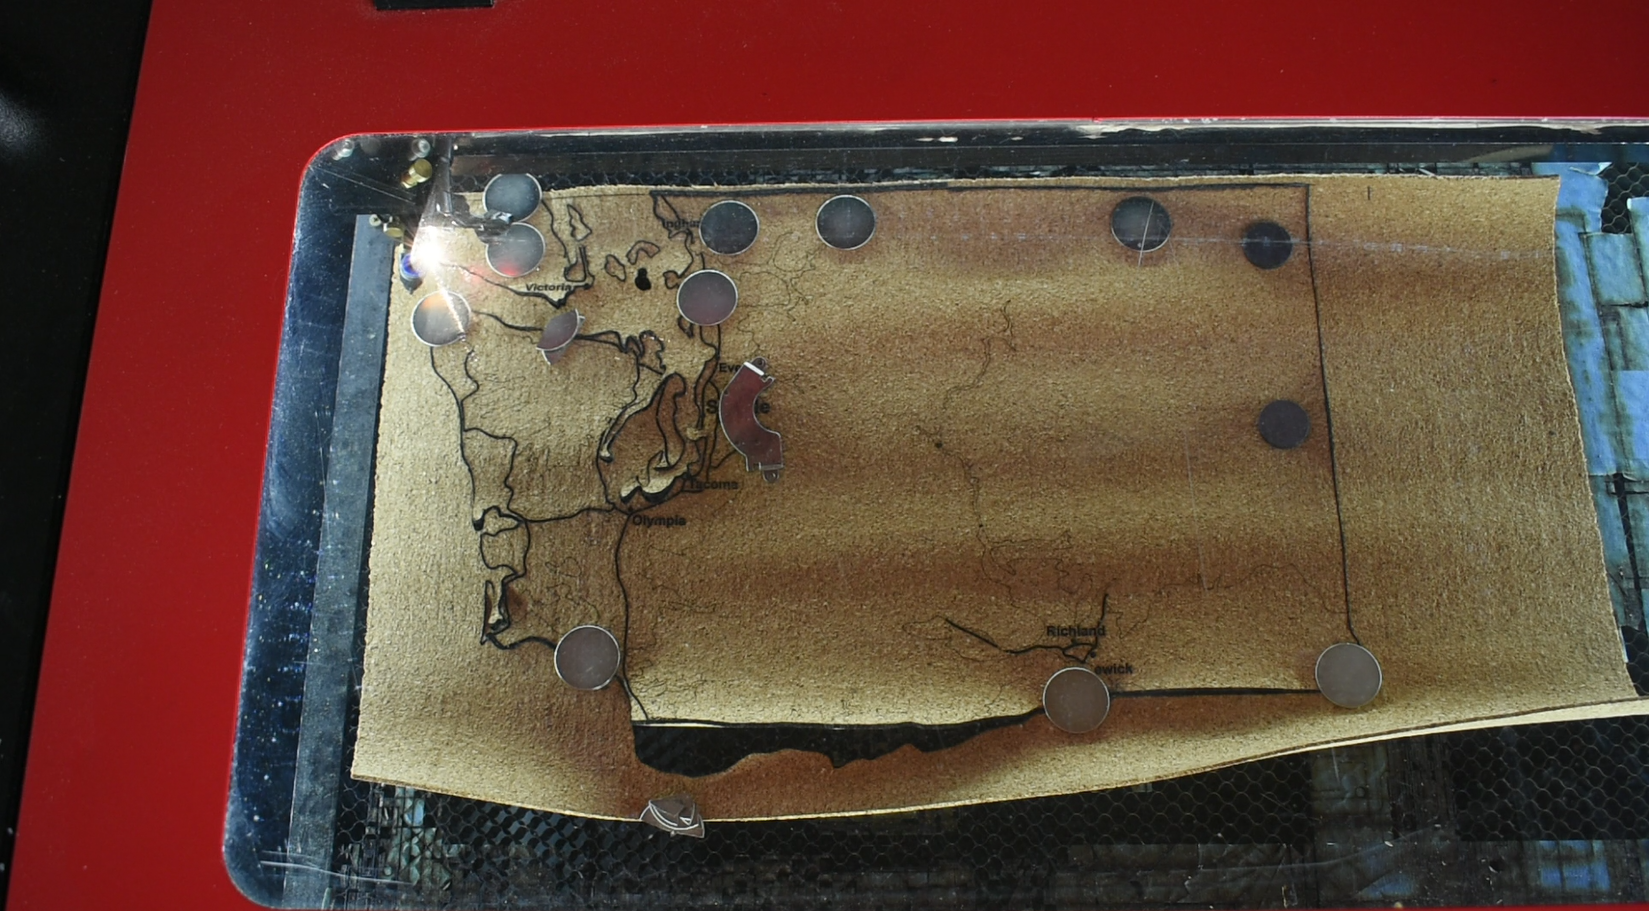
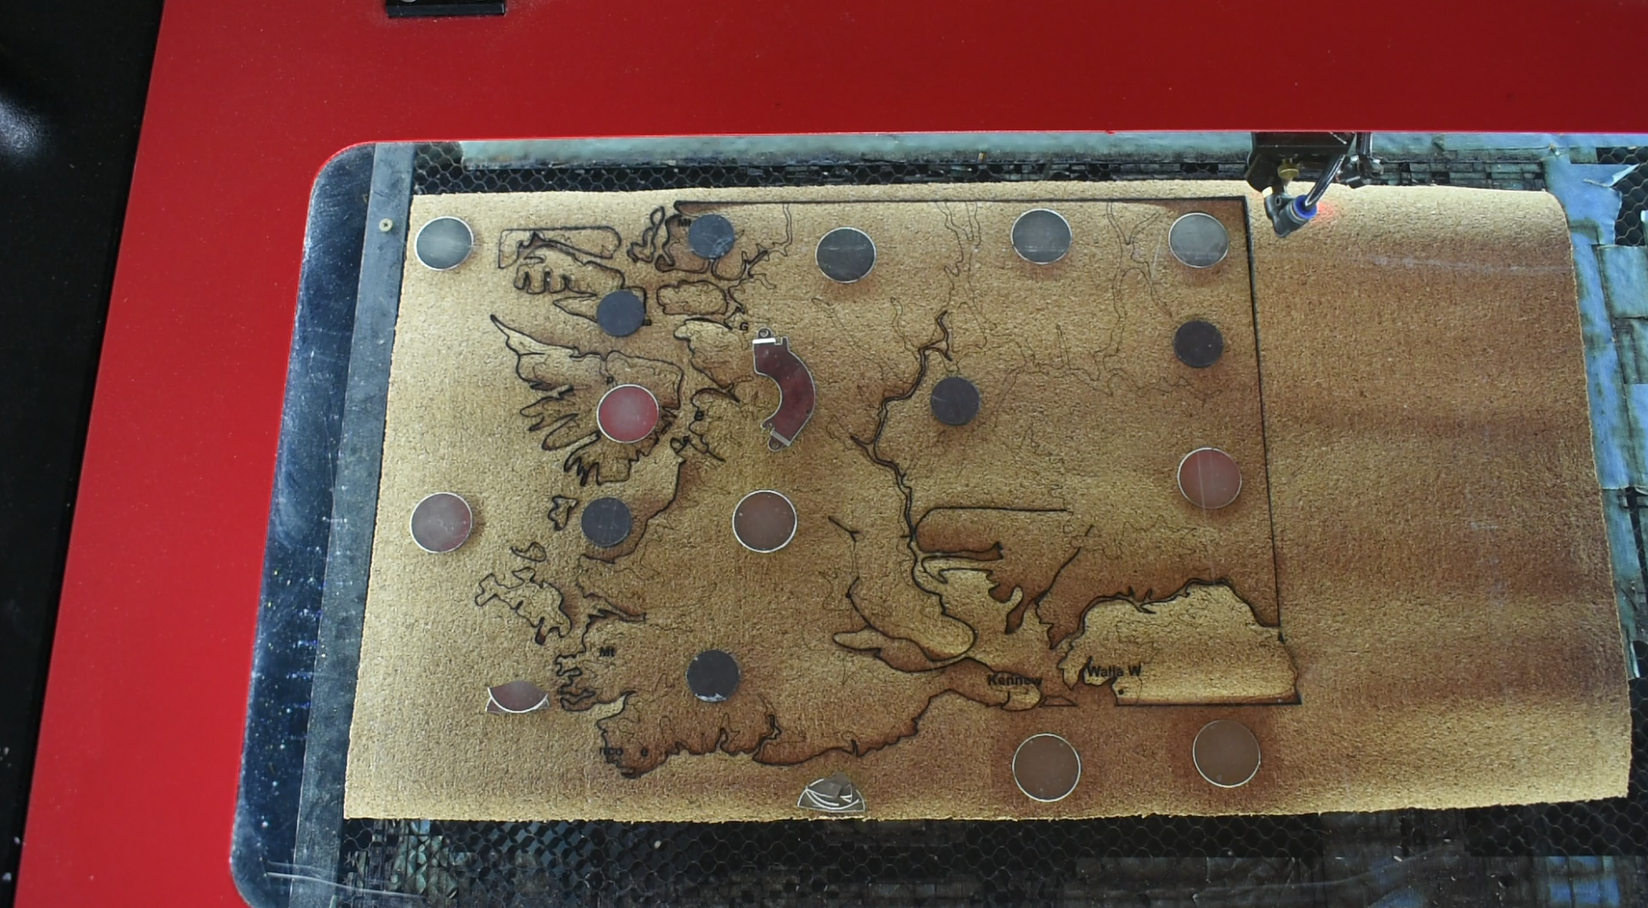
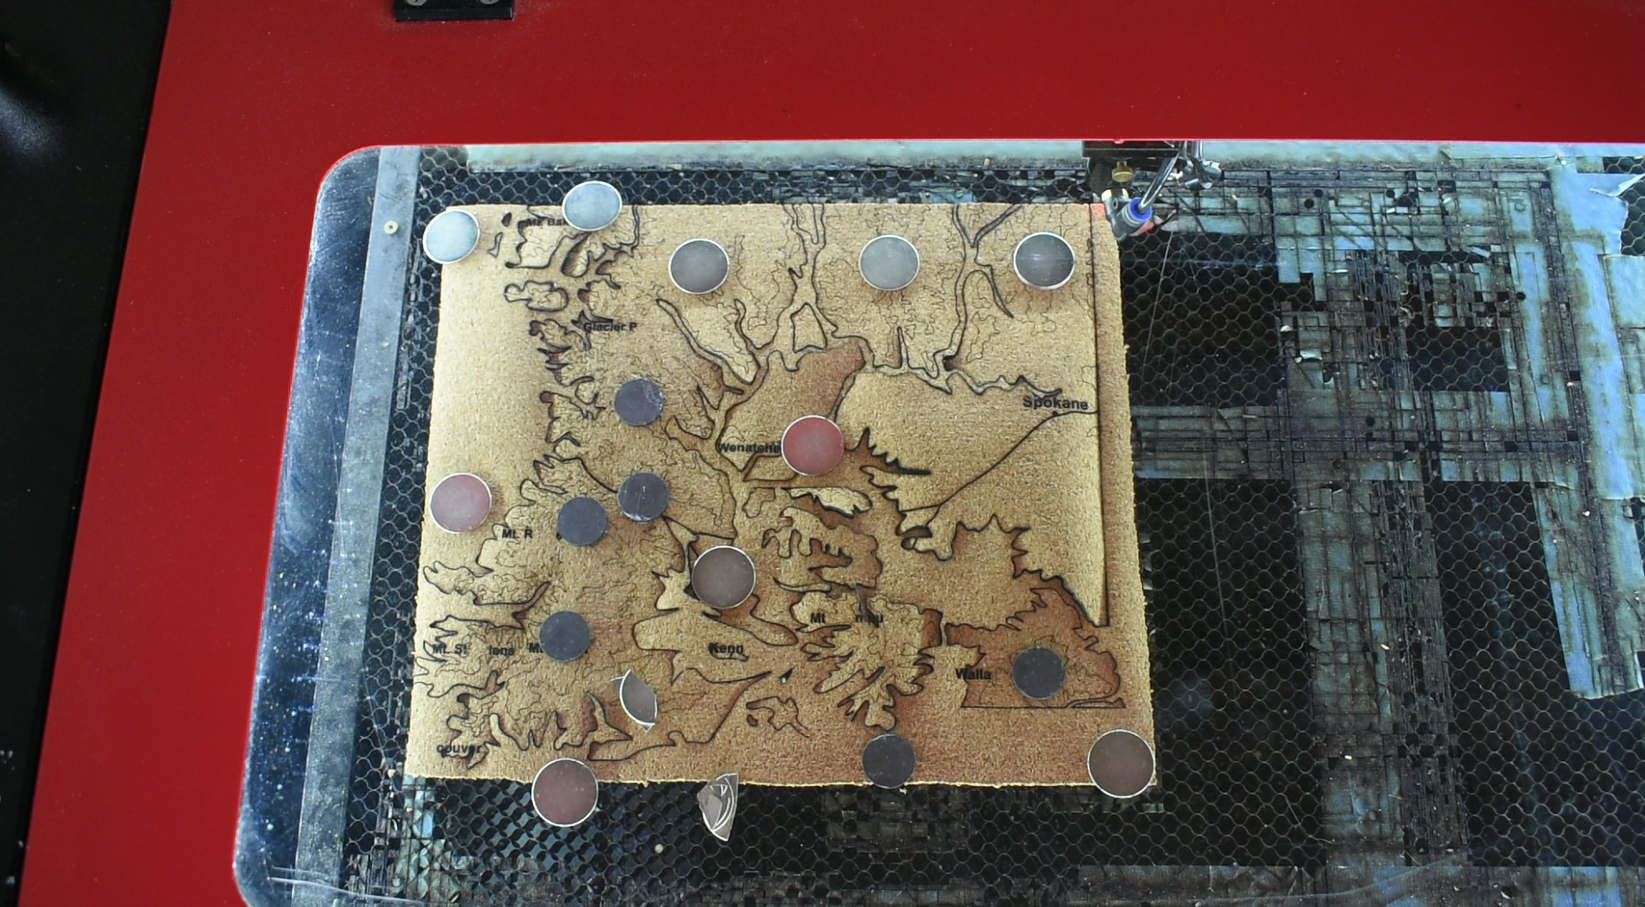
Besides the cutting difficulty, the other major hurdle you may have to deal with (if you got your cork board in a roll, which you probably will), is that it's going to be hard to keep flat in the laser cutter. You can help mitigate this by trying to flatten it ahead of cutting. My recommendation however, is to use magnets (strong magnets like neodymium will work best) to hold down the cork while cutting. It's not perfect-you will need to pause the laser cutting throughout the cutting process to make sure that the magnets are not in the way of the cutting-but it's the best way I know how to keep the cork from warping to the point that the laser is too out of focus from the cork surface to cut. Besides that, the rest of the cutting should be straight forward.
Step 10: Gluing
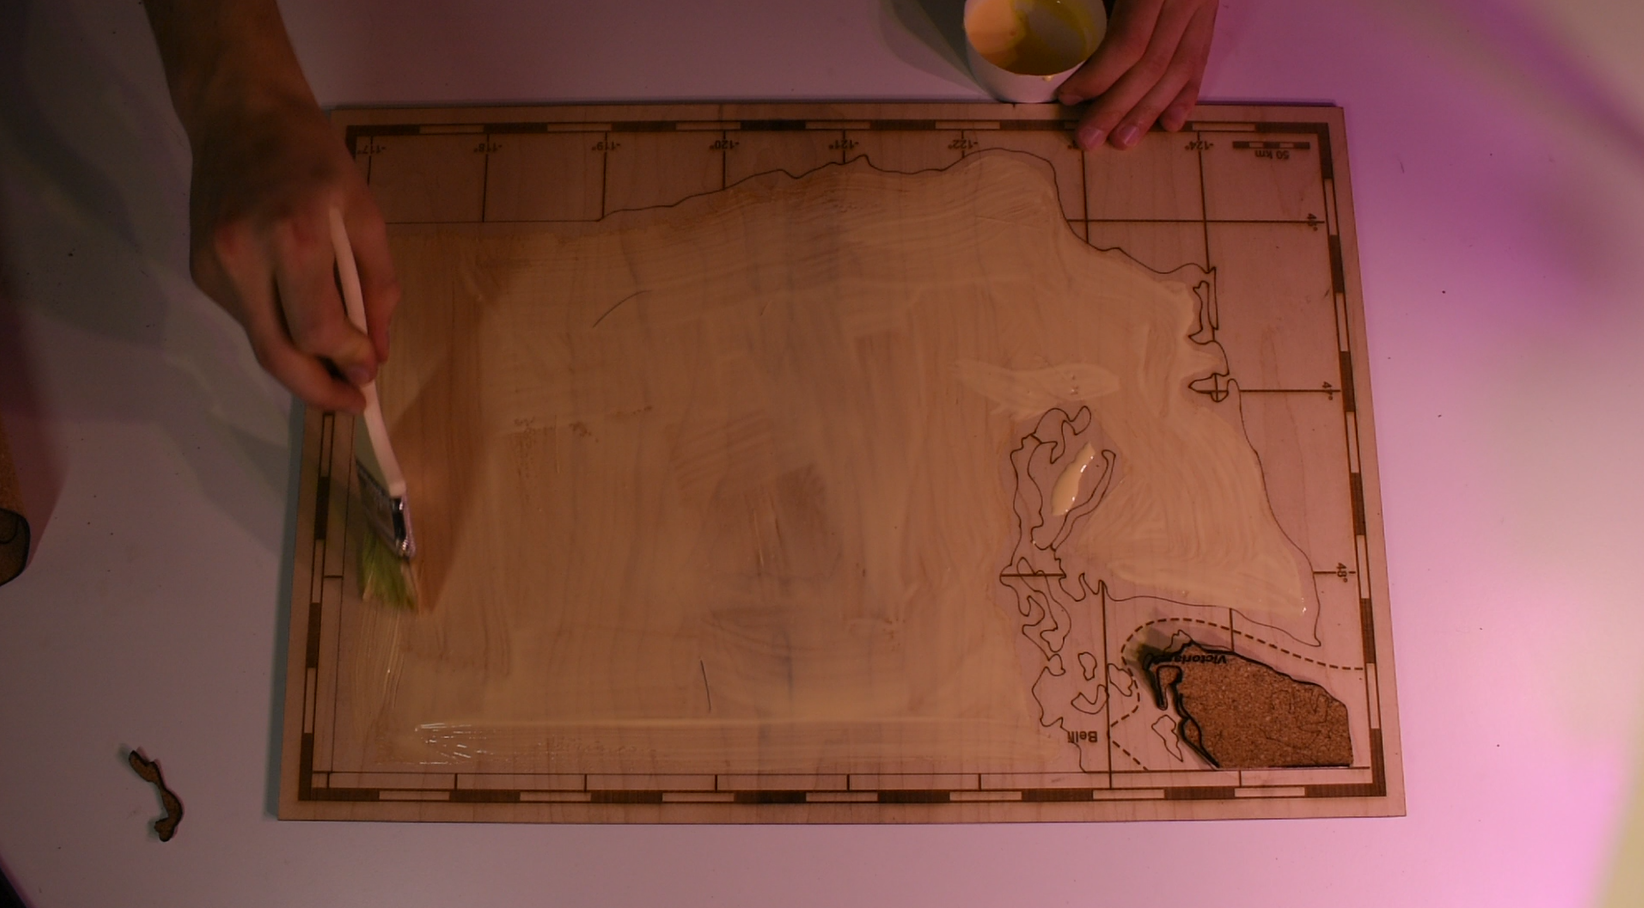
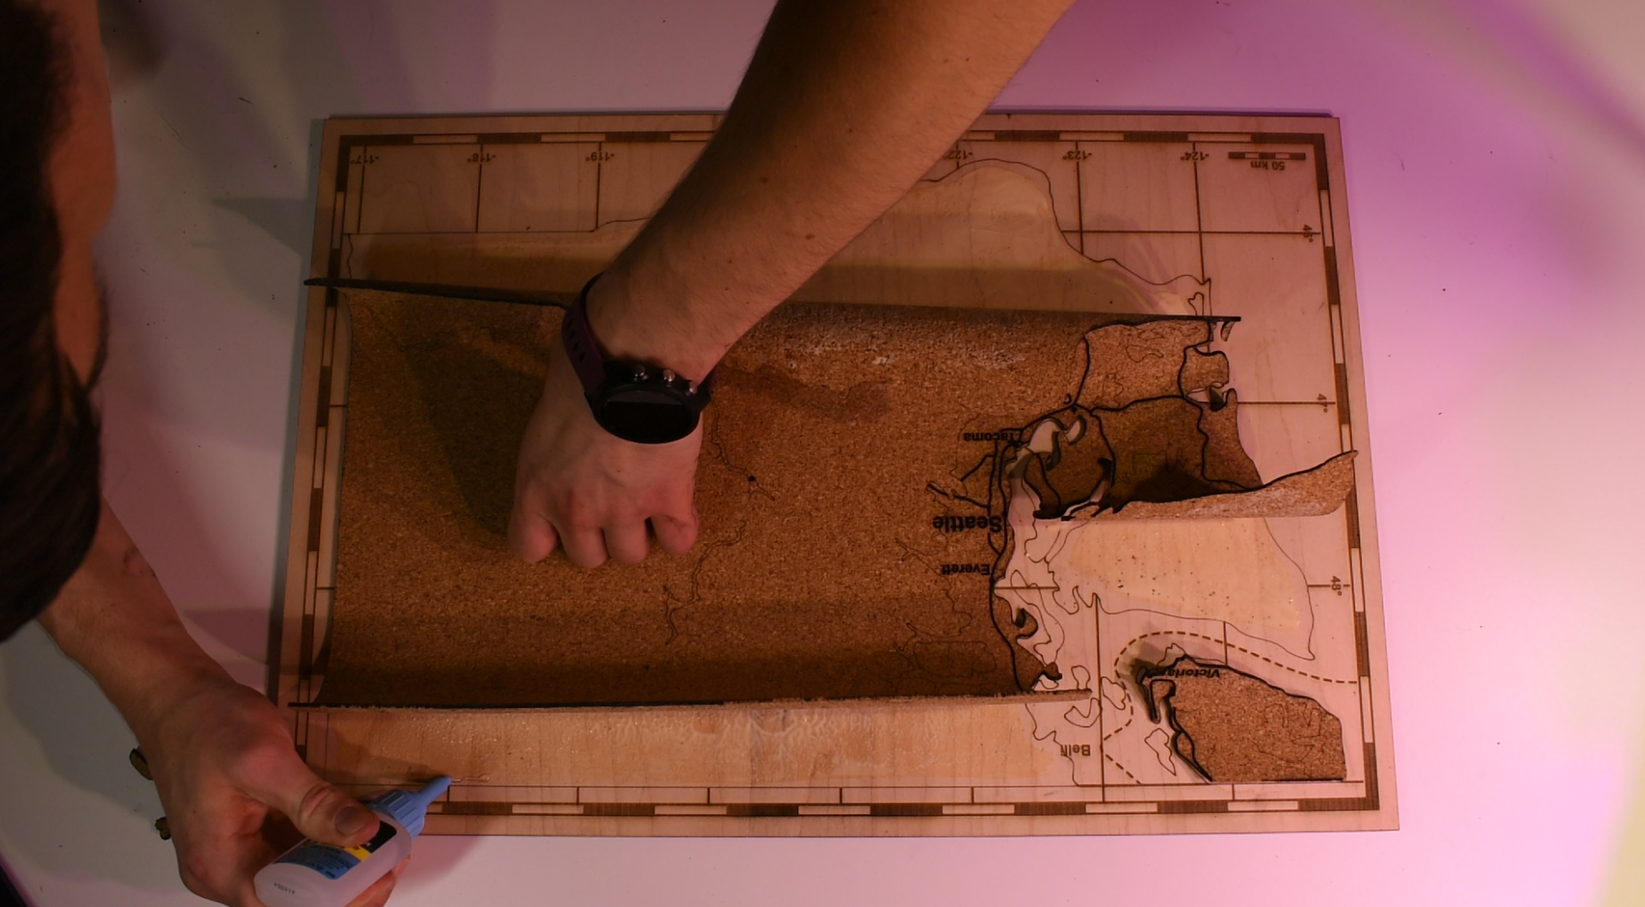
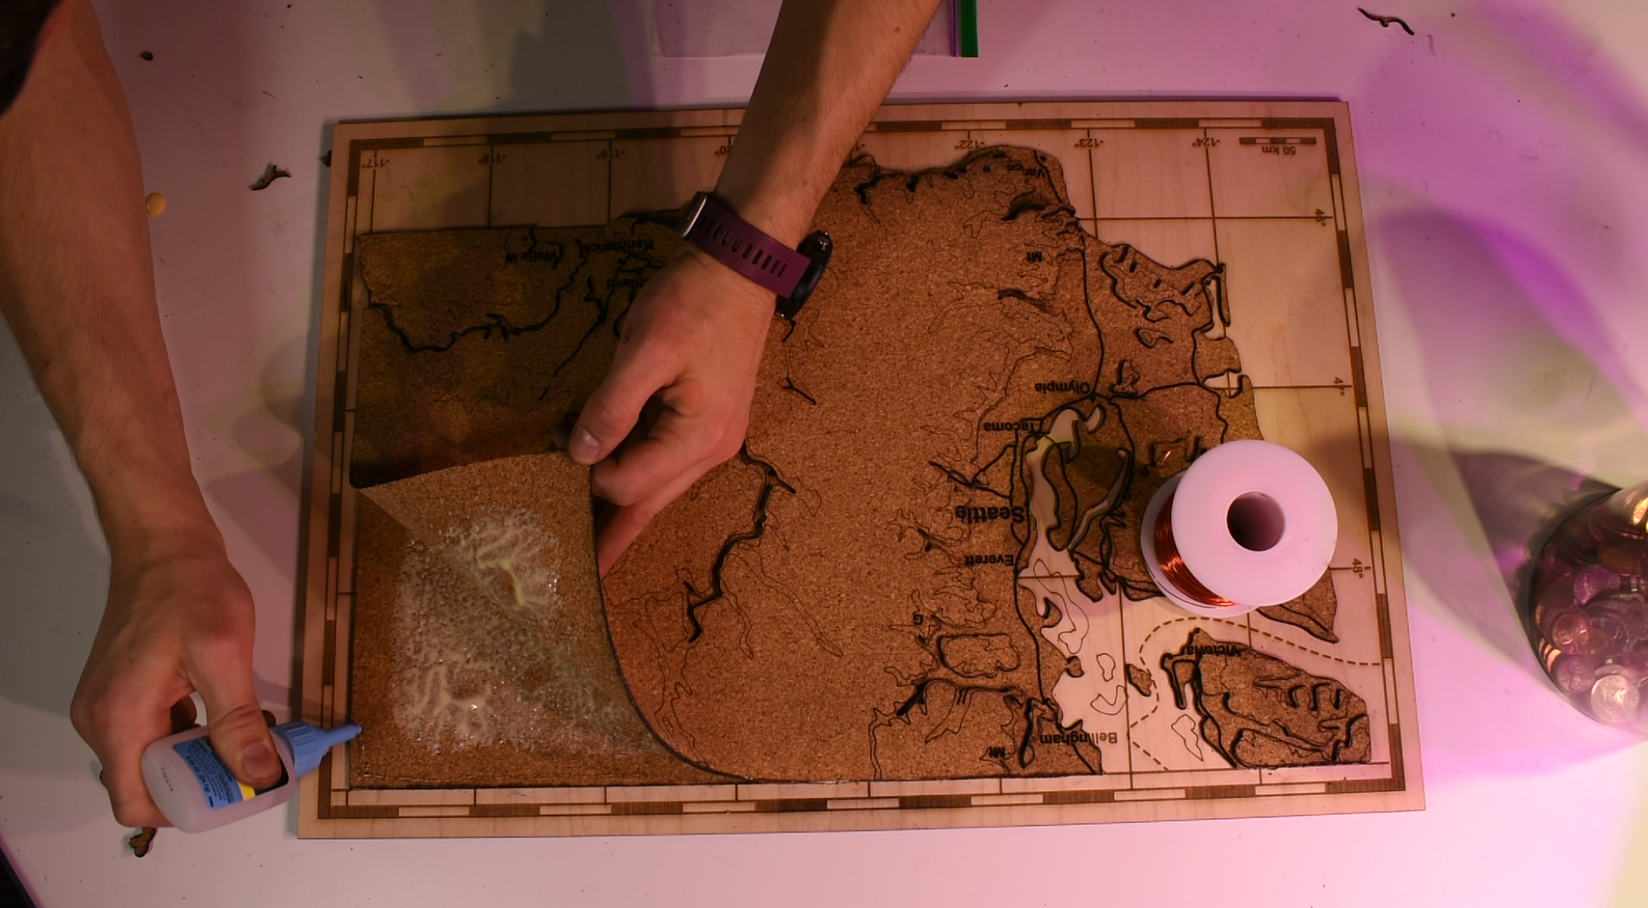
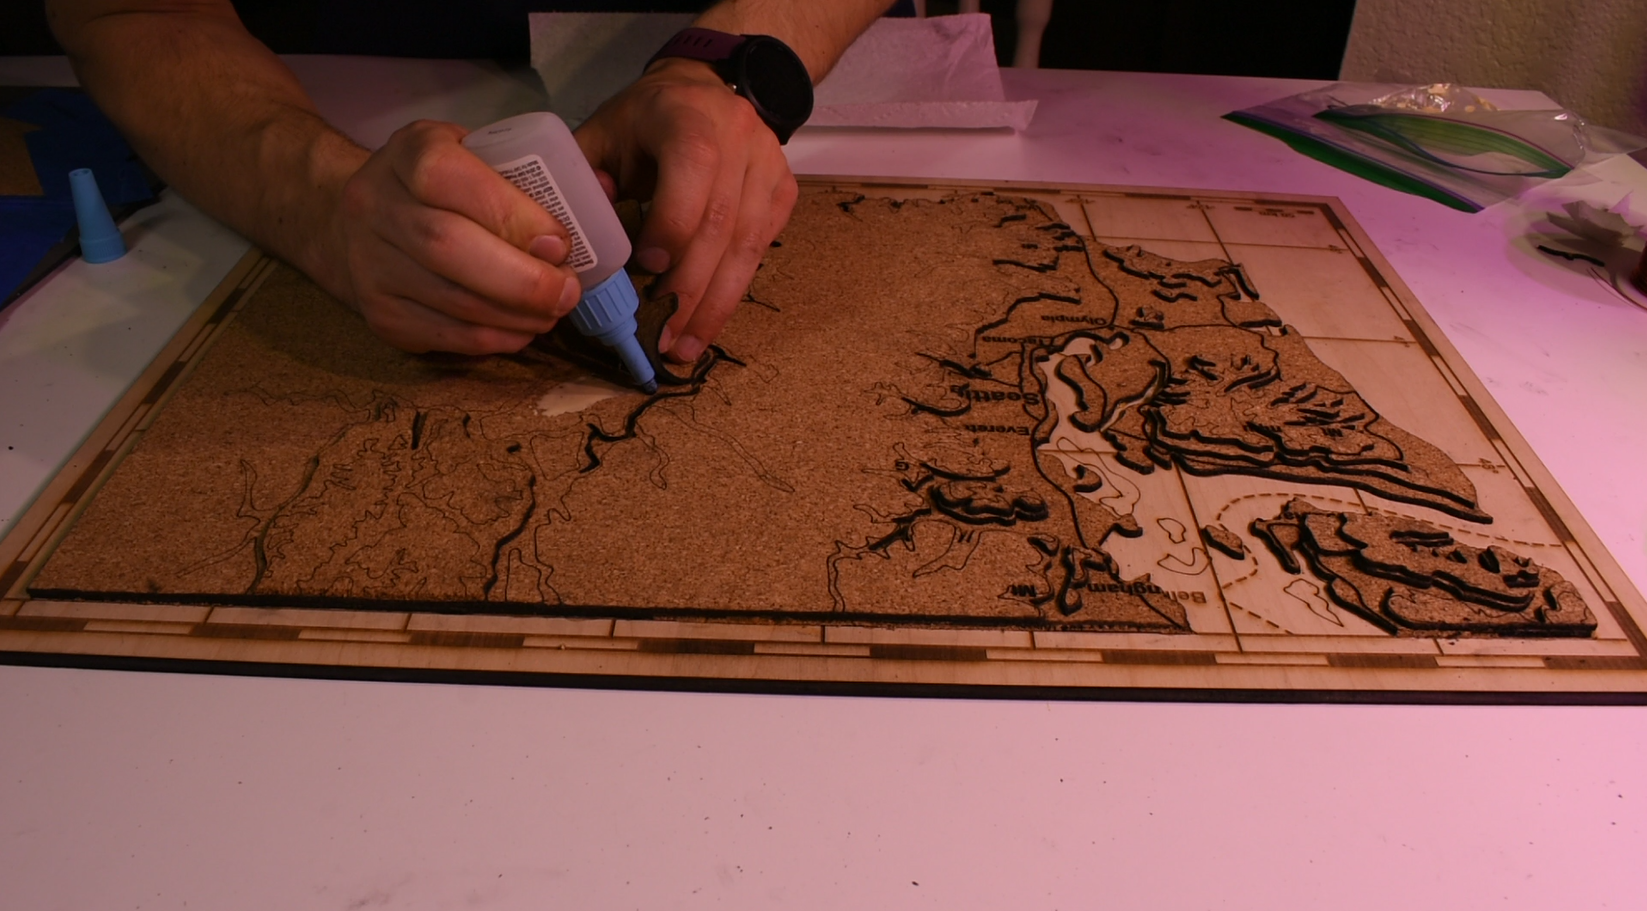
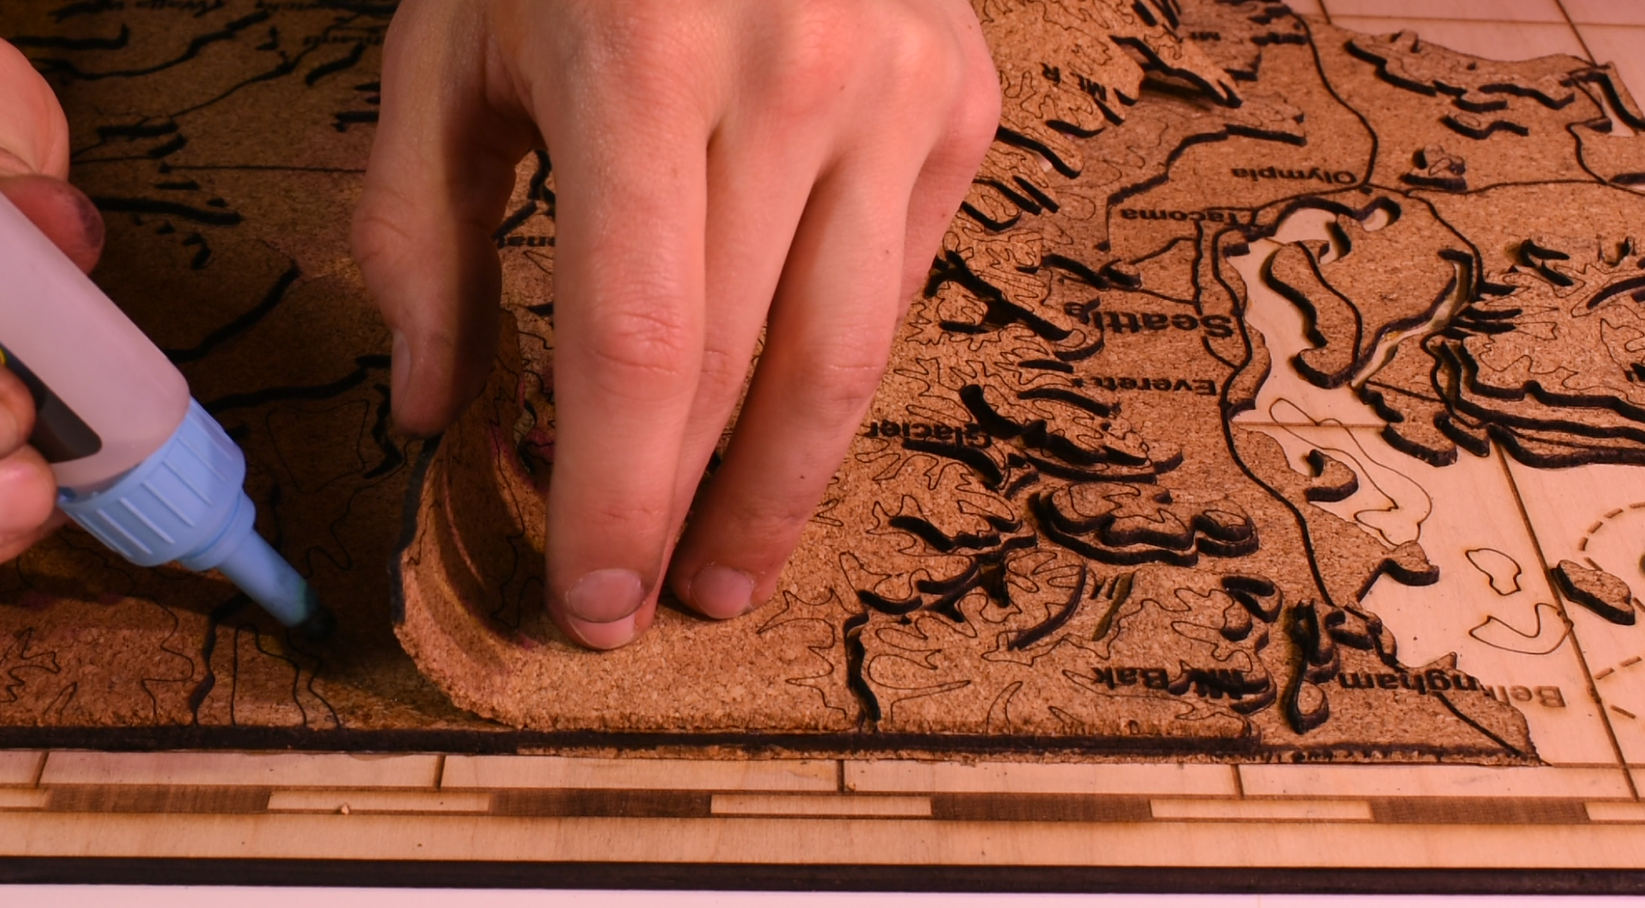
Step 10 - Tools and Supplies:
Glue (both Wood Glue and a quick drying Super Glue recommended)
Brush (if using wood glue)
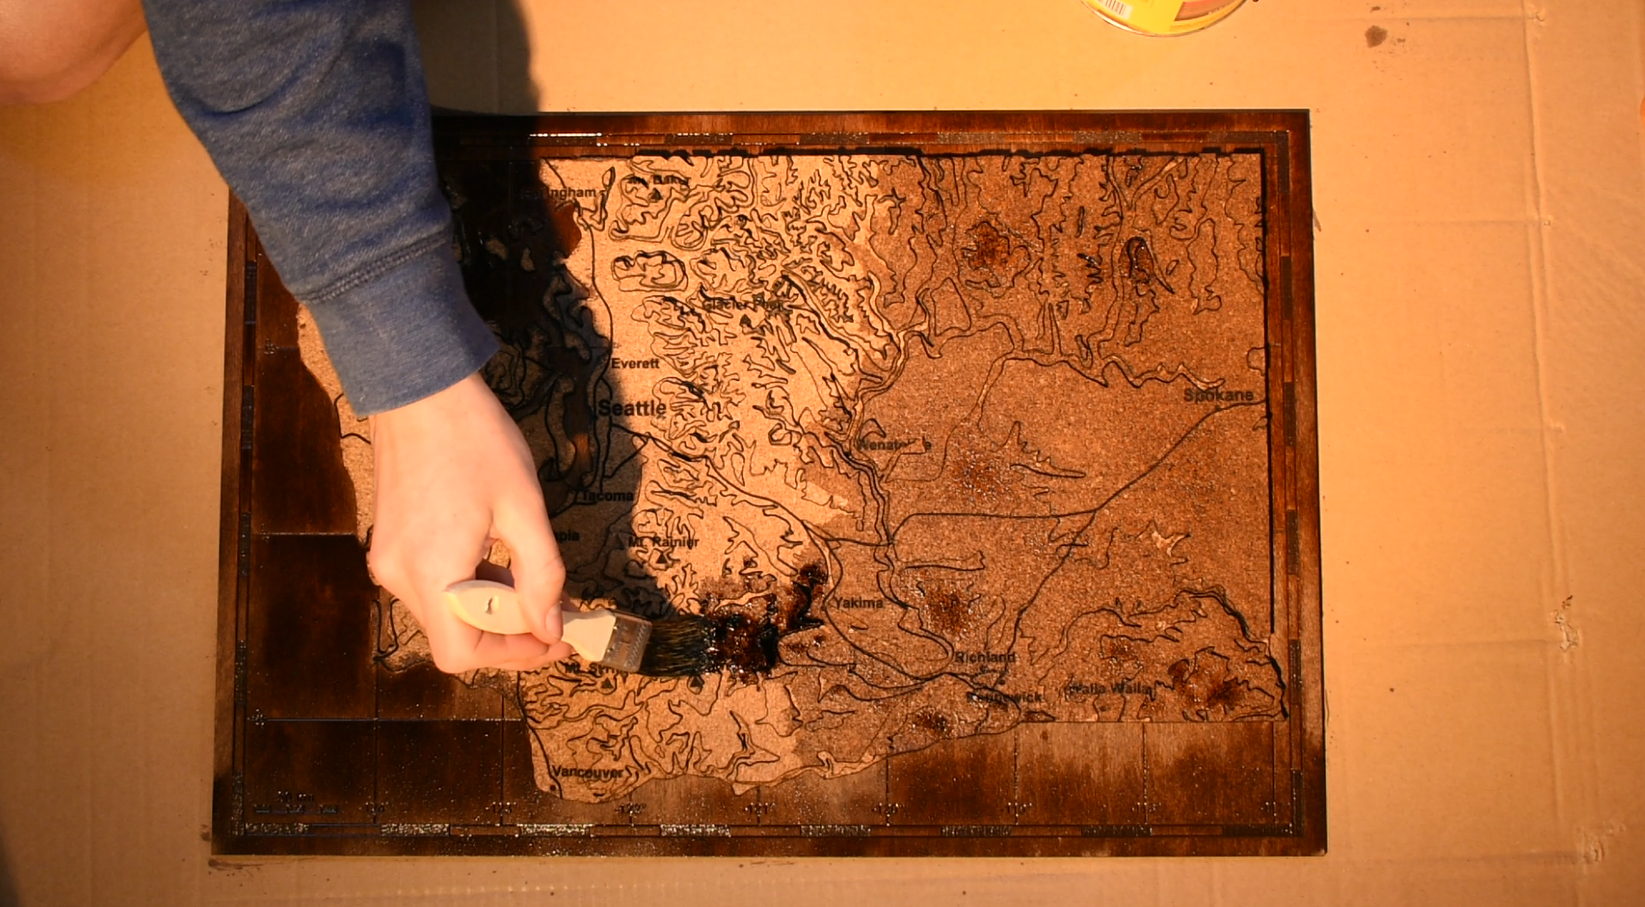
Important Note: Even though I glued before staining, if I were to do it again, I would flip those steps. I didn't originally plan on staining the cork, but decided to because it would help hide the vector lines that I cut in to help me lay the next layer down (because I didn't perfectly lay down every layer, the lines could still be seen in many areas). The glue will stop the stain from absorbing on the plywood base and the cork, creating lighter spots. And because the cork is very soft, it is not easy to sand the glue off.
The basic process for gluing each layer of cork down involved:
Brushing on wood glue at large areas where the cork will touch the lower layer, making sure to be within the edges.
Laying the new layer on top of the last one, with as much precision as possible
Using the quick drying super glue on the edges to hold the new layer in place, making sure to line up as close as possible to the etched layer below. Do this along all of the edges until the new layer is held down
Put something flat and heavy on top of the new layer for ~30 minutes so that the wood glue will set. Then you can move on to the next layer
Repeat this process for each consecutive layer. You will use less wood glue as you progress because the layers will be smaller
Step 11: Staining and Finish
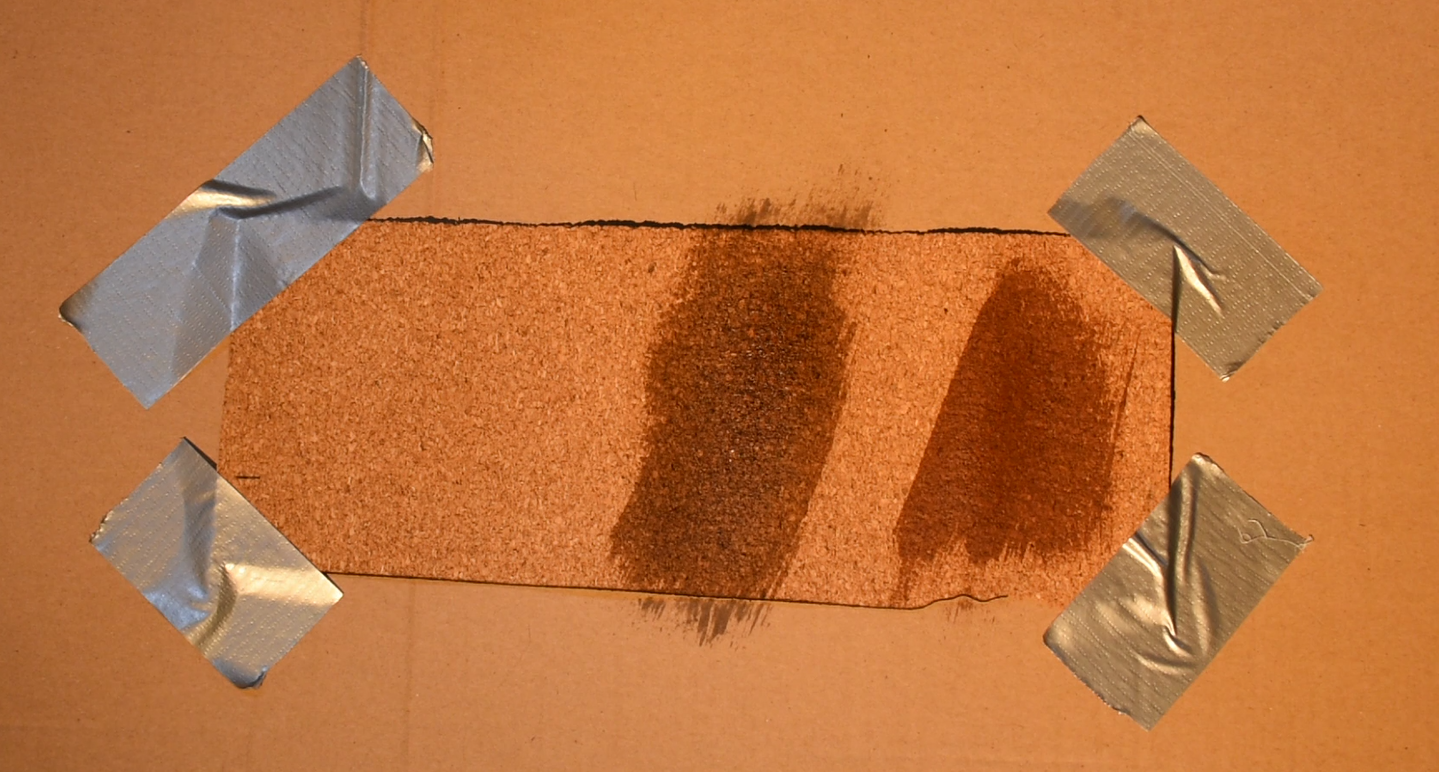
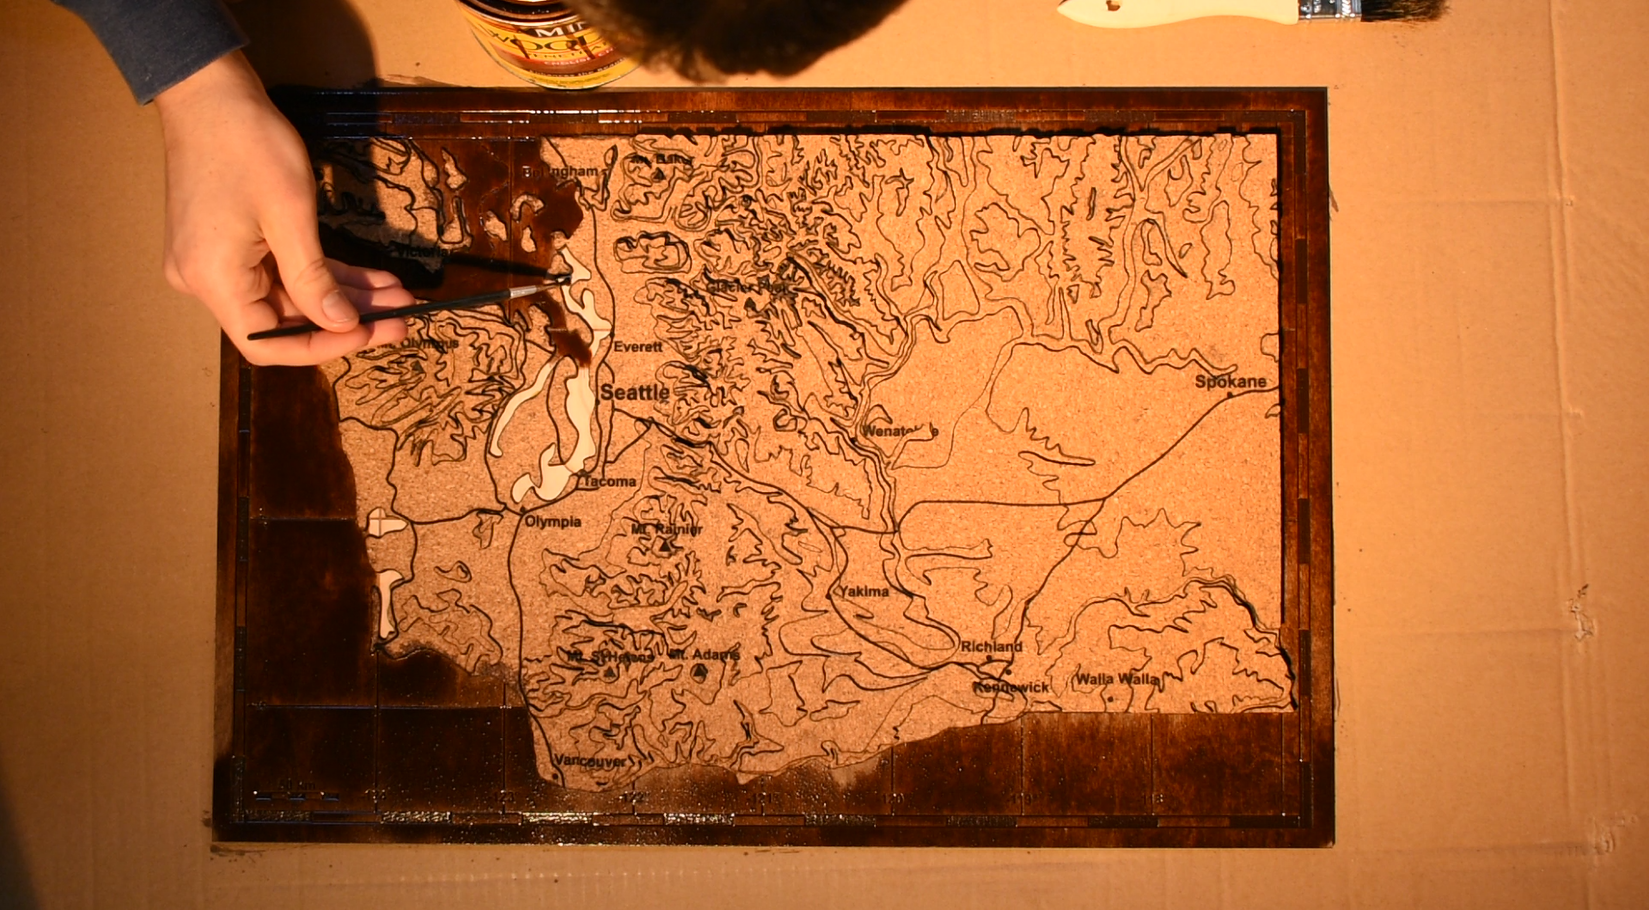
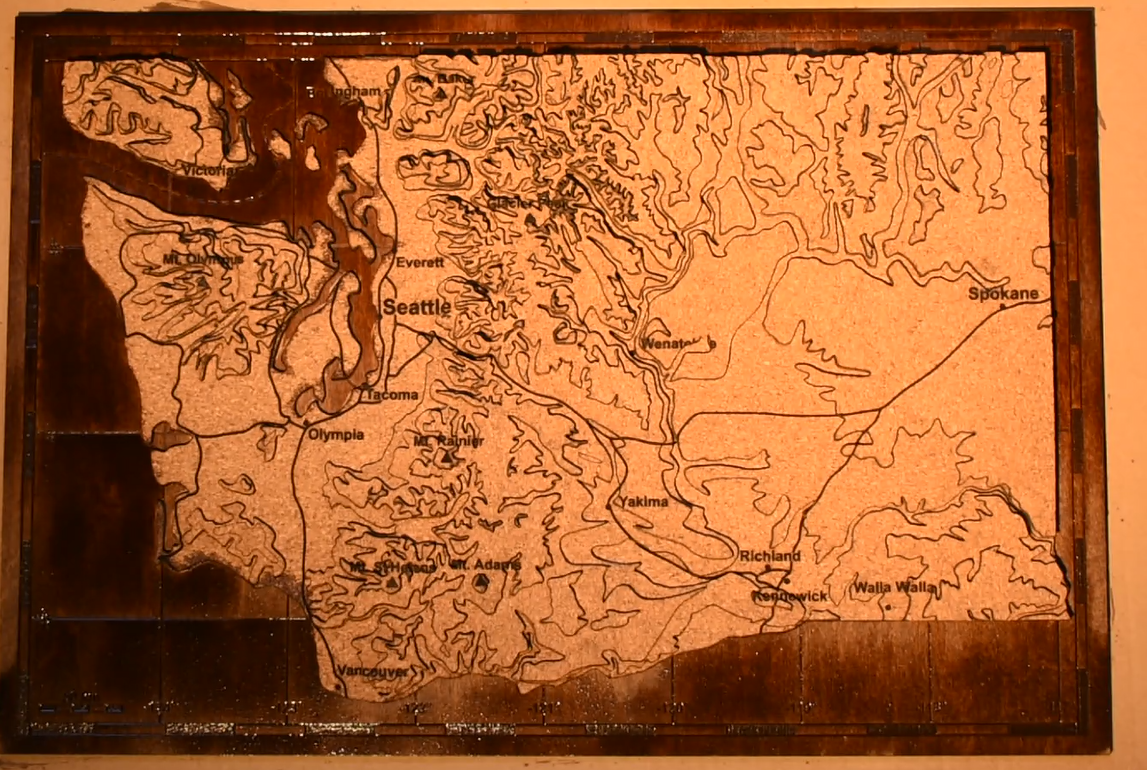
Step 11 - Tools and Supplies:
Wood Stain (2 different colors is best to contrast plywood and cork)
Brush
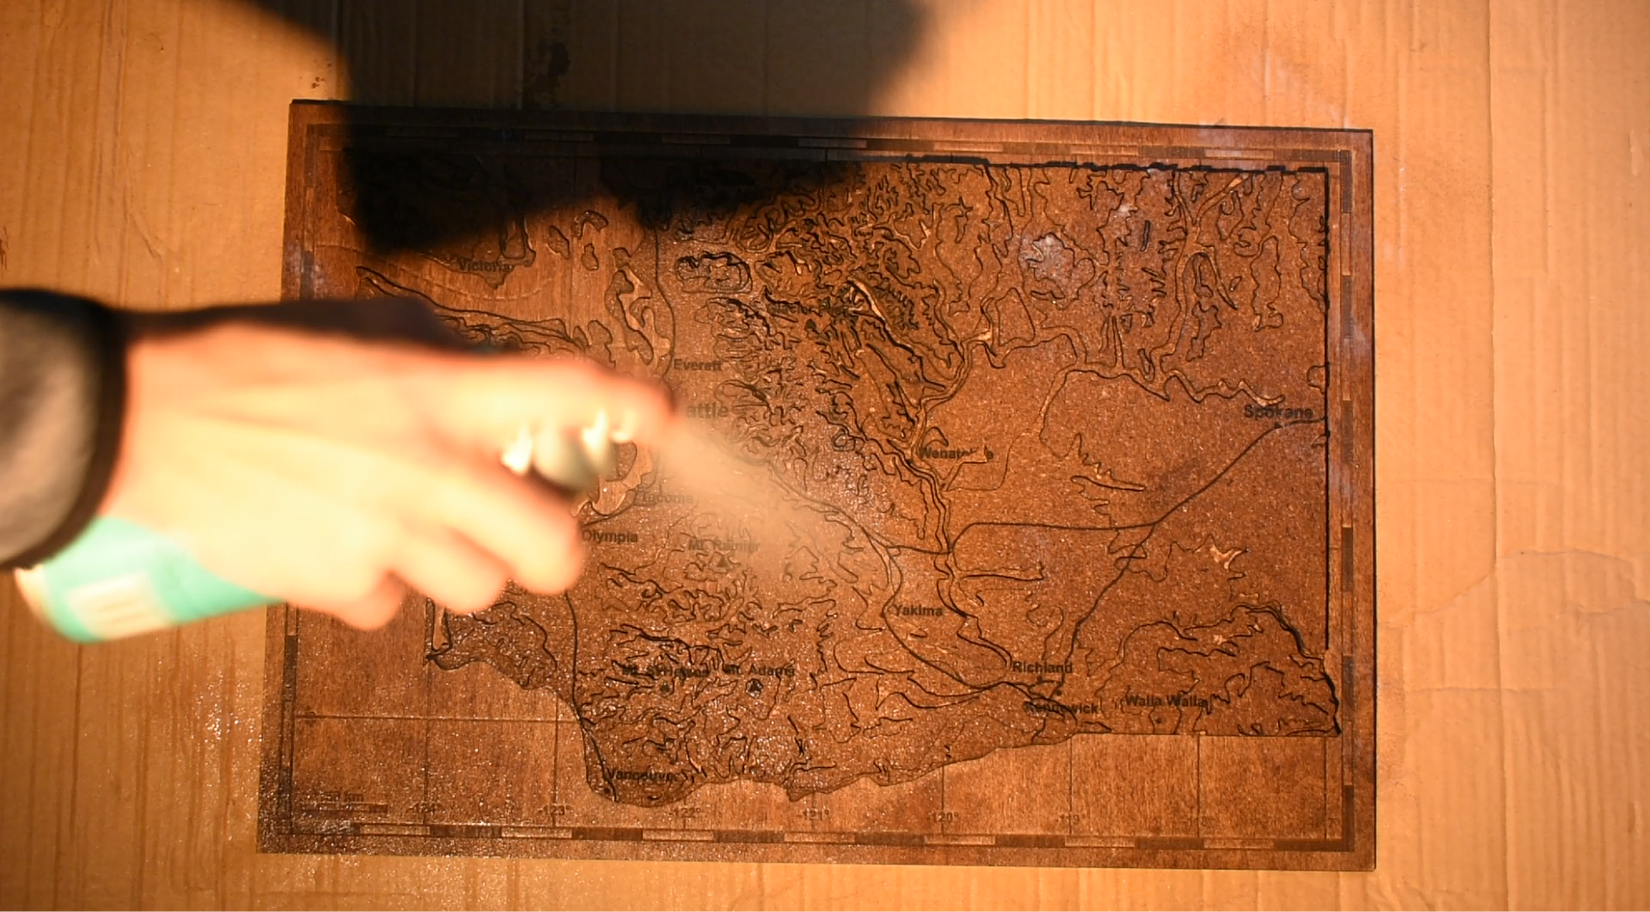
Wood Finish (I found spray worked best for the cork)
Again, if staining, I recommend staining before gluing.
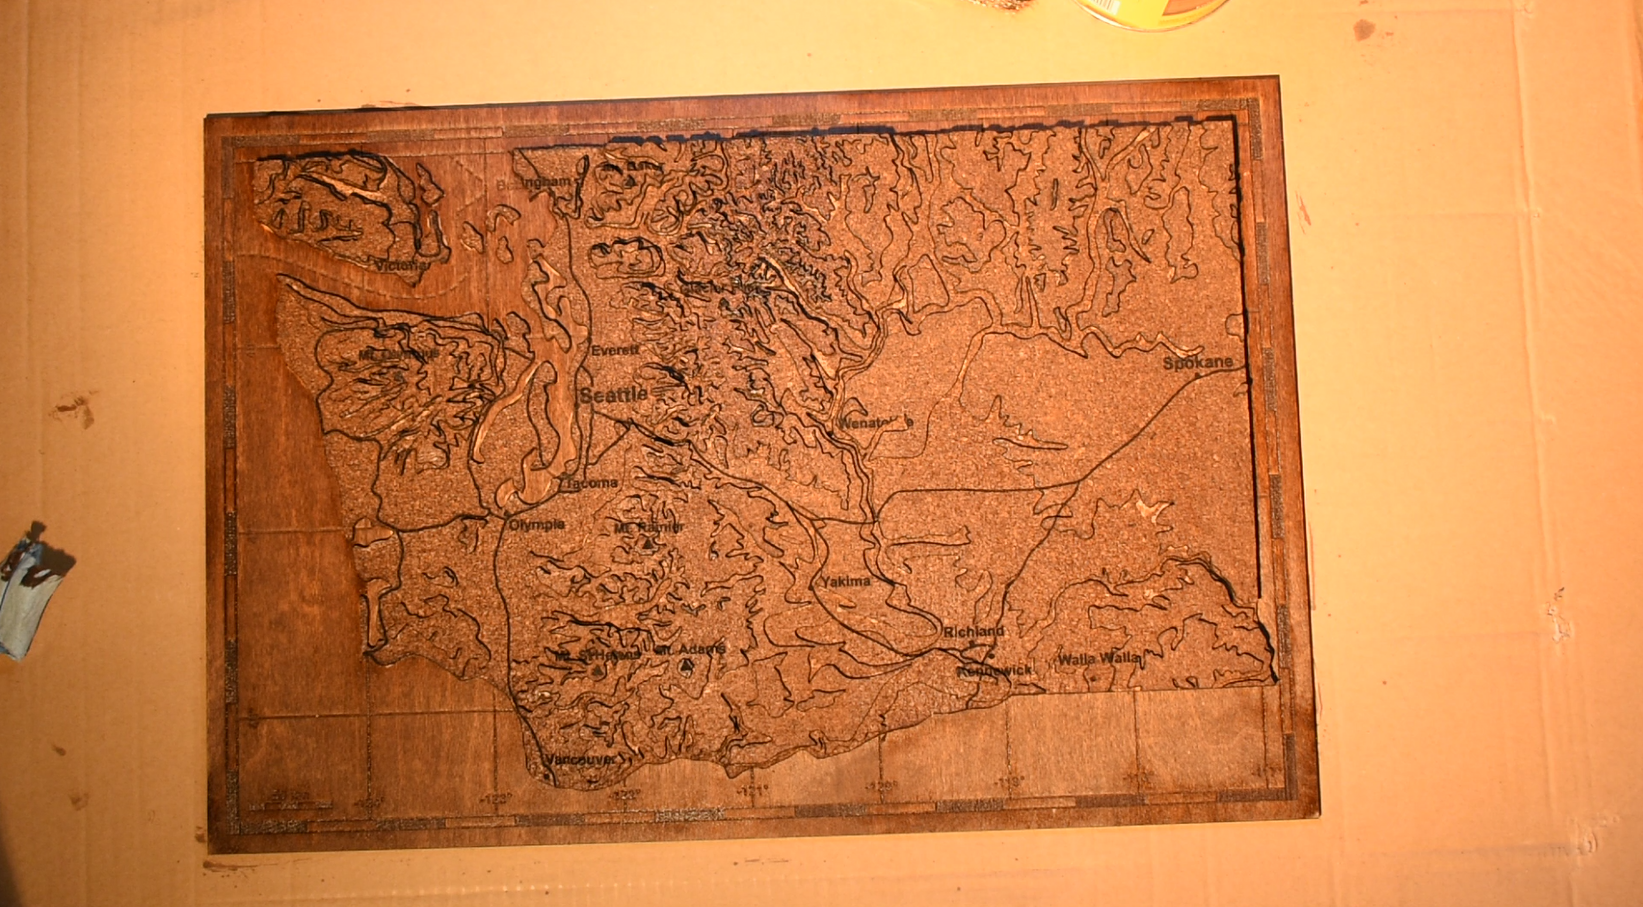
This step is relatively simple. I recommend two different stains; one for the plywood base, and one for the cork. I used a smaller paintbrush for finer details (to try to make sure that I wasn't also staing the cork), but it ended up not being that big a deal because the stain ended up bleeding into the cork anyways. Because of that, I recommend using a darker stain for the cork, so that the bleeding is not as obvious.
After the stain has dried, I sprayed on a polycrylic finish (I personally used a matt finish). I recommend a spray on finish because of how absorbent the cork is.
Step 12: Push Pins and String
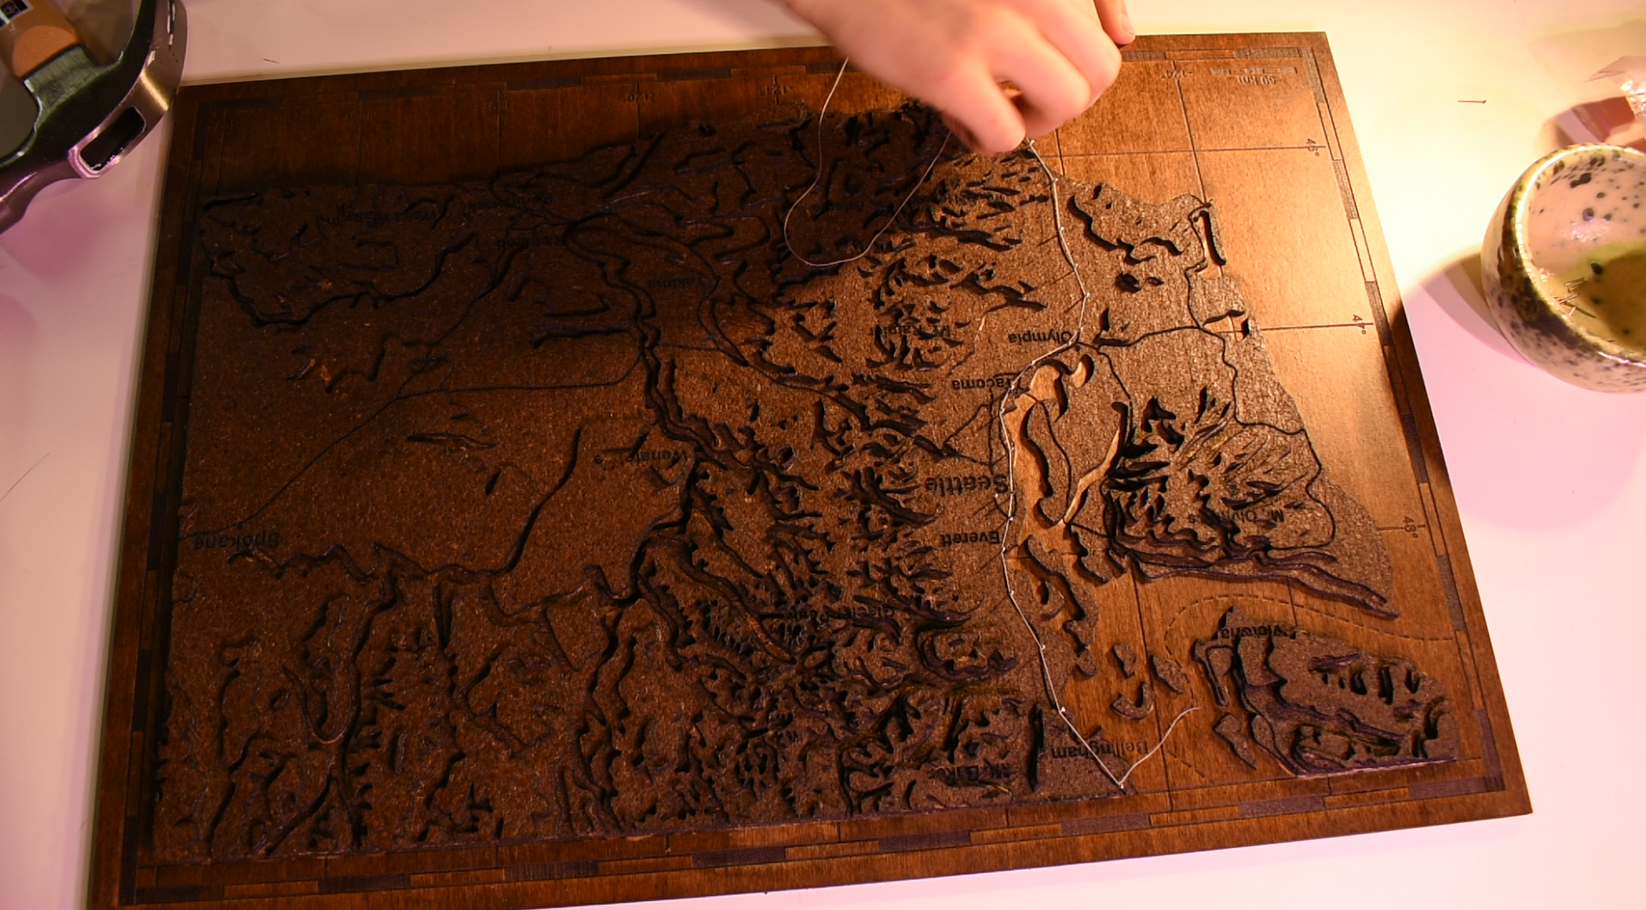
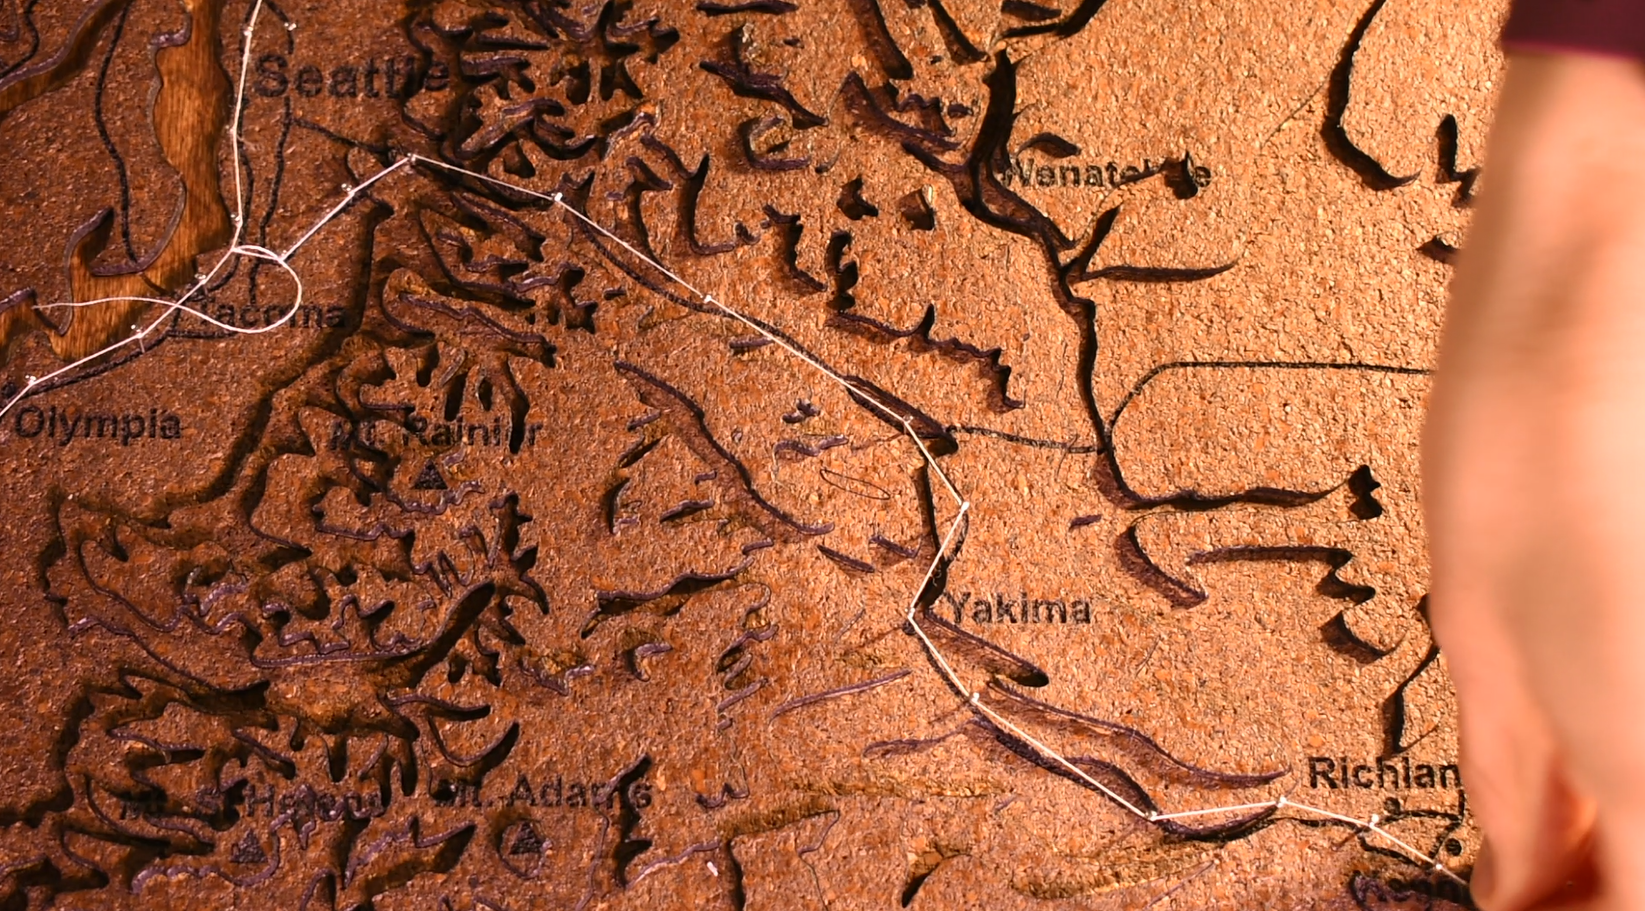
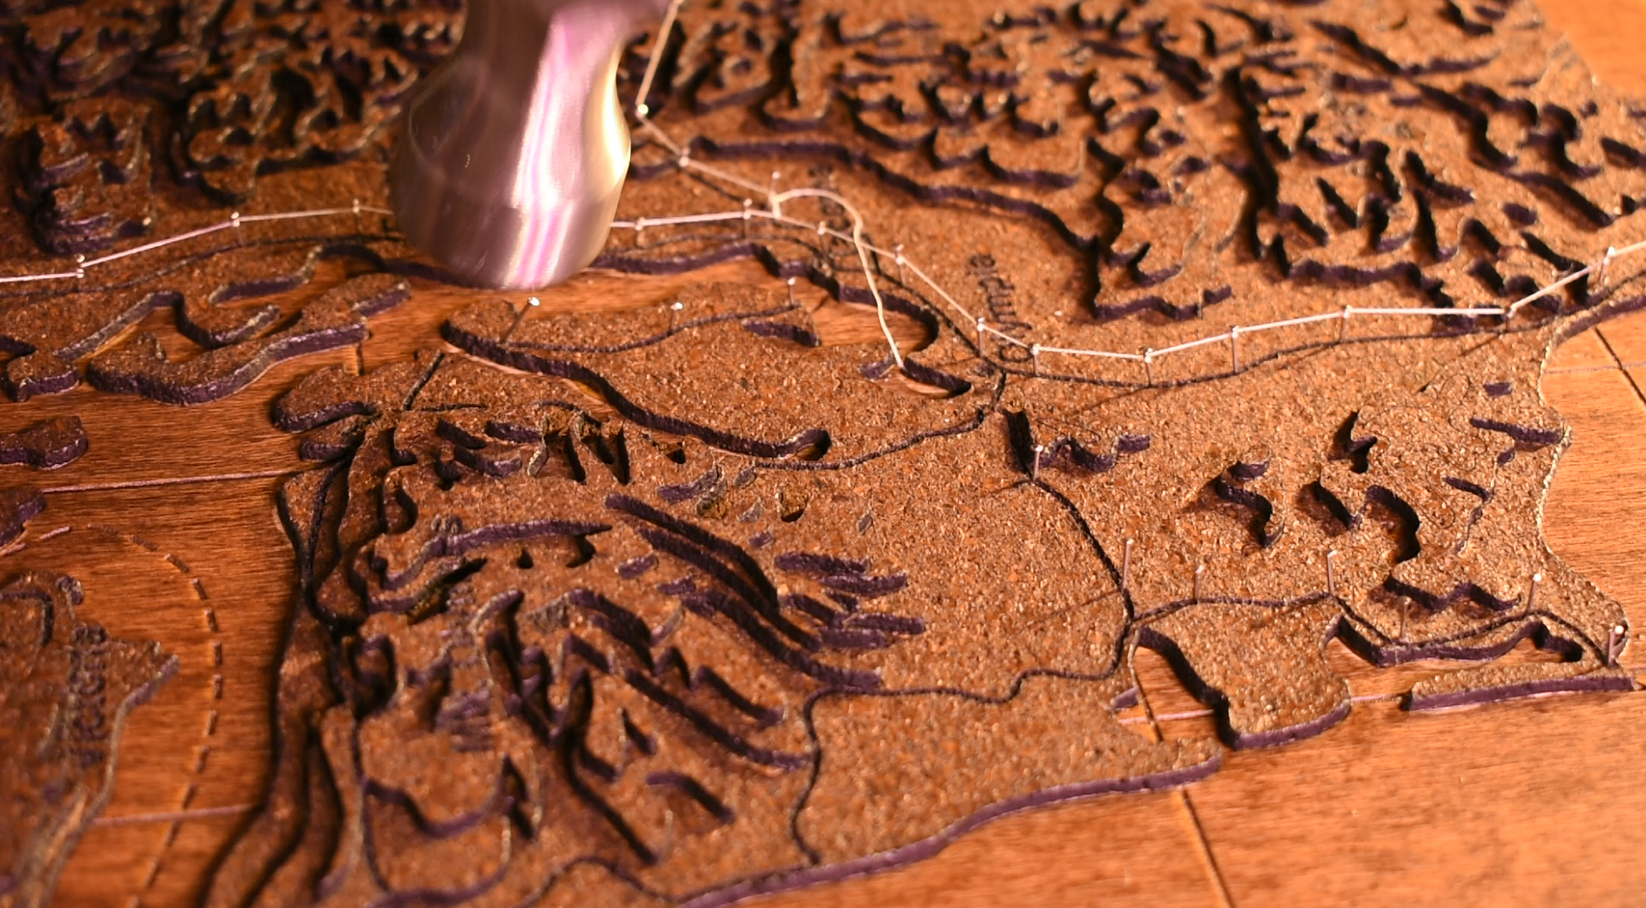
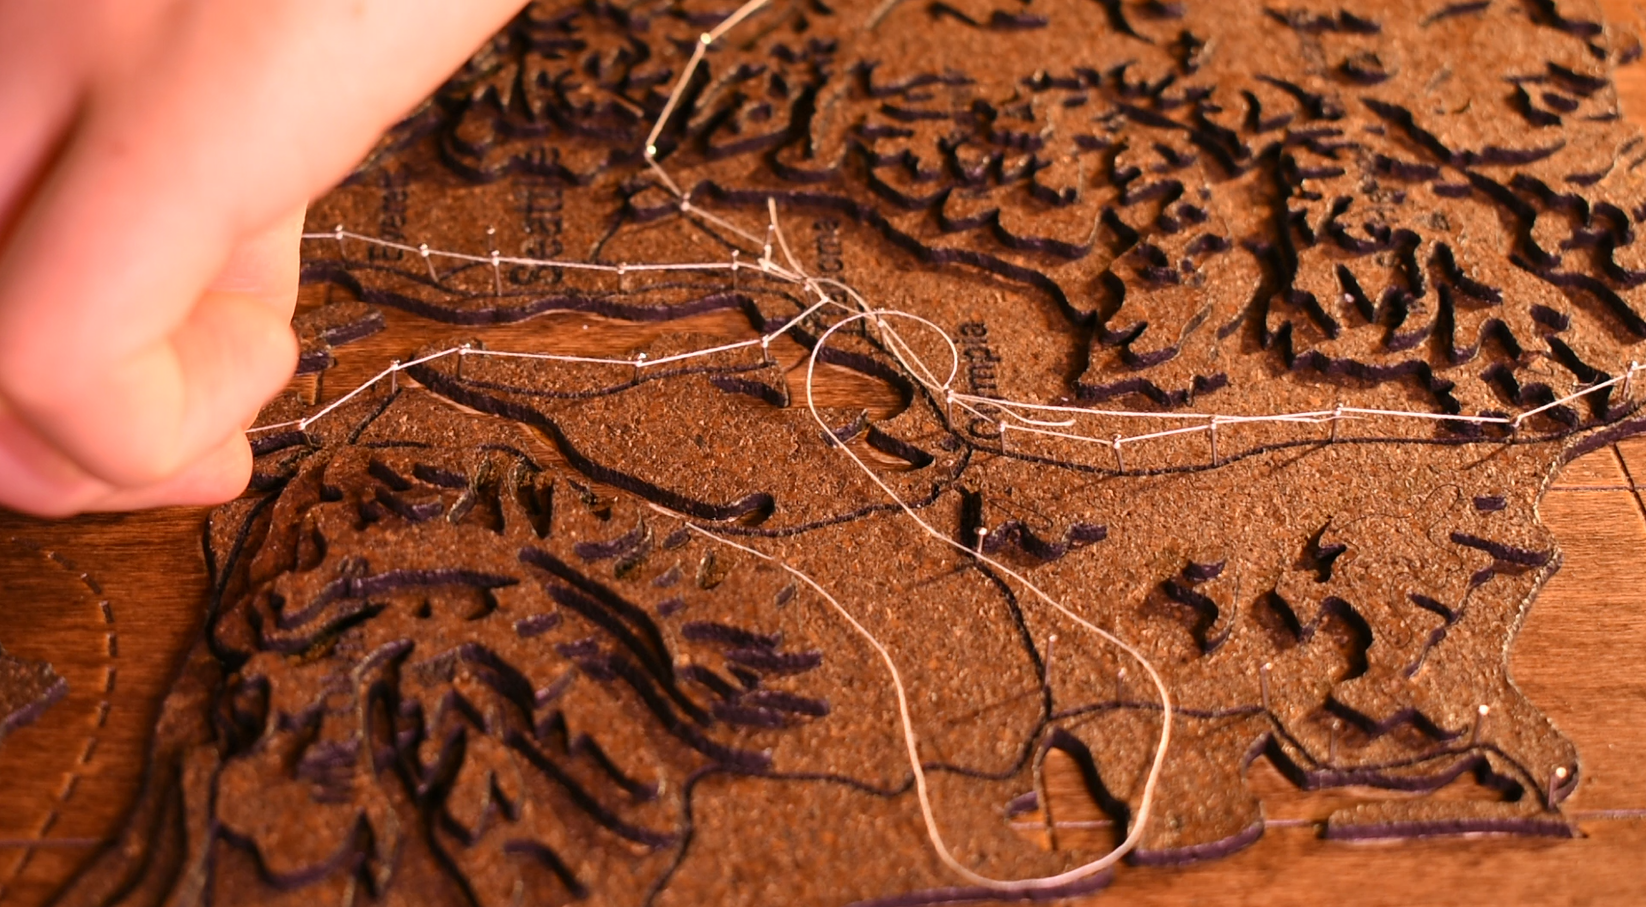
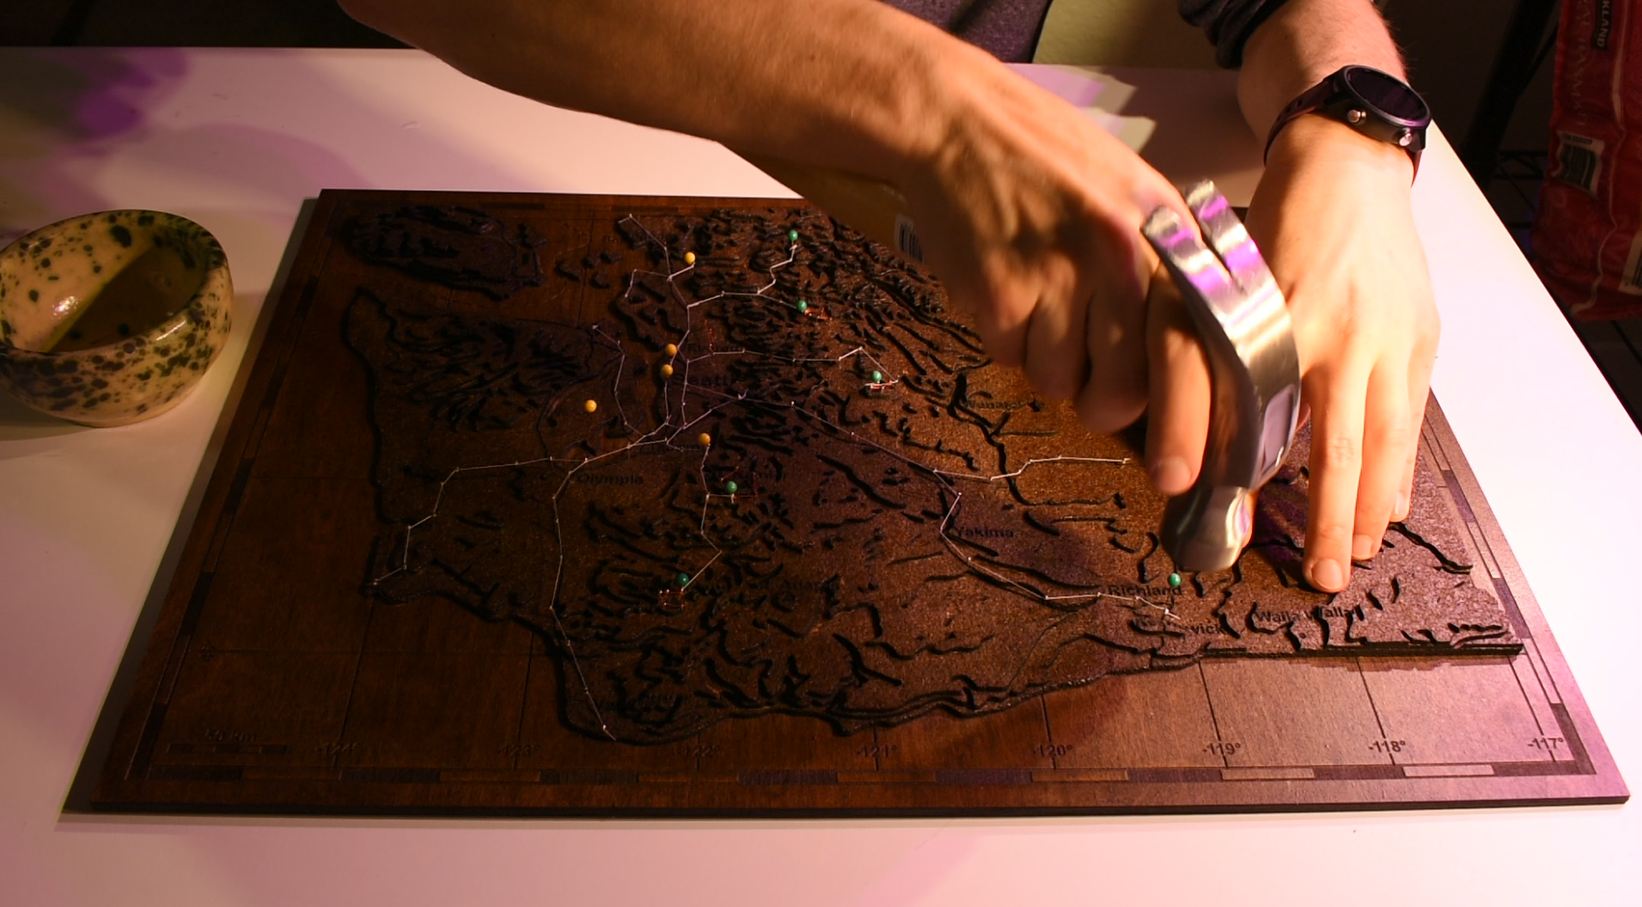
Step 12 - Tools and Supplies:
Push pins, string, and anything else you want to put on the map!
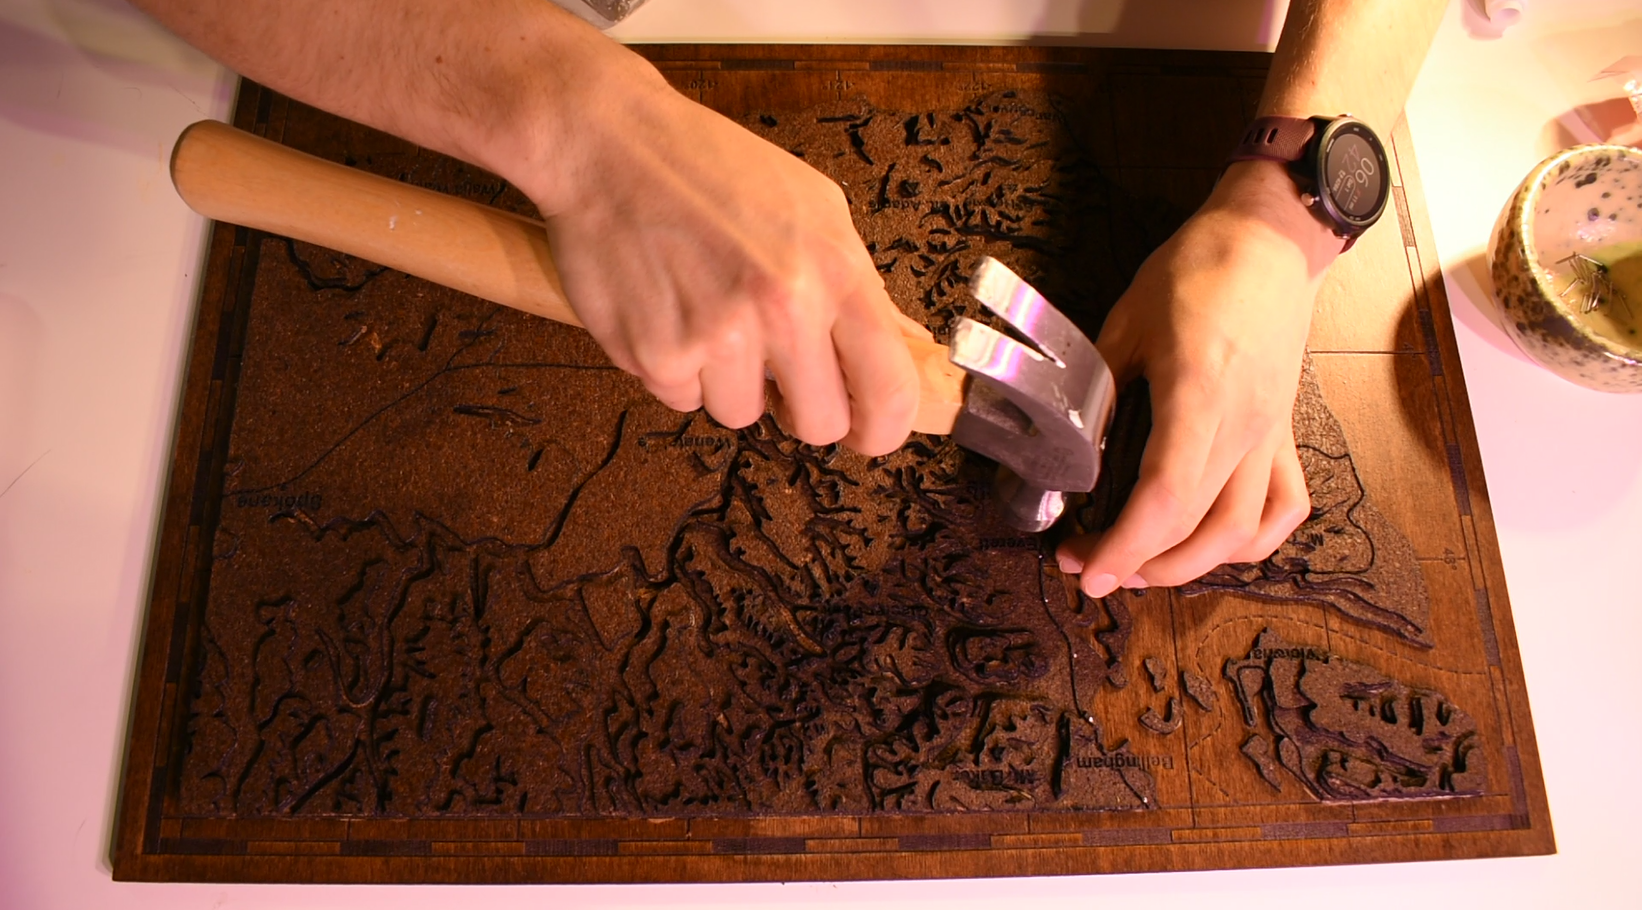
May need a hammer to make sure that the push pins stay in
May want some type of wire/needle cutters to shorten the pins
The final step is using the new push pin map for it's intended purpose; adding push pins!
I used two kinds of pins. The first are simple "dressmaker pins", which I used in conjunction with sewing thread to plot routes that I have taken on my map. I tied the thread off at each end, and then wrapped the thread around each pin a couple times to keep the thread in place. Personally, I think its a great way to add context to the map, and looks very cool when used with the push pins and topographical features.
The second were regular push pins, which I simply put at each location that I wanted.
Unfortunately, 1/8" isn't very thick, so the push pins won't push in well until about 3 layers or so. My simple solution was to hammer them into the base plywood layer to make sure that they were stuck in place. This isn't a perfect solution (as it is a push pin map after all), but it worked well enough.
Step 13: Done!
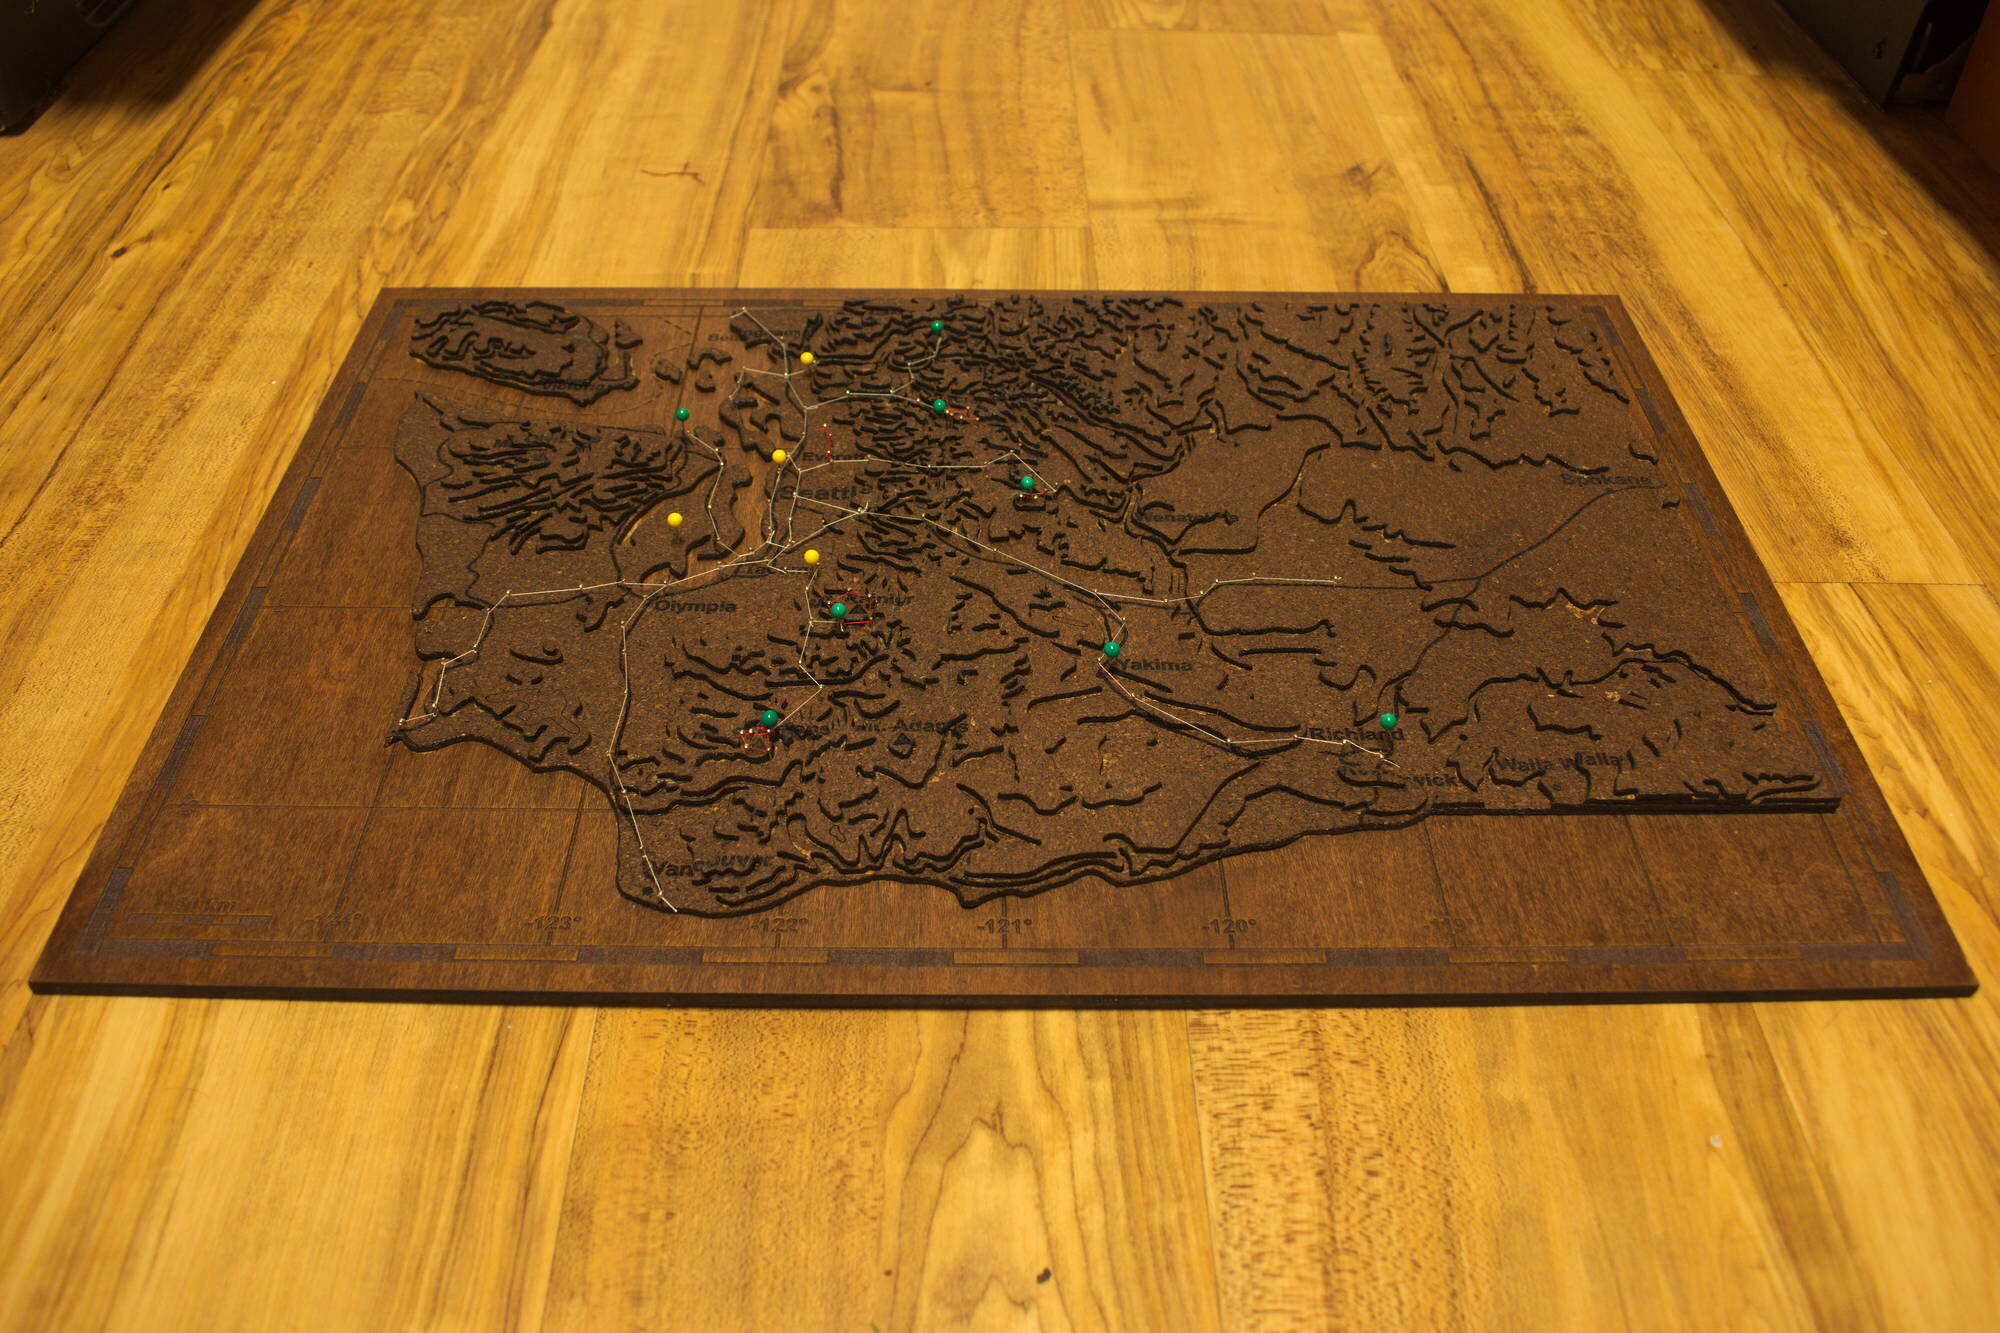
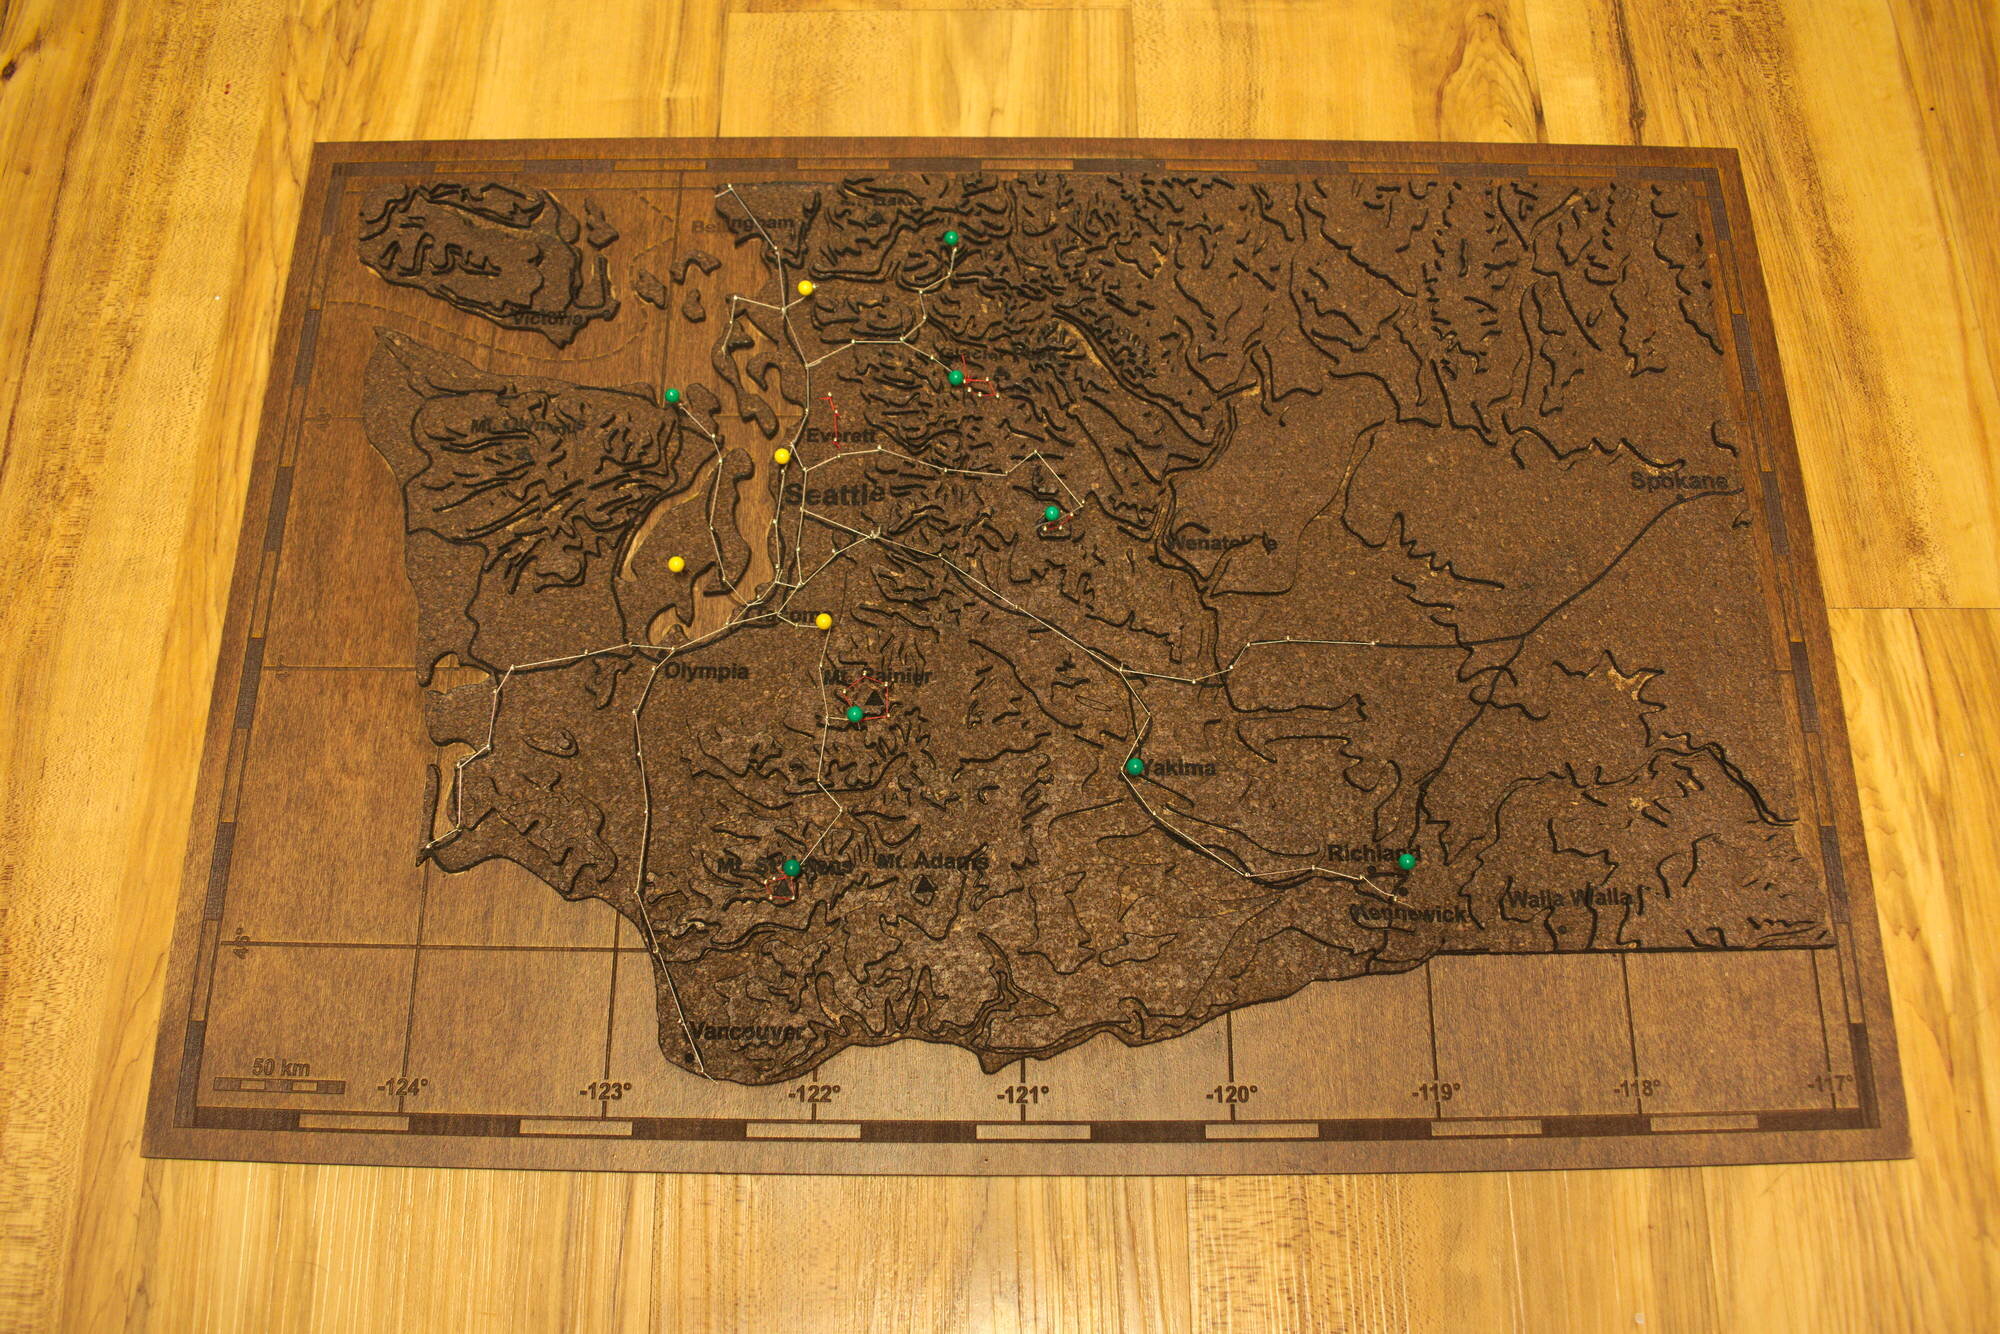
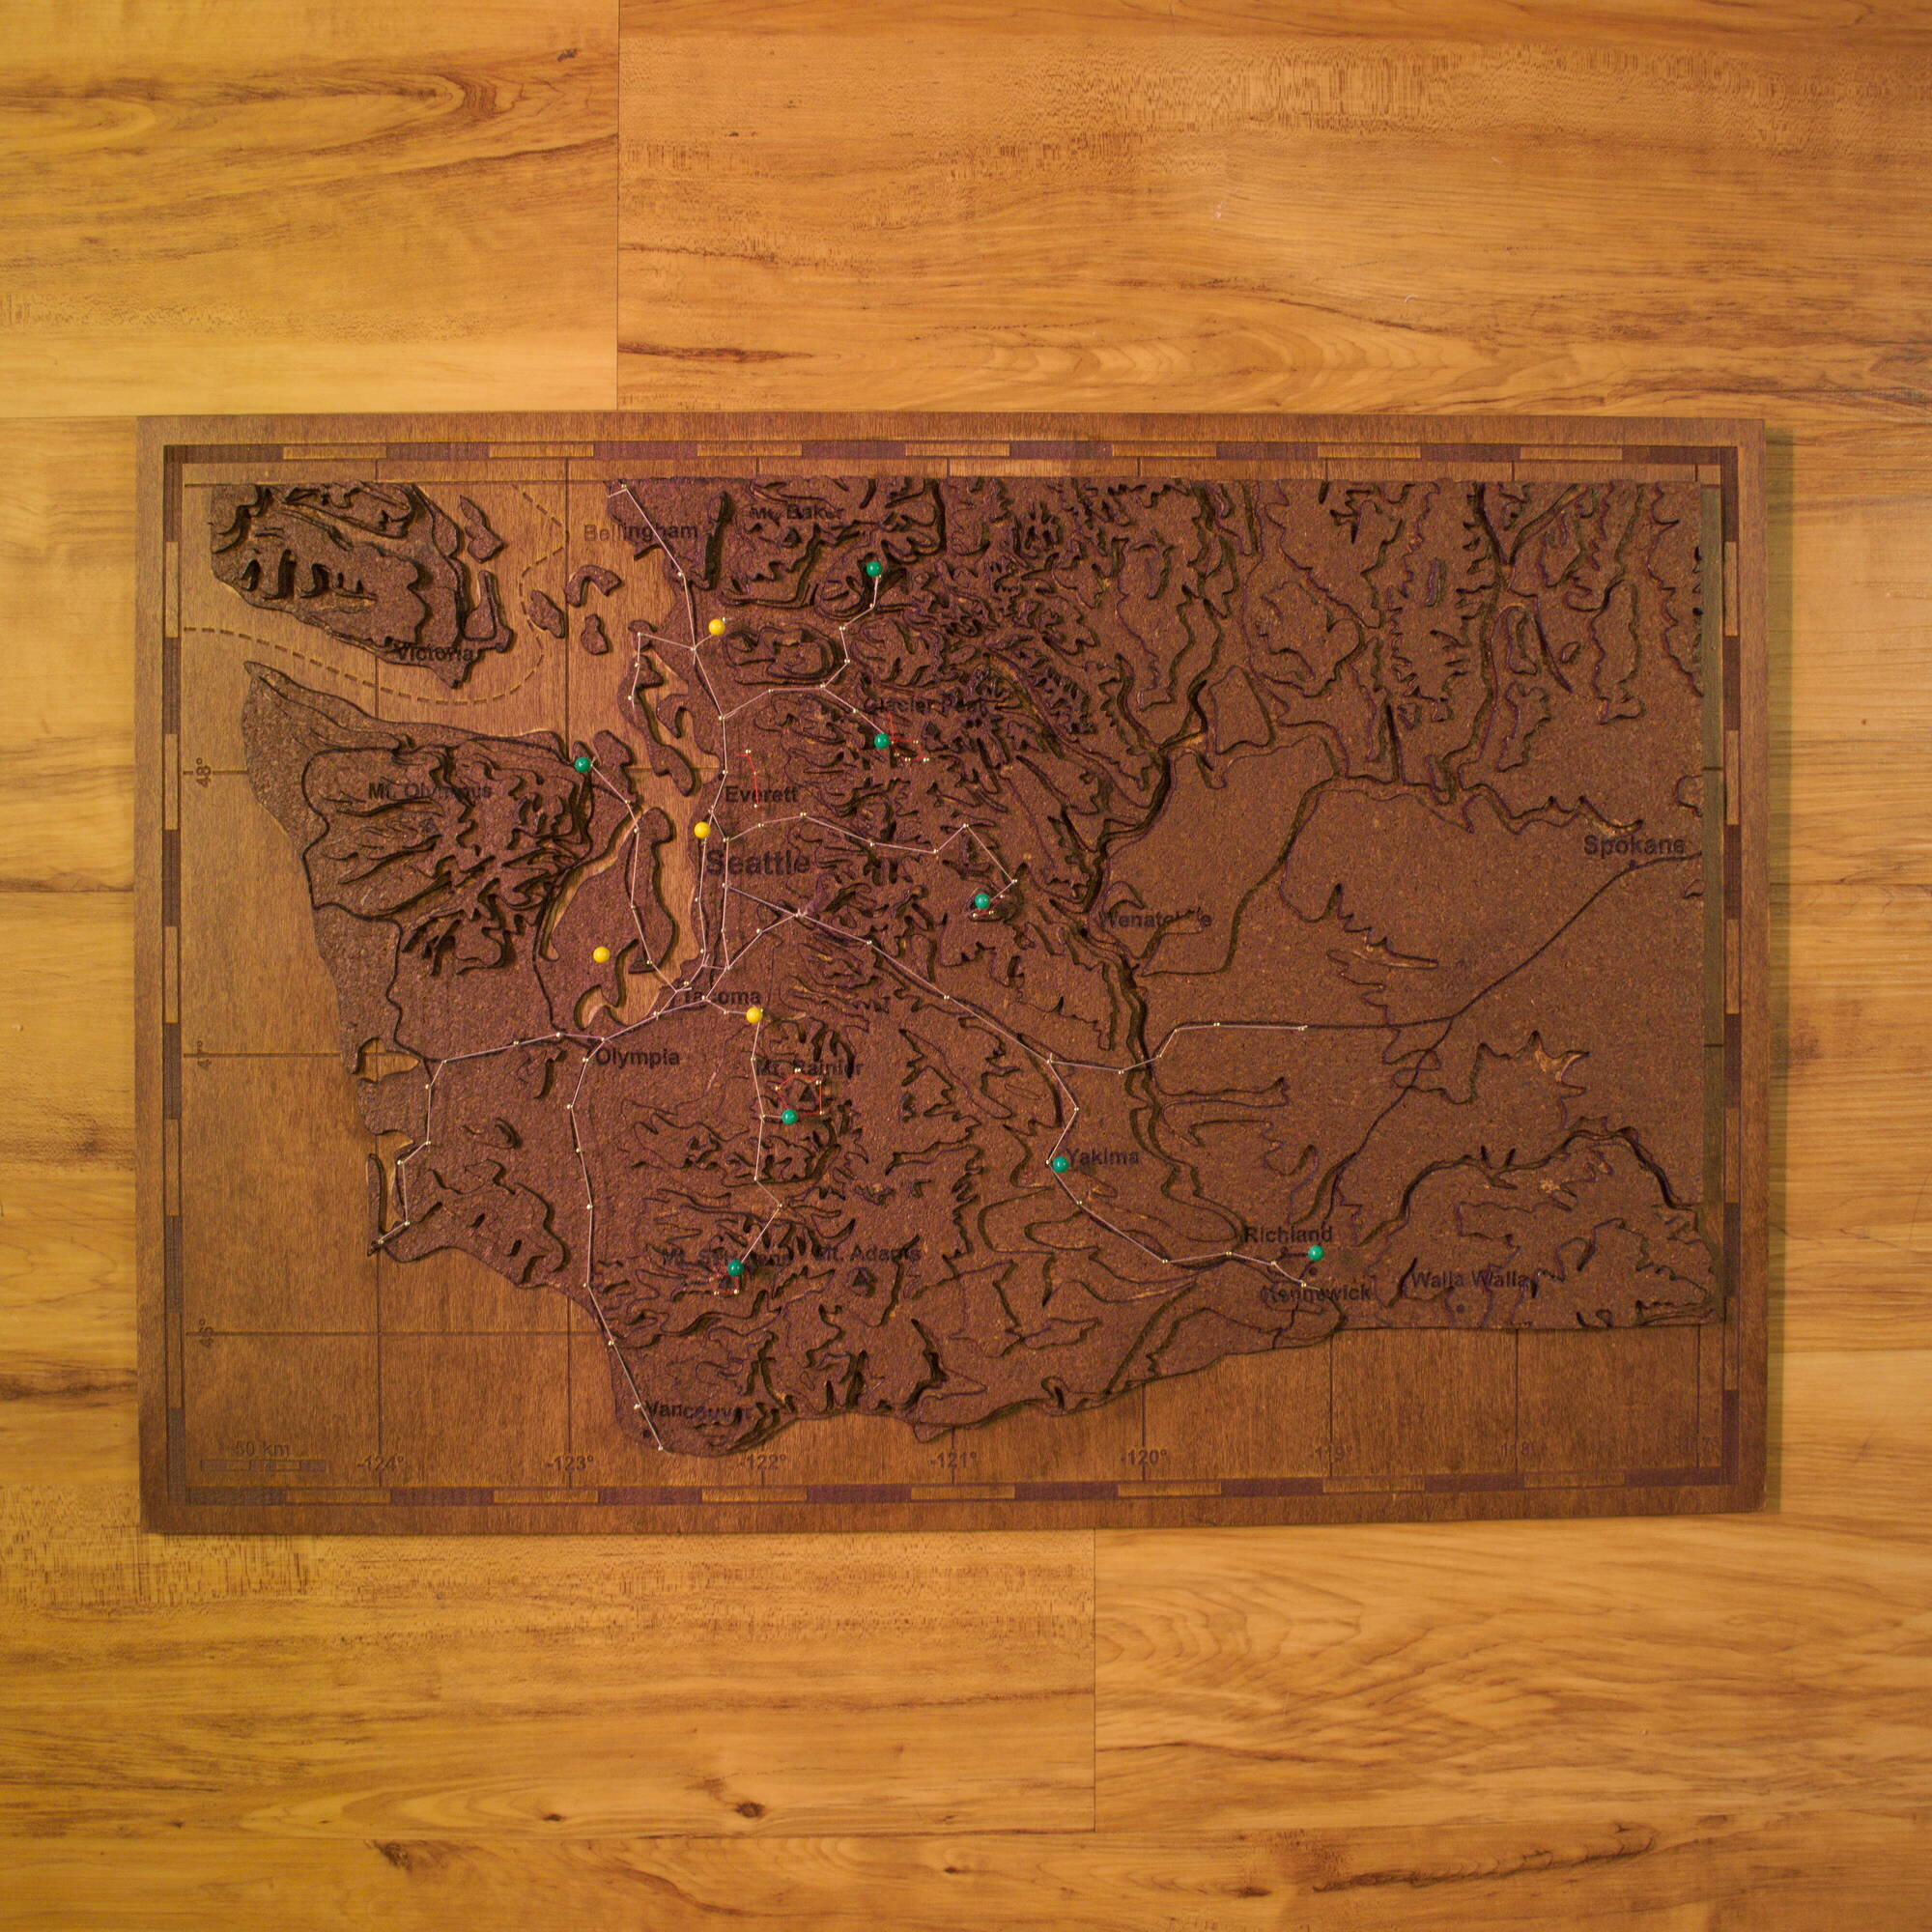
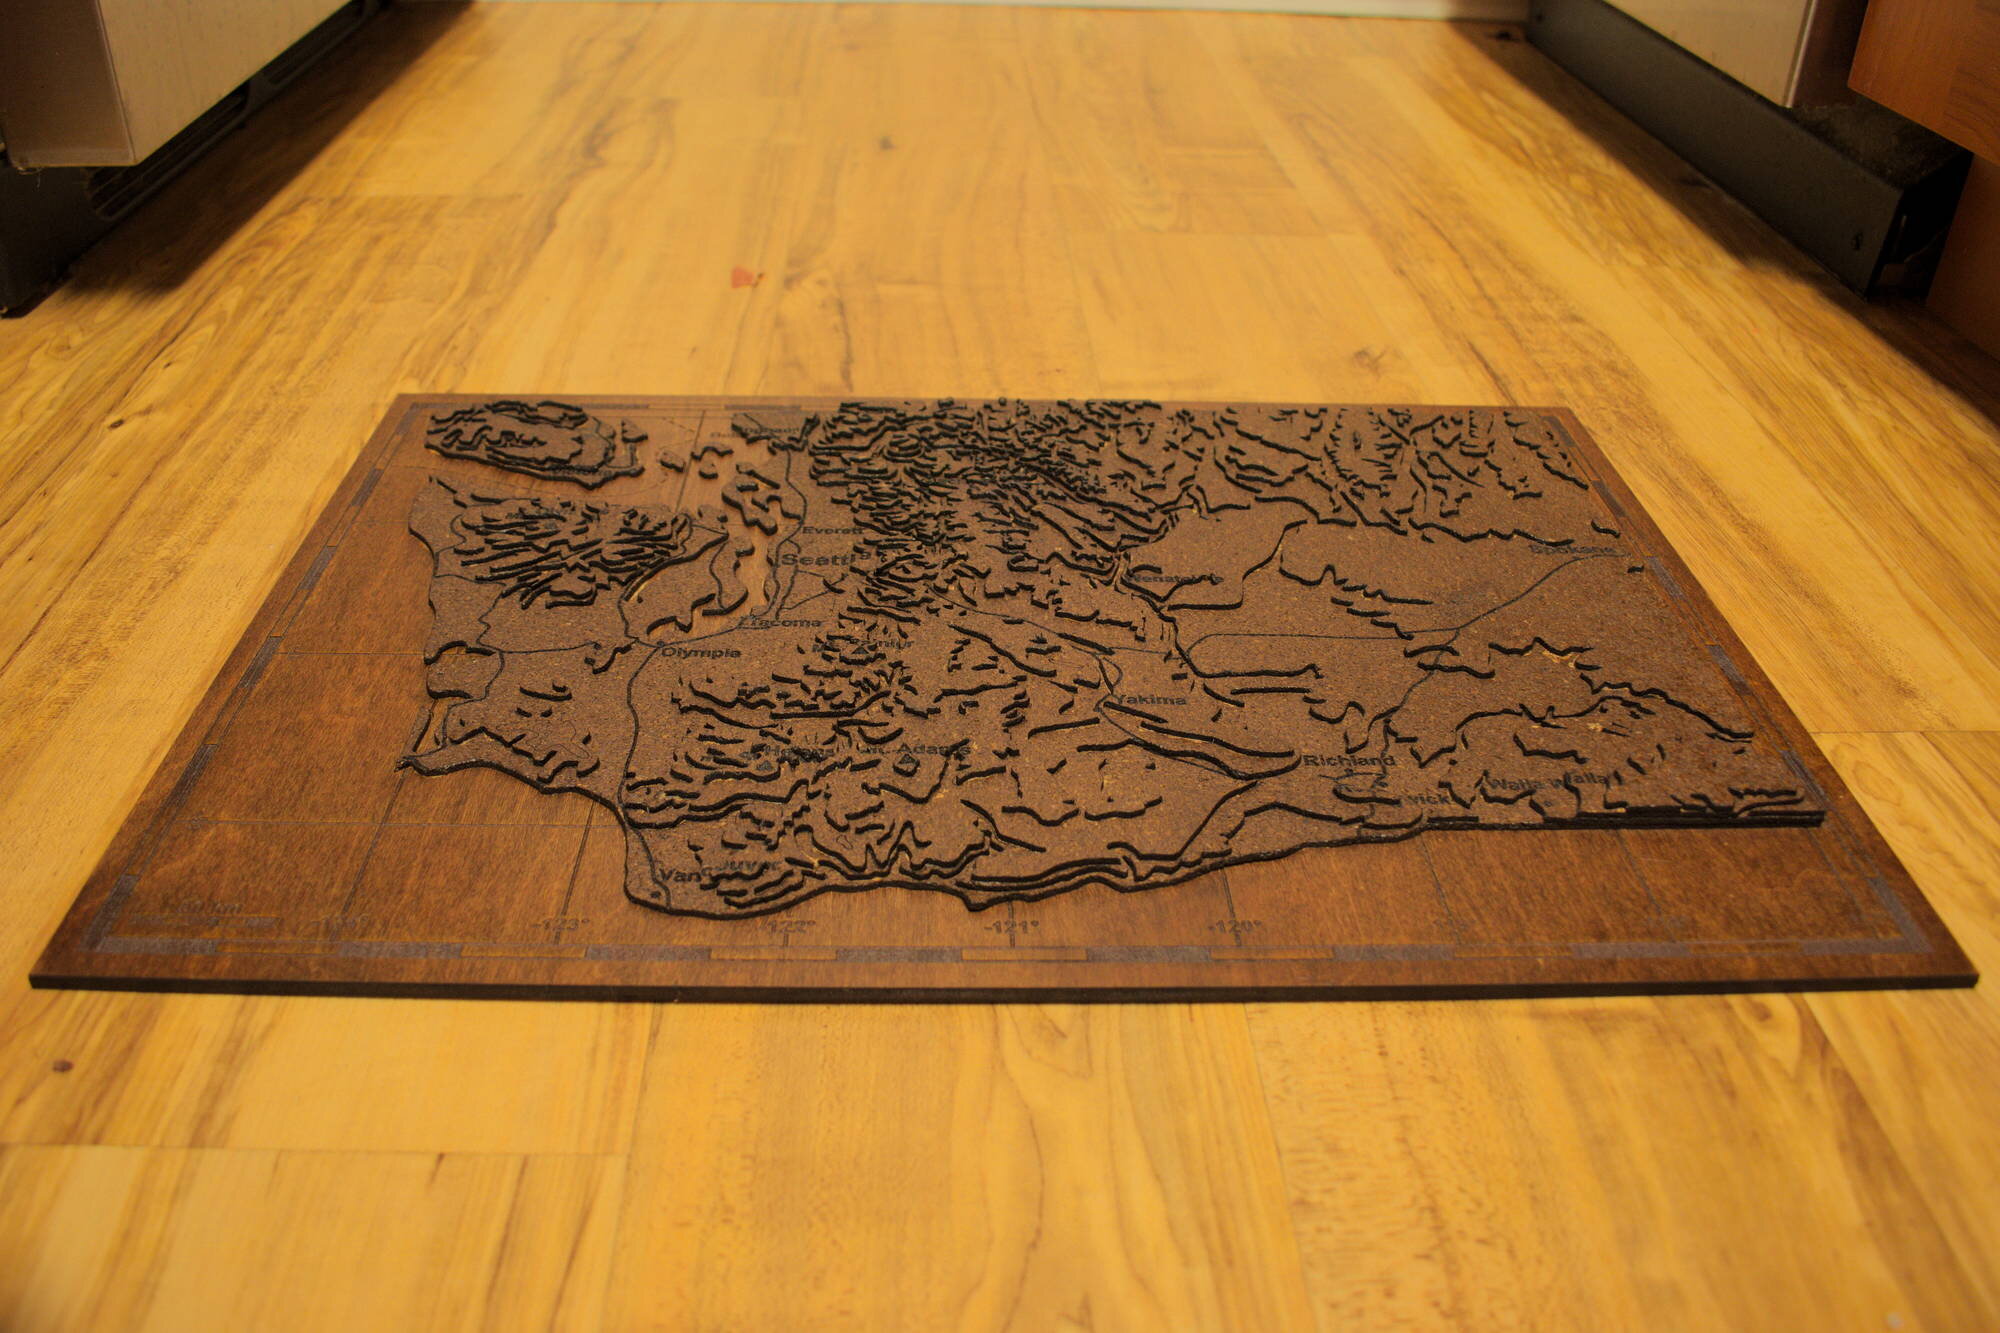
And that is the basic process I followed for making a topographical push pin map. It was a prototype, and I do recommend changes in a couple places (most notably swapping the staining and gluing). But I hope you can use this tutorial as a springboard for your own project.
